
“There are people in the world so hungry, that God cannot appear to them except in the form of bread.”
—Mahatma Gandhi
Baking my own loaf of bread has been a revelation – lessons in patience and perfection, that comes only by practice. There are times when you have to allow things to happen on their own and all you can do is watch and wait. It`s such a basic truth of life. My bread baking has been inspired by so many blogs – The Kitchn Blog, and of course this one. Try this just once and enjoy the aroma of bread wafting in your kitchens!
INGREDIENTS:
3 Cups Bread Flour/ All Purpose Flour.
2 Tbsp Sugar.
1 Tsp Salt.
1 – 1 1/8 Cup Water.
2 Tbsp Olive Oil.
1/2 Tbsp Yeast.
A few notes about Yeast:
What is yeast? Why is it required to make soft fluffy airy bread loaves?
Bread wouldn’t be bread without yeast and yeast can’t work without sugars. Yeast is alive—living organisms—and living organisms need food for fuel, in this case, simple sugars. Yeast needs to feed on these sugars and multiply to create two byproducts—alcohol (ethanol) and carbon dioxide. The carbon dioxide is what leavens the bread—carbon dioxide gases filter through the bread and creates beautiful air pockets and the alcohol evaporates during the process of baking.
Proofing of Yeast:
Every packet of dry active yeast is used in making many different kinds of breads, cakes, loaves etc. Since its the very basic requirement of any bread, it is important that we know that the yeast is going to work its magic and multiply, thus fermenting the dough to make it rise. Some times, the yeast is old and not active and hence will not “proof”. We need to “prove” that the yeast is good enough and active and will aid in the baking process. All one has to do is to take a bowl of lukewarm (not hot) water and add some form of sugar – sugar crystals/ honey/ agave nectar/ maple syrup which is required for the yeast to start its process of “proofing. Then add the yeast and mix it in. leave the bowl undisturbed for about 7-10 minutes. The surface of the water will slowly bubble and get frothy. Allow it to stand for the full ten minutes. If the surface is all bubbly and frothy (yes it is a little smelly!!!) then the yeast has “proofed” and can be added to the flour to make bread etc. If this does not happen, dump the water and start the process afresh.
PREPARATION:
- Measure out 1 1/8 cup of water in a glass jar and microwave for about 30 seconds. When you insert the finger in to the water it has to be just warm it should not be hot,as this would kill the yeast.
- Yeast needs a sweet medium to multiply, so next add the 2 tbsp of sugar. Now add the yeast, give it a stir and let it sit for about ten minutes.
- While the yeast is “proved”, we can get the dough ready.
- In a mixing bowl, measure out the flour and salt and sieve once. Add the olive oil and the yeast+sugar+water mixture.
- Using a spatula or a wooden ladle, mix it until you get a sticky dough. Add flour or water as needed until you get a smooth dough.
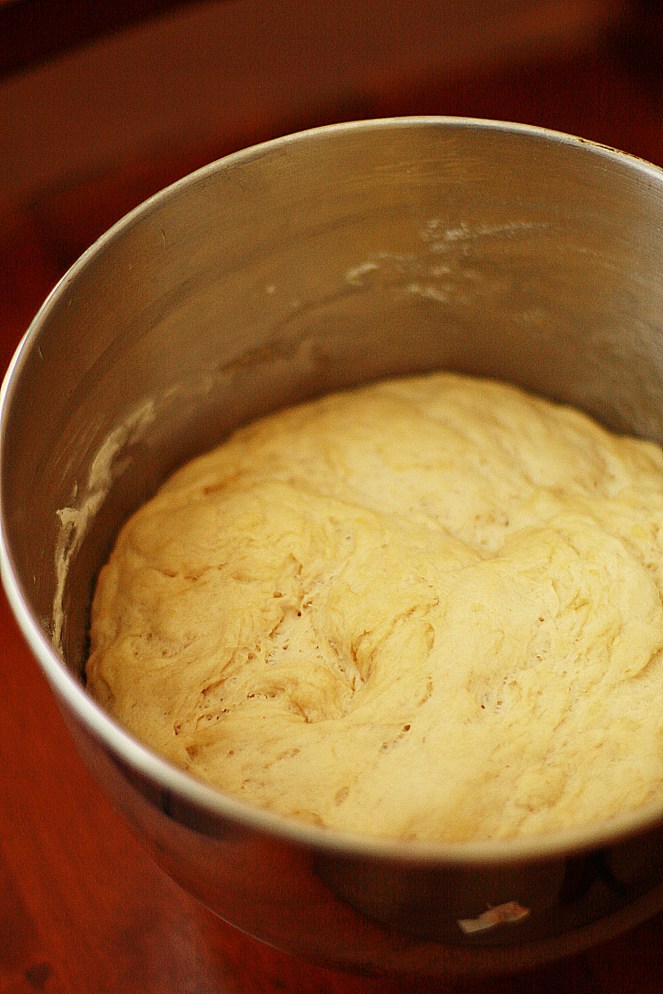
- Oil the base of the mixing bowl and place the dough in the bowl. Smear more oil on the surface and cover it up with a moist kitchen cloth.
- Keep for about 1 1/2 hours in a warm place undisturbed until the dough doubles in size.
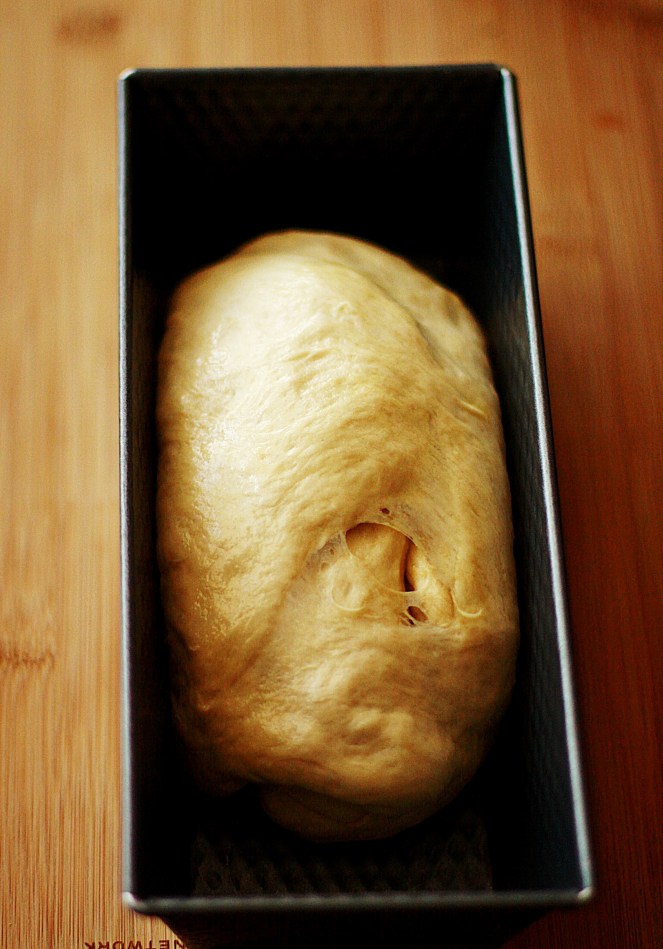
- Punch the dough lightly and remove the air inside and fold it a couple times until its shaped as shown.
- Grease a loaf pan and place the dough inside.
- Lightly cover with a thin kitchen cloth and place inside the oven with the light switch on, or in a warm place for another 45 minutes, until the dough rises.

- Preheat the oven to 375F or 190 C and place the loaf pan in the middle rack.
- Spray a couple squirts of water on the sides of the oven. This step is optional but helps keep the outside of the loaves moist and supple so that the bread can spring for as long as possible. Once the outside of the loaf begins to dry out it hardens, preventing further spring. Then the crust begins to form.
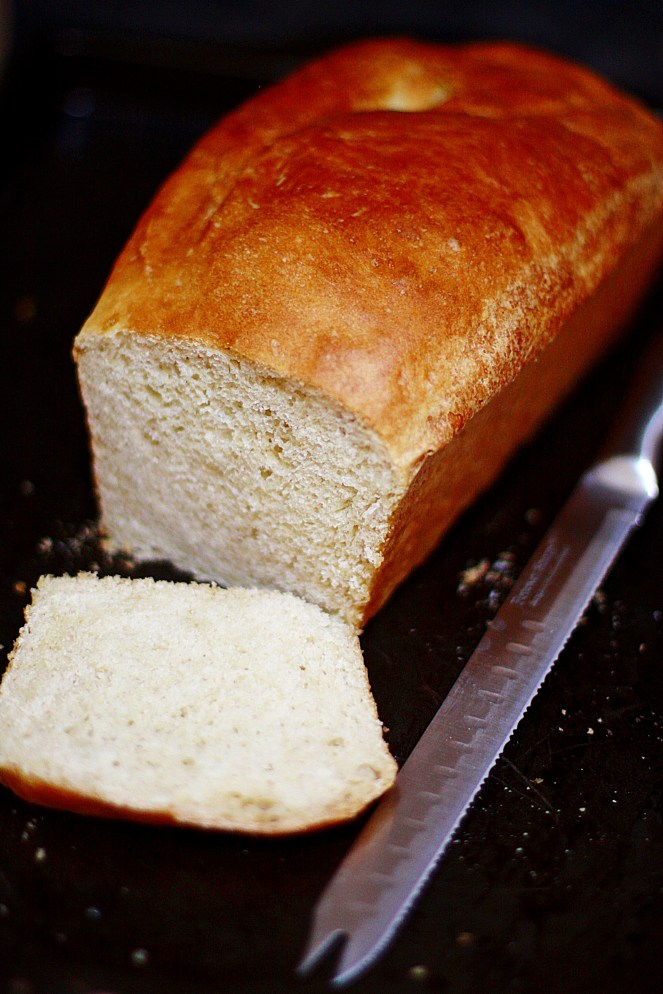
- Bake for about 35-40 minutes or until the top of the loaf sounds hollow and the crust is a beautiful golden brown.
- Cool for about 30 minutes before slicing.

STORING HOME BAKED BREAD:
- I have always found that baking bread at home is extremely therepautic and energising, but when it comes to storing home made bread for even 3-4 days, its a challenge.
- Many people recommend placing it the sliced side down on to a cutting board.
- Some suggest a bread box, but I have not found it too helpful.
- I did see an online bread storage bag like this one: http://www.amazon.com/gp/product/B0000VLGIY/ref=s9_psimh_gw_p79_d1_i2?pf_rd_m=ATVPDKIKX0DER&pf_rd_s=center-2&pf_rd_r=1WFPVF7AATRM6RSP6ZM4&pf_rd_t=101&pf_rd_p=1389517282&pf_rd_i=507846 but did not read very many good reviews.
- I have this time around, sliced my bread, but fashioned them as a loaf, moved them to a plastic grocery bag, and then stored it in an air tight rubbermaid container, to keep fresh for at least 4 days. I am not a fan of mold at all.
- How do you store your bread??

Wowww… Looks super soft and perfect.. thanks for the wonderful recipe 🙂
@Hari Chandana,
thhat was quick. thanks for the comments..
Shobha
Now, I am looking at this pic like I havent seen a loaf of bread before…
Bread is one of those things where humble ingredients magically transform into a delectable dish.. Divinity!
I love baking breads at home,cant explain how the house will smell while baking bread, excellent and super soft loaf.
thanks shoba for the link love. glad to know the bread post inspired you. bread baking is indeed therapeutic as well as satisfying.
@ Nals,
its really magic…to see a bag of flour, some water and yeast…poof you get a loaf of soft bread! imagine the possibilities…
Shobha
@ Priya
I enjoy the process of bread making each and every time!
SHobha
@ dassana,
thanks for the comments,
Shobha
GORGEOUS!!.. I can almost smell the amazing aroma of the bread from your pics!
Perfectly risen loaf and a beautiful bake!
The bread looks so perfect shoba. Looking forward to baking this 🙂
Looks perfectly done! I tried few times, but I think I have to buy a bread knife first 😀 I could not slice it beautifully. Lovely photographs
@ Raks,
A bread knife is very very important as I can slice the bread very fine! Thanks for the lovely comment Raks.
Shobha
@ Nandita,
Thanks for visiting!
Shobha
@ Sanjeeta,
thanks for your comments.
Shobha
@ Niv Mani.
Thanks for those lovely words. I enjoy the process of baking the bread, the aroma of bread baking filling my home and of course the joy in seeing your little ones enjoy them! I dont think I had more than a few crumbs!!
Shobha
Amazing ….looks very easy..
What a useful recipe and so neatly done! You make me want to bake one right now. Thanks for sharing!
@ Sonali,
Thanks so much for your lovely words.
SHobha
There is something satisfying about making your own bread. And the smell of freshly baked bread is just the best. I usually store my bread in the freezer, and warm up the portion that I need in the microwave.
@ Cakelets.
Do you actually freeze baked bread? Wow i never knew you could do that…what if you wanna make a sandwich for lunch? Would that stay soft??
|Shobha
My Father has made bread for us for as long as I can remember. He does not pre-slice, instead wraps the whole loaf in foil and then we slice whenever we want a piece. The bread can keep up to a week and never gets moldy!
DEar Alice,
Wow , I never knew you could wrap up home made bread in foil…what happens after you start slicing them? Do you still wrap them up in foil? Do they stay fresh
Shobha
I’ve tried every trick in the book for storing our bread. I recently purchased a box of plastic bags from Sams (online) in the size I need for our loaves. I have found that if I let the bread cool thoroughly cool (3-4 hours) putting it in plastic and using a tie works very well. Make sure to expel all the air you can before tying it off. In the summer humid months, I do keep it in the fridge and that will give us a little more time. We consume a lot (read TOO MUCH) bread, but homemade bread is like a drug! Ha! Therefore, it usually doesn’t last more than 48 hours.
@ Tracee,
Thats a lot of information about storing bread…let me try that out ad let you know. Thanks a ton.
Shobha
Lovely bread, and I specially love the first pic… looks so humble and well crafted… thanks for all the tips and information shared
so glad to follow you 🙂
@ Nupur,
thanks for the lovely comments. Try it and you`ll see that life is never the same again!
Shobha
What is the size of loaf tin you need to use for this measurement of ingredients?
Dear Meena,
Generally when you say “Loaf Tin” it is pretty standard. Please askfor the same. If you are in the US, look in places like Marshalls/TJ Maxx etc where they are available for a lot lesser.
Thanks
Shobha