Naivedhyams/ Festival Offerings. · Snacks & Tiffin Items

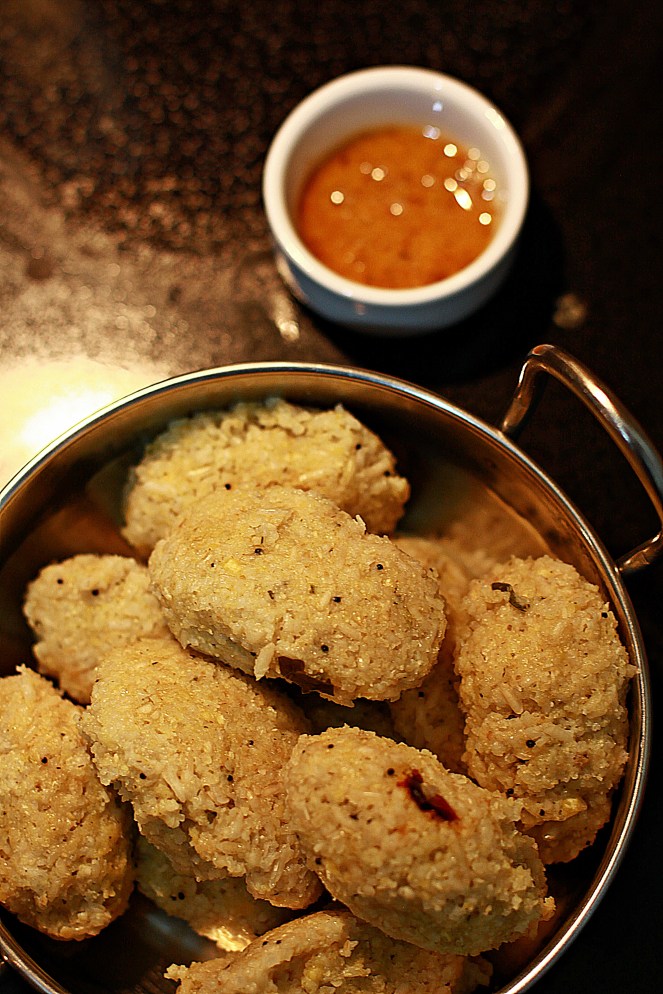
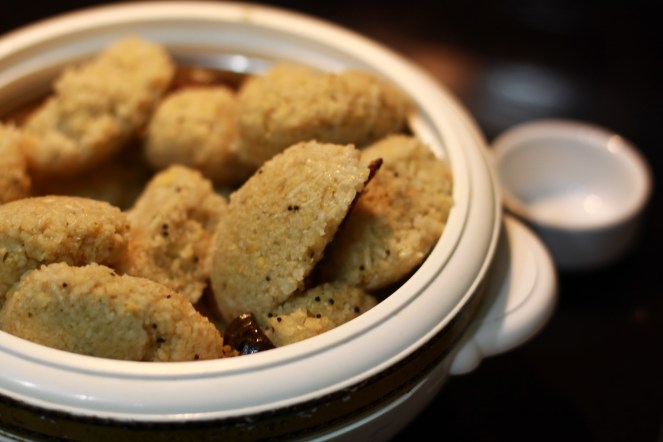
Chettinadu Vellai Thenkuzhal Murukku.

IMG_5458

“Simplicity is the ultimate form of sophistication”

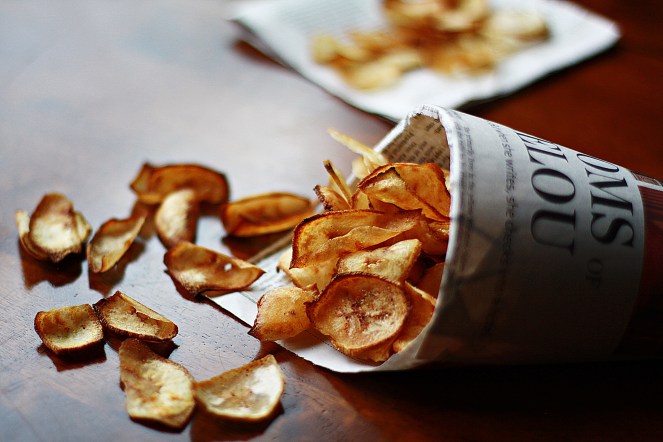
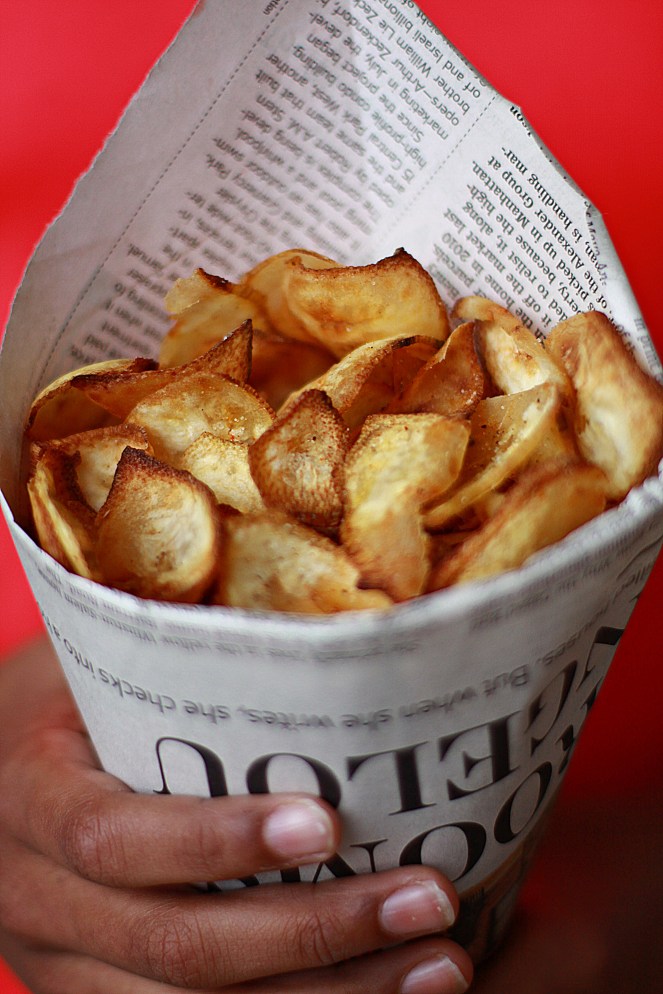
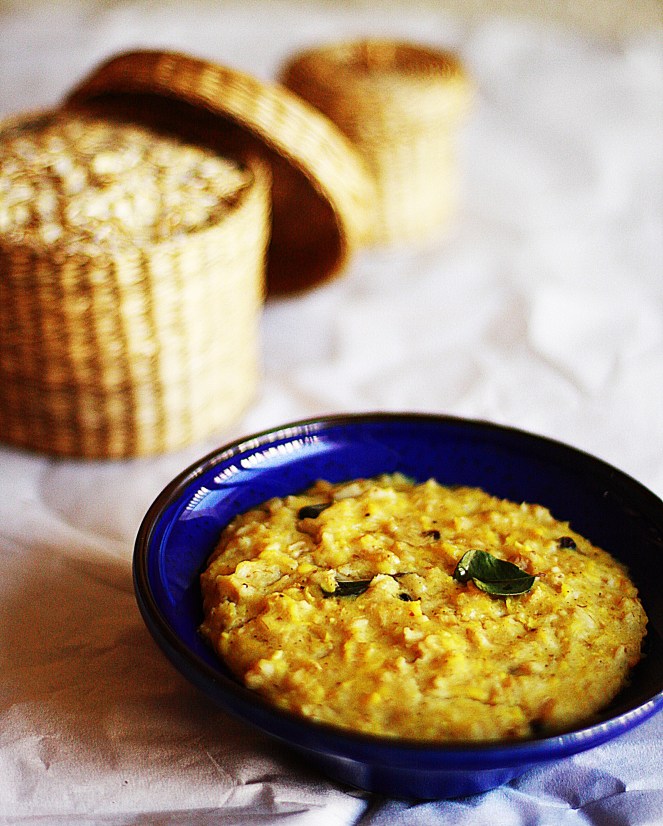
The most tastiest dish is probably the most simple and yet the most comforting. What could it be? The porridge that your mother makes with the most available ingredients on hand…sometimes it`s hot steaming rasam, or a bowl of soup, or a cup of dhal…be it whatever it may, what really counts is the small acts of care and love that go with it. This is a delicacy that I learnt from my good friend`s wife. She is an expert in making it and would never fail to send it for me whenever she did…I loved biting in to its crisp rings and enjoy the crunchiness and the simple flavors. It never felt greasy at any point and you would almost feel  like it was baked! There are simply a few things that have to be taken care of when you make this murukku. I have enlisted them at the very end…hope this helps.

INGREDIENTS:

2.5 Cups Raw Rice Flour.

1 Cup Roasted  Urad Flour.

2-2.5 Tsp Salt depending on the taste.

3-4 Tsp Oil / Vanaspati /Ghee.

PREPARATION:

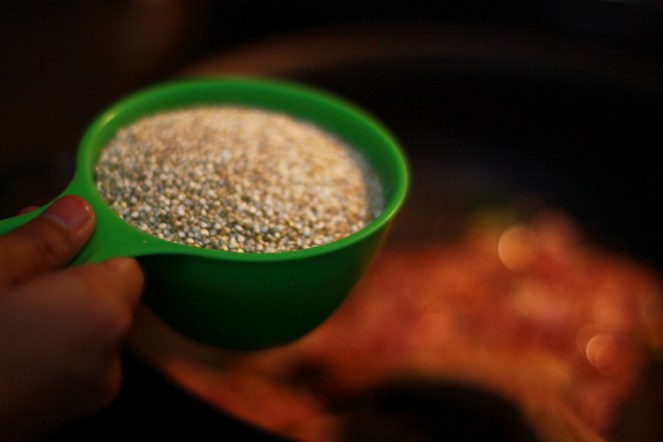
  • Rice Flour could be made in two ways. One way is to wash the raw rice, allow it to dry by spreading on a sheet and when completely dry, getting it powdered in the Flour Mill. The other way is to use the Rice Flour that`s readily available in the stores. Either way make sure that the rice flour is sieved and set aside.
  • This Murukku is called “Vellai” as it`s almost white in color. This is acheived by roasting the Urad Dhal on a low flame until you get the wonderful aroma. It should NOT be roasted red as we do in Kozhukattais. Once they Urad Dhal is well roasted, cool, powder and sieve. Set aside.
  • Mix the rice flour, urad flour, and salt and add the required amount of oil/ ghee/ vanaspati. Use room temperature water and mix to get a smooth pliable dough. When done, smear the ball with a spoon of oil and keep covered with a damp cloth so the dough does not dry out.
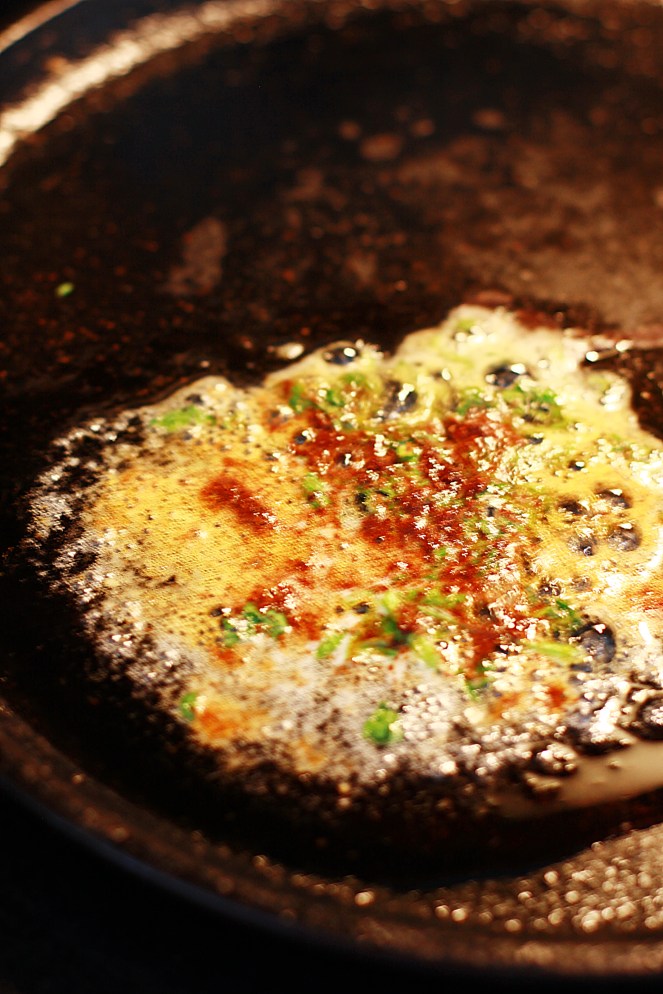
  • Heat the oil in a heavy bottomed vessel and keep a dry collander lined with a paper towel ready.
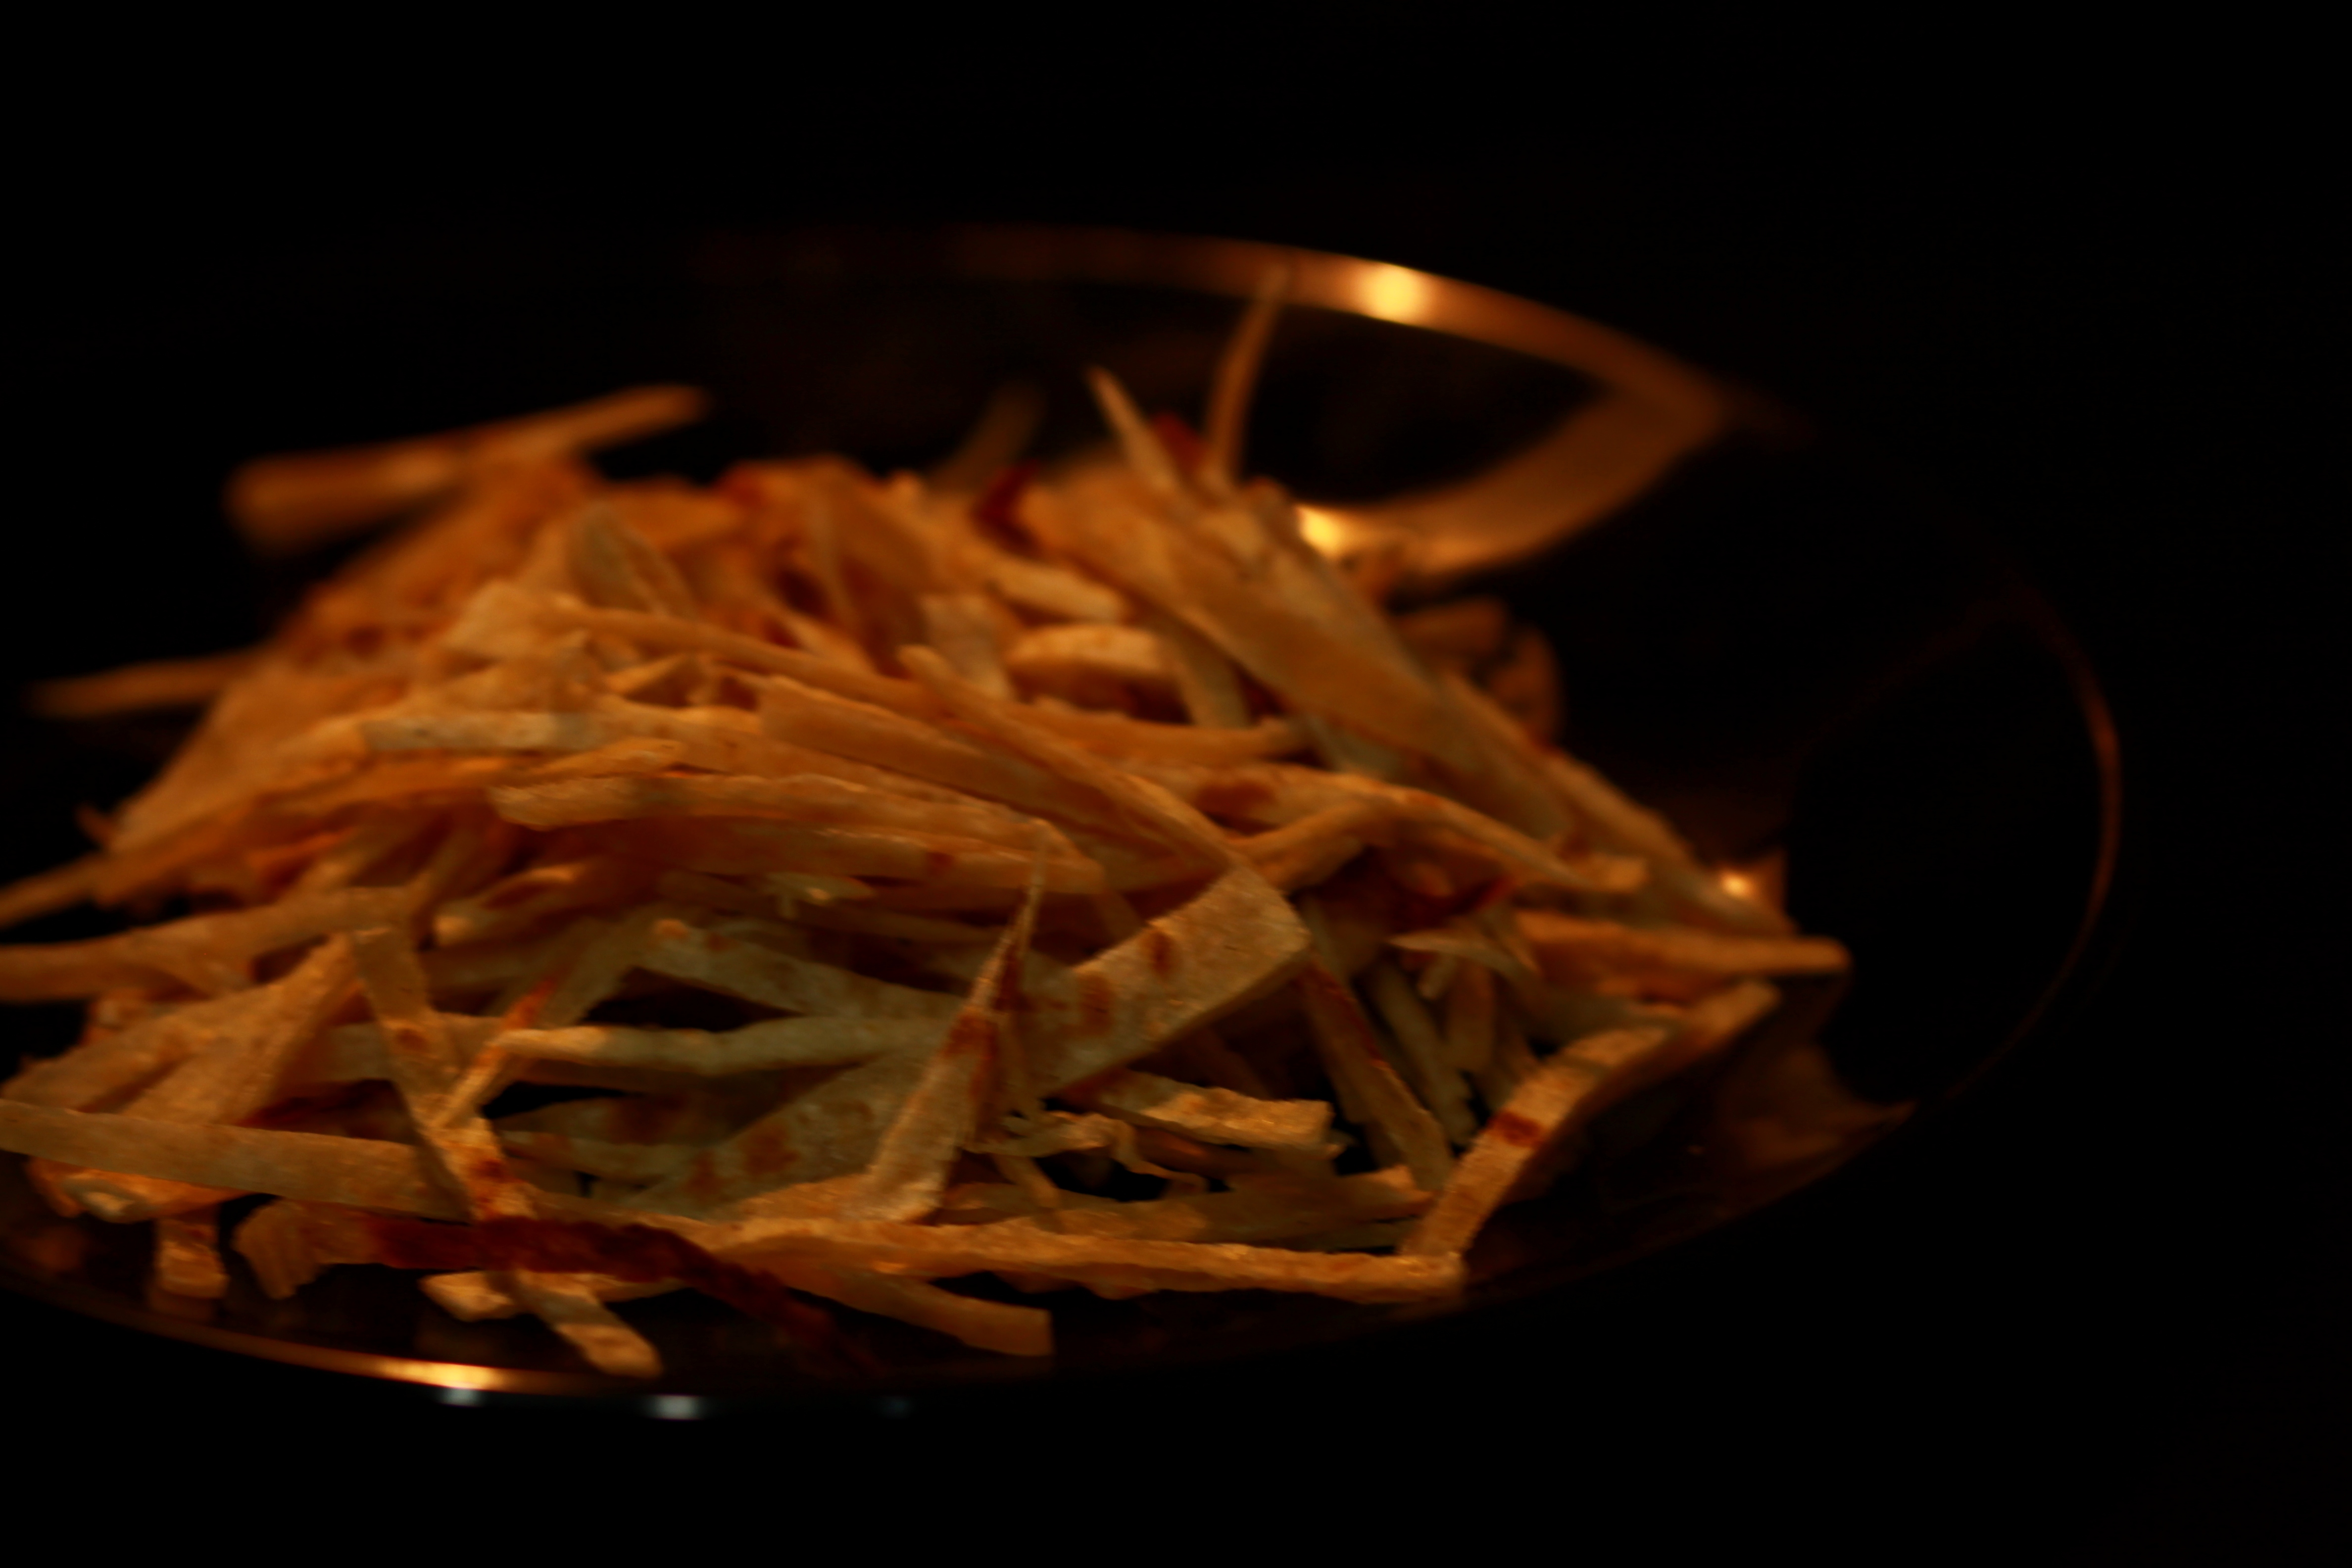
  • When the oil is hot enough, press it in to little murukkus with a Murukku Press directly on to the oil.
  • When the murukku hits the oil it will hiss and get fried. Once the bubbles subside, remove the murukku with the help of a slotted ladle or a skewer and drain on to the collander.
  • These Murukkus are very crisp yet buttery, light yet melt in the mouth soft.
  • Store in air tight containers for about 2-3 weeks.

TIPS:

  1. This is the most simplest and minimalistic murukku with just 3 ingredients, yet the most flavourful.
  2. If you find the dough is dry, sprinkle a few drops of water and a tsp of oil. If you think its too squishy, add a few spoons of rice flour little at a time and a spoon of oil and knead it together.
  3. Coating the  ball of dough with oil, helps it to retain all the moisture without drying out.
Easy LunchBox Series. · Kid Friendly Recipes. · Snacks & Tiffin Items

Aloo Kathi Roll / Tibbs Frankie -Bombay Street Food.

IMG_5106


“Brilliant!!!” was the first word that came to my mind when I saw the Tibbs Frankies Counter right outside the Globus Store in Chennai. It was everything packaged in to one tiny roll of goodness. When I bit in to the hot veggie frankie, I attained instant nirvana. It was a combination of sorts – spicy, tart, chunky and crunchy. It was a match made in heaven. Since that day it has been something that makes me go weak in the knees. I confess to even choosing Globus over some of the other stores, simply with the knowledge that we would have the frankie. When we moved to the US, it was one of those things that I missed the most…well, apart from Woodlands Pongal, Sangeetha`s Pineapple Kesari, Madras Bhel Puri House Bhel Puri, Hot Chips Samosa Chat, Saravana Bhavan Parotta Kurma, and Mainland China`s Dumplings to say the least! I had to make my own version and the first step was getting the Frankie Masala. On my last trip to India, I got the Kapol`s Frankie Masala and I must say its a keeper.  My version is inspired by many on the internet and of course my own spin to it. Hope you enjoy it!

INGREDIENTS:

1 Medium Onion.

1 Tsp Frankie Masala.

1 Cup Wheat Flour.

1 Cup Unbleached Organic All Purpose Flour.

Salt to taste.

For the Stuffing:

2 Medium Sized Potatoes boiled with salt and mashed.

1 Tsp Cumin Powder.

1 Green Chilli Chopped.

1/2 Tsp Red Chilli Powder.

1/2 Tsp Chat Masala.

1/2 Tsp Garam Masala Powder.

Salt if needed.

1/2 Cup Bread Crumbs.

1/2 Tsp Sugar. (Optional).

For The Green Chutney:

2 Tbsp Thick Curd.

1 Green Chilli.

2 Tbsp Roughly Chopped Ginger.

1/2  Cup Packed Cilantro Leaves.

3-4 Mint Leaves. (Optional).

A few drops of lemon juice or 1/2 Tsp Kala Namak.

PREPARATION:

  • Prepare the outer dough just like you would for rotis. Add the all purpose flour,  maida and salt and using just enough water roll in to a pliable dough. Smear a thin layer of oil and cover tightly until use. You can also use whole wheat flour completely if needed.
  • Chop a medium onion in to thin long slices. Squeeze half a lemon on the onions and top with 1/2 Tsp Chat Masala. Set aside.
  • In a kadai add a tsp of oil and add the green chillies and the mashed potatoes. Follow up with all the dry spices – Cumin Powder, Red Chilli Powder, Chat Masala and Garam Masala Powder and give it a quick saute.
  • Remove from the kadai, trasfer to a bowl and add more salt if needed after tasting. Add about 1/2 cup  of bread crumbs and gently mix.
  • For bread crumbs just add one loaf of bread to the mixie jar and quickly pulse.
  • At this point the stuffing should have a thick cutlet dough like consistency. Roll in to cylindrical pieces and shallow fry until browned on all sides.
  • IMG_5092
  • Puree the curd, cilantro, green chilli, mint leaves and ginger to a smooth consistency. If you don’t want to use curd, just add a few drops of water.  Season with a pinch of kala namak (black salt) or lemon juice. Transfer to a bowl.
  • Kathi Rolls are pretty much assembled just before serving them so they dont get soggy.
  • Arrange all the ingredients required – Stuffing, warm rotis. green chutney, chopped cilantro, seasoned onions and optionally chat masala powder or frankie masala powder.
  • Lay out the roti and place two of the potatoe rolls on one side.

IMG_5101

  • Top with green chutney, chopped cilantro, and onions and sprinkle chat masala.
  • Gingerly roll tightly and pack one end in to a small sheet of aluminum foil.
  • Serve fresh!

 HINTS:

  1. You can sunstitute half the boiled potatoes and replace it with paneer instead.
  2. You can marinate the panneer / aloo in achari masala and then sear it to make Achari Panneer Kathi Rolls.
  3. Leftover stuffing can be easily reused the next day for kids lunchboxes in the form of sandwiches.


Snacks & Tiffin Items

Chettinadu Masala Vadai – Tea Kadai Style!

IMG_4856

Always always, memories are woven in to every little item, or episode that’s close to our hearts. Sometimes, its the first time you had won a contest growing up, the first time your parents felt very proud of your accomplishments, a favorite train journey, eating out at a favourite restaurant, memories of festivals, new clothes, shopping, first gold jewelry, first cycle…suddenly the wheels spin faster and faster until the memories simply rush in and lift you up in a daze…Memories can do that to you, take you about 20 years back in a flash and make you feel the same feelings you felt then…the happiness, sorrow, despair, joy, pain…anything…something that you keep in your little brain, tucked away…

My first career posting was at a bank and I had this really close friend of mine, M. She and I used to enjoy eating out now and then and we shared the same culinary preferences. Sometimes it would be at a simple restaurant, or a bhel puri joint, or even a cup of tea and this Madras Tea Kadai Masala Vadai. The aroma was just astounding. Sometimes in the evenings, we would ask the office boy to get us some tea and this vadai and chat up in the break room for a few minutes. It was pure bliss! Every bite filled with the flavourful crunch of this vadai, with the aroma of fennel and onions wafting…I can grab on to that memory for a second….and almost enjoy it right now! I had to recreate this vadai and had asked the boy who gave me a rough recipe and ran away! Recreating it after all these years, made me almost go there and relive those moments.

INGREDIENTS:

1 Cup Channa Dal.

1 Tbsp Raw Rice.

Small Onions – 12-15 diced finely /  1 Medium Onion Chopped fine..

2 Tbsp Chopped Cilantro.

2 Tbsp Chopped Fresh Mint Leaves.

Salt to taste.

A small pinch of Garam Masala.

Handful curry leaves crushed.

1 1/2 Tbsp Rice Flour or as needed.

Masala Base to be pulsed:

1 Inch Ginger.

5 Cloves of Garlic.

2 Tsp Fennel Seeds.

1Red Chilli.

2 Green Chillies.

4-5 Mint Leaves.

PREPARATION:

  • Soak the channa dal and rice together for about 3-4 hours in water enough to immerse.
  • When its time to make the vadas, drain the channa dal and rice on to a collander and allow to sit for a couple minutes.
  • In a small mixer container, roughly pulse all the ingredients under Masala Base – Ginger, Garlic, mint leaves, fennel seeds, red chilli, green chillies.
  • Now add half of the drained channa dal and allow to roughly pulse. The channa dal should NOT be ground to  a smooth paste. The consistency should be rough and grainy.
  • Now grind the other half to a same grainy consistency and transfer to a mixing bowl.
  • Add salt, finely chopped shallots, mint, cilantro, curry leaves and the required rice flour to accomodate any extra moisture and to give the vadais some crispness. Taste the batter to make sure that the salt is not too much. If you feel so, add a little more rice flour/ rava and mix it in.
  • When the dough comes together, make balls and lightly flatten to resemble a patty.
  • Pour enough oil in to a shallow flat bottomed kadai and keep on medium heat. As you make little vadas in the palm of your hand, gently drop them in to oil.
  • When the vadai is dropped in the oil, let the heat be medium high.  When they are cooking, bring the heat down to a medium and allow to slowly fry on both sides.
  • Drain on to collander lined with a paper towel.
  • Delicious crisp Tea Kadai Masala Vadai is ready and can be served with steaming hot cups of coffee or tea.

HINTS:

  1. Adding rice flour is completely optional and only mentioned to adjust the final consistency.
  2. Do not add water to the dal while pulsing. Use short pulses to bring them to a rough consistency.
  3. Keeping the oil at the right temperature is important to achieve uniform cooking of the vadais.
  4. Garam Masala is added only a pinch. If you feel that the smell is too overpowering, you can avoid this step.

IMG_4852

Snacks & Tiffin Items

Kunukku – Leftover Adai Batter gets a makeover!

IMG_4624


“Memory is a way of holding onto, the things you love, the things you are, and the things you never want to lose”!!!

Many of the dishes that I make are all associated with some random part of my childhood that I wildly clutch on to…There was a lot of pain, there was sorrow, but there was loads and loads of happiness too. All those times, I never knew that those were the moments I was going to think back on, reminisce, and wish I could go back to, over and over again. My sisters made my life so worth it, then, now and forever, I am sure. There are so many people who influence so many little things about all of us, our thinking, our values, our ideals and definitely our approach to life. My grandmother was all that and more…She taught me the principles of reuse, recycle and reduce almost 20 years ago!  Everytime there is leftover Adai Batter we almost always make Kunukku and have it with spicy tomato ketchup! Sometimes I use the Abel skiver Pan/ Appam Pan to make them!

INGREDIENTS:

2 Cups Adai Batter.

2 Tbsp Fine Rava.

1 Tsp Rice Flour.

1 Red Onion sliced fine.

Handful Curry Leaves.

Chopped Cilantro.

Hing as needed.

PREPARATION:

  • Take the leftover adai batter and add rava, finely chopped red onions, handful torn curry leaves, and chopped cilantro.
  • If the consistency of the batter is too watery, simply add a spoon of rice flour and mix it in.
  • Heat the oil and pop in small balls of the batter in to the oil and fry on medium heat until the outside is crisp.
  • Remove from oil and drain on to a paper napkin.
  • Serve with Sweet Dates Chutney or Tomato Ketchup.


Snacks & Tiffin Items

Home Made Plantain (Vazhakkai) Chips.

IMG_1435 Vazhakkai Chips have always been a delicacy at our home , growing up. When we were in school, there was almost no buying snacks from the stores. Processed food was not something we have been used to. Many days whenever my grandmother found fresh green plantains at the local market at Ranganathan Street, she would buy a couple to make these delicious chips. The only gadget that all homes had for this purpose was the Anjali slicer which apparently was the best. I would peel and slice the vazhakkai and spread them on a newspaper next to the stove and my grandmother would pop them in to the hot oil right away. When the fried chips were set to drain on to the colander, I would sprinkle the spice powder over the hot chips, all the time, resisting temptation to eat a few. The Chips Aisle in the grocery supermarket is crowded with so many different brands and a myriad variety of flavors – Sour Cream and Onion, Barbecue, Black Pepper and Sea Salt, Maui Onion, Garden Vegetable etc. There are so many varieties of chips in the market – kettle cooked, popped, baked, toasted etc, but nothing comes even close to the bursting flavours of the simple home made version. 

INGREDIENTS:

3 Fresh Raw Green Plantain.

Oil to Fry.

1/2 Tsp Salt.

1/3 Tsp Red Chilli Powder.

1/4 Tsp Hing.

PREPARATION:

  • Pour enough oil in to a heavy bottomed kadai and set  stove on medium flame allowing time for prep work.
  • Mix the dry powders and set aside.
  • Its`s important to have a sharp good quality mandoline and I have been wanting the MicroPlane Adjustable Slicer with Julienne Blade  or the Swissmar Borner Mandoline which is heavily rated and reviewed on Amazon but couldn’t actually get round to looking at one. So I settled with the OXO Adjustable Slicer which is pretty awesome too!
  • Peel the green plantain one at a time and quickly slice the plantain on to a dry paper towel . When the oil is hot enough, slowly pop them in to the hot oil and deep fry them until they get light and crispy and a golden brown.
  • Drain them on to a colander and sprinkle the spice mix on to the chips and toss lightly.
  • Transfer to an air tight container.

IMG_1448

Snacks & Tiffin Items

Mumbai Street Food – Paav Bhaaji. (Spicy tangy gravy with mashed vegetables and seasonings served with soft toasted paav buns)

 IMG_1362

Street Food they say sometimes tastes way better than the food available at world class restaurants because it has that simplicity built with robust taste that cannot be beaten. This is really true of Mumbai and its street food, as people of all classes love and enjoy eating roadside food. Some of the most famous street food available there are Vada Paav, Bhel Puri, Paani Puri, Paav Bhaji, Ragada Pattice, Sev Puri, Dahi Puri etc. This time my India trip also had afew days at Mumbai and I went to the Chowpatty Beach and tasted their amazing chaat varieties. We polished them off with the Khala Khatta Ice Gola availabke there – almost felt like a fushion of thickened  coke, sugar, kala namak and chat masala. I should try that sometime!!!  My daughter simply loved all the chat items and had been wanting me to try the Paav Bhaji at home. My recipe is inspired by a number of recipes online as well as by watching the paav bhaji wales make them first hand!  They had these monstrous sized tavas whuch were perennially over a gas flame, shared by a couple men concocting different items. Simply YUM!

INGREDIENTS:

1 Capsicum diced fine.

1 large ripe tomato or two small tomatoes diced small.

2 boiled potatoes mashed.

1/2 cup peas thawed/ cooked and mashed.

1 Tsp Red Chilli Powder.

1 Tbsp Ginger Garlic Paste.

A pinch of turmeric.

1 Tbsp Butter.

1 Tbsp Paav Bhaji Masala.

Chopped Cilantro.

Salt.

Ingredients for Saute Seasoning:

1 Tbsp Butter.

3/4 Cup Onion Diced Fine.

1/2 Tsp Red Chilli Powder.

1 Tsp Paav Bhaji Masala.

1 Tbsp Kasuri Methi.

Chopped Cilantro.

1/2 Lemon`s Juice.

PREPARATION:

  • Take a wide mouthed kadai and place on the stove. Immediately add the chopped capsicum, chopped tomatoes, mashed potatoes, peas, ginger garlic paste, turmeric and red chilli powder.
  • Give it a quick mix and add about 1/2 cup water to the kadai and allow the veggies to cook well until tender.
  • Add 1 Tbsp butter and mash the vegetables with  a masher slowly until all the veggies get  mushy.
  • Add a little more water if needed and keep mashing and mixing until the oil seperates.
  • Now add the 1 tbsp of paav bhaji masala. chopped cilantro, and salt. Mix it in again and let it simmer.
  • In another kadai, we make another saute of seasonings and add it to the bhaaji. It`s hard to think ,with all the aromas wafting around, but stay with me and we`ll wrap this up soon.
  • To the second kadai, add a  spoon of butter.
  • When melted, add onions, ginger garlic paste, red chilli powder, paav bhaji masala, hing, kasoori methi, chopped cilantro, lemon juice and saute it until it all comes together. The onions need to get slightly pinkish brown.
  • It`s optional to add a pinch of red colouring but I try to avoid artificial food colours as much as possible.
  • Add all of the seasoning to  to the bhaaji kadai and boil until blended.
  • Garnish with more chopped cilantro.

ASSEMBLING THE PAAV BHAAJI:

IMG_1352


IMG_1357

  • Add a spoon of butter and when it begins to melt, add a dash of paav bhaji masala, red chilli powder ( if you want to kick it up a little), and chopped cilantro.
  • The seasonings simmer and bubble in to the melted butter.
  • Smear this all over the tava and toast all the paav buns on both sides with the awesomeness on the tava. Just a couple minutes more so hang on there….
  • Serve as shown with a side of bhaaji, toasted paav buns, chopped onions, a small wedge of lemon, a dollop of butter and of course more chopped cilantro.

HINTS:

As I see this dish, its pretty much built on the seasonings, the large amounts of chopped cilantro and of course the salted butter. Don`t go easy on the butter as it spoils the creaminess of the dish itself.

ENJOY!

IMG_1368

Salads/ Recipes for the Calorie Conscious. · Snacks & Tiffin Items

Brown Rice Pidi Kozhukattai (Brown Rice Steamed Dumplings).

IMG_5563

Rice Pidi Kozhukkatais has been an absolute favourite saturday night dinner, all through my childhood.  Those were days when we would never go out all weekend. It would be spent at home with my sisters, catching up on the week`s lessons, cleaning, getting ready for the next week and of course chatting up with each other. We could never ever get enough of talking to one another. There was always something that we had forgotten to share, about an event at school, or that nasty girl who spoke behind our back, or a shocking gossip about a teacher, or the topic we all three always always loved – Music! We could talk about it for hours on end and it would figure all kinds of music forms – Pop, Rock, Carnatic, Classical, Movie Songs, Indipop….there was just so much music all the time around the three of us. I always miss those days of my growing up together with my sisters!!!

These days rice pidi kozhukattais have been a little rare and I have been using other fibre rich or protein rich ingredients as substitutions for rice. I had made a version completely with cracked wheat  and I have another version with Quinoa. Today`s version is with Brown Rice, as its high in fibre ,and minerals like manganese and phosphorus, and low in saturated fat and has a moderate glycemic index.

INGREDIENTS:

1 Cup Brown Rice.

Handful of Cracked Wheat.

A handful Toor dhal.

1 Tsp Urad Dhal.

2 Green Chillies.

2 1/2 Cups of Water.

Seasoning:

Oil.

Mustard

Curry leaves.

2 Red Chillies as per taste.

A few broken cashews.

PREPARATION:

  • Grind the brown rice and the cracked wheat to a coarse gritty texture.
  • Soak the urad dhal, toor dhal and the green chillies in water for about 2-3 hours. The Urad Dhal is mostly a binding agent for bringing the kozhukattais together.
  • Grind the urad dhal, toor dhal and the green chillies using little water, to a smooth paste. I also added a few sprigs of cilantro and some curry leaves.Set aside. Measure out the fluid (apprx 1/2 cup).

IMG_5540

  • To this ground paste add enough water to bring it to 2 1/2 cups measurement. Set aside.
  • Take your favorite kadai and add about 1 Tbsp of coconut oil. When hot, add the ingredients mentioned under “Seasoning” and mix away until they are lightly roasted.
  • Now bring down the flame to a medium low and add the measured water + ground paste which is totally 2 1/2 cups. Mix them all in.
  • Now add sufficient salt and wait until the water just starts to boil.
  • Bring down the heat and slowly add the pulsed brown rice + cracked wheat mixture.
  • Bring down the heat to medium low and with a whisk bring it together until its almost resembling a thick upma.
  • Switch off the flame and allow to cool for a few minutes.
  • When its a little more easy to handle, make little balls by holding them inside your palm and closing your fingers over them so as to fashion them so.
  • Grease idli plates with coconut oil and place the pidi kozhukattais in the depression.

IMG_5552

064

Brisk Breakfast · Salads/ Recipes for the Calorie Conscious. · Snacks & Tiffin Items

Oats Pongal – A healthy alternative to Ghee Pongal.

IMG_7140

Pongal has always been my most favourite breakfast item at any south indian restaurant. Normally the pedigree of the restaurant can be measured by just tasting their “Venn Pongal”.  Venn Pongal  literally translated means Pongal thats white in colour and is differentiated from its sweetened variety “Chakkarai Pongal” which incidentally is the main offering for many festivals.  Pongal served on a green banana leaf, dolloped with ghee, served with Hotel Sambar and Coconut Chutney is the staple breakfast in many homes.  These days with the mounting concern on the amount of carbs that we intake I was always looking at an alternate to this dish. I did try it with brown rice, but as per the quality of brown rice itself, its very difficult to cook it until it turns mushy. Oats on the other hand holds its own form and taste and yet can get mushy and provide a lot of body to the dish. I must say I never actually missed the rice at all! Try out this healthy alternative to refined white rice and enjoy the taste!!

INGREDIENTS:

1 1/2 Cups Old Fashioned Oats. (The Quick Cooking Variety will get mushy too fast!)

3/4 Cup Moong Dal.

1- 1 1/2 Cups Water.

1 1/2 Tsp Jeera.

1 1/2 Tsp Pepper.

1 Tbsp Ginger sliced to thin pieces.

Curry Leaves.

6-7 Cashews sliced.

Salt.

Ghee.

Milk to loosen the pongal if needed.

PREPARATION:

  • In the cooker vessel, add the 3/4 cup of moong dal, give it a quick wash and then add a little turmeric powder. Cook until mushy.  Smoosh it well with the back of a ladle and set aside.
  • In a kadai, add the measured oats and 1 – 1 1/2 cups of water, salt  and allow to cook on a medium low flame. When the oats uses up all the water and get cooked in it, add the cooked mushy moong dal.
  • Adjust salt and stir  briskly on low flame.
  • In a seasoning kadai, add 2 tsp of ghee, powdered jeera, roughly crushed black pepper and ginger and allow it to fry well in the ghee.
  • Finally pop in the cashew nuts and curry leaves and pour over the oats pongal.
  • If you feel the consistency is too thick, add 1/4 cup of milk to loosen it.
  • Serve hot with Hotel Sambar.


IMG_7157

Salads/ Recipes for the Calorie Conscious. · Snacks & Tiffin Items

Quinoa Upma or is it Khichdi???

IMG_6487

“From the bitterness of disease man learns the sweetness of health.”

It is definitely a boon to stay healthy and live a life of good habits and good values.  The road to good health per se has been a long journey for me with so many learnings about the greatest creation of God – Man! The human body is a very complex structure that has many million functions running at a particular instant and requires all of  them to do so, ever so smoothly for us to be able to take a breath of air. Isnt that really amazing? Of my latest learnings, I am beginning to delve in to the subject that been discussed to death – PROTEIN.  Why do we need protein? Proteins are the building blocks of life.

The body needs protein to repair and maintain itself. The basic structure of protein is a chain of amino acids.

Every cell in the human body contains protein. It is a major part of the skin, muscles, organs, and glands. We need protein in your diet to help your body repair cells and make new ones. Quinoa is a a very rich source of protein needed by the body and is also a complex carbohydrate that digests slowly and does not cause a spike in sugar and insulin levels. I started off making an upma from Quinoa but finished up as a khichdi. It was extremely delicious and very filling!

INGREDIENTS:

1 Cup Quinoa.

1 Medium Red Onion or two small onions diced fine.

1/4 Cup Raw/ Roasted Peanuts.

1 Red Chilli.

1 Tsp Salt.

A pinch of turmeric.

Half a lemon`s juice.

2 1/2 Cups Water.

Seasoning:

1 Tbsp Oil.

1 Tsp Mustard Seeds.

1 Tsp Bengal Gram.

4-5 Cashew nuts.

Curry leaves.

2 Tbsp Ginger diced.

1 Green Chilli diced.

PREPARATION:

  • In a large kadai, add the oil and when its hot, add the seasonings  – Bengal Gram, Cashew nuts, ginger, green chillies, and when they are sauted in the oil, add the mustard seeds and the curry leaves. If you add the mustard seeds first, they will burn and it then wouldnt be possible to roast any of the remaining ingredients. 
  • Now add the diced onions and saute for a couple minutes until they turn a dull pinking brown. Now add the measured quinoa in to the pan and saute until it mixes in with the onions.

IMG_6469

  • Add a pinch of turmeric and add in the measured 2 1/2 cups of water.
  • Now add salt and mix it in and on medium flame give it a couple minutes to come to a boil.
  • Now reduce the flame to low and cover and cook the quinoa for about 20 minutes. I am guessing it would be much faster on an LPG stove so keep the flame really low and let it cook.
  • This is almost like allowing rice to cook on a low flame so it doesn’t burn. Quinoa is a nutty tasting gluten free grain that has the ability to fluff up when cooked well. So give it some love.
  • In the mean time take a dry pan and roast the peanuts for about 3-4 minutes until it emits an amazing aroma. Add one red chilli and give it a quick stir. When slightly cooled, transfer to a mixer jar and give it a quick pulse. Set aside.
  • Keep a check to make sure that there is moisture in the pan along with the quinoa. When its almost done squeeze the lemon juice and garnish with the powdered peanut-chilli powder.
  • This is exactly the same one I use in the Sabudhana khichdi which is another amazing dish.
  • Serve hot with Tomato Thokku and enjoy the flavours of nutty quinoa, onions, ginger, lemon and peanut-chilli powder all  in  one bite. Sounds over-powering? no way they all marinate beautifully and give out an indulgent taste!

IMG_6497

Indo-Chinese Cooking. · Kid Friendly Recipes. · Snacks & Tiffin Items

Chappati Chowmein (Wheat flatbread sliced and spiced in to stir fry!)

IMG_5944

All the forces in the world are not so powerful as an idea whose time has come!!!

Victor Hugo

One of my most popular posts that tops the hits on Anubhavati everyday, is the Restaurant Style Indo Chinese Fried Rice, and I am sometimes overwhelmed at the comments posted on the blog. So many people also e-mail me saying that it thrills them that they can make something so close to a restaurant taste – sans the grease! This keeper recipe is simply a rehashed version of the Fried Rice. Only we make it all the more interesting by playing with the textures  – Remove the rice, replace noodles – Remove the noodles replace Chappati Slices.

INGREDIENTS:

2 Chappatis.

1 Inch Ginger julienned.

2-3 Elephant Garlic pods sliced thin. (Use 4-5 of the thin variety).

1/2 Cup thinly sliced Cabbage.

1/2 Cup thinly sliced Carrots.

1 Capsicum sliced thin.

2 stems of green onions chopped fine.  – (Seperate the white parts and the green leafy parts.)

3/4 Tsp Pepper Powder.

1 Tsp Soy Sauce.

Salt to taste.

PREPARATION:

  • Its always been on my mind to fashion leftover chappathis from dinner in to chowmien the next day, but my little one always liked to smear fresh fruit jams on them and roll them up and enjoy the burst of sweetness after the bite in to the flatbread. I never had any leftover chappatis!
  • This time I went ahead and make a couple extra just to try out the chowmien. My pantry co-operated with the right ingredients and I made it for lunch for S.
  • Roll up the chapattis and slice them lengthwise. Now cut  away thin slices with your kitchen shears. Set aside.

IMG_5935

  • Heat up a kadai and add the required amount of oil. Pop in the sliced ginger and garlic and allow a minute or two for them to get fried in the oil. Do not hasten this step as this is what provides the flavour to the chowmien!
  • Now add the white portion of the spring onion and give it a quick saute.
  • Nice, now dunk in all the veggies in to the pan and give it a quick stir.
  • Add salt, pepper powder and soy sauce and allow to saute. DO NOT allow to cook enough to get mushy, as the veggies need to retain their crunch.
  • Now toss in the sliced chappati slices and mix in well.
  • Garnish with the green portion of the spring onion.
  • Serve hot with tomato ketchup! Kids love this for lunch!

IMG_5976