Easy LunchBox Series. · One Pot One Shot (OPOS) · Rice Varieties.

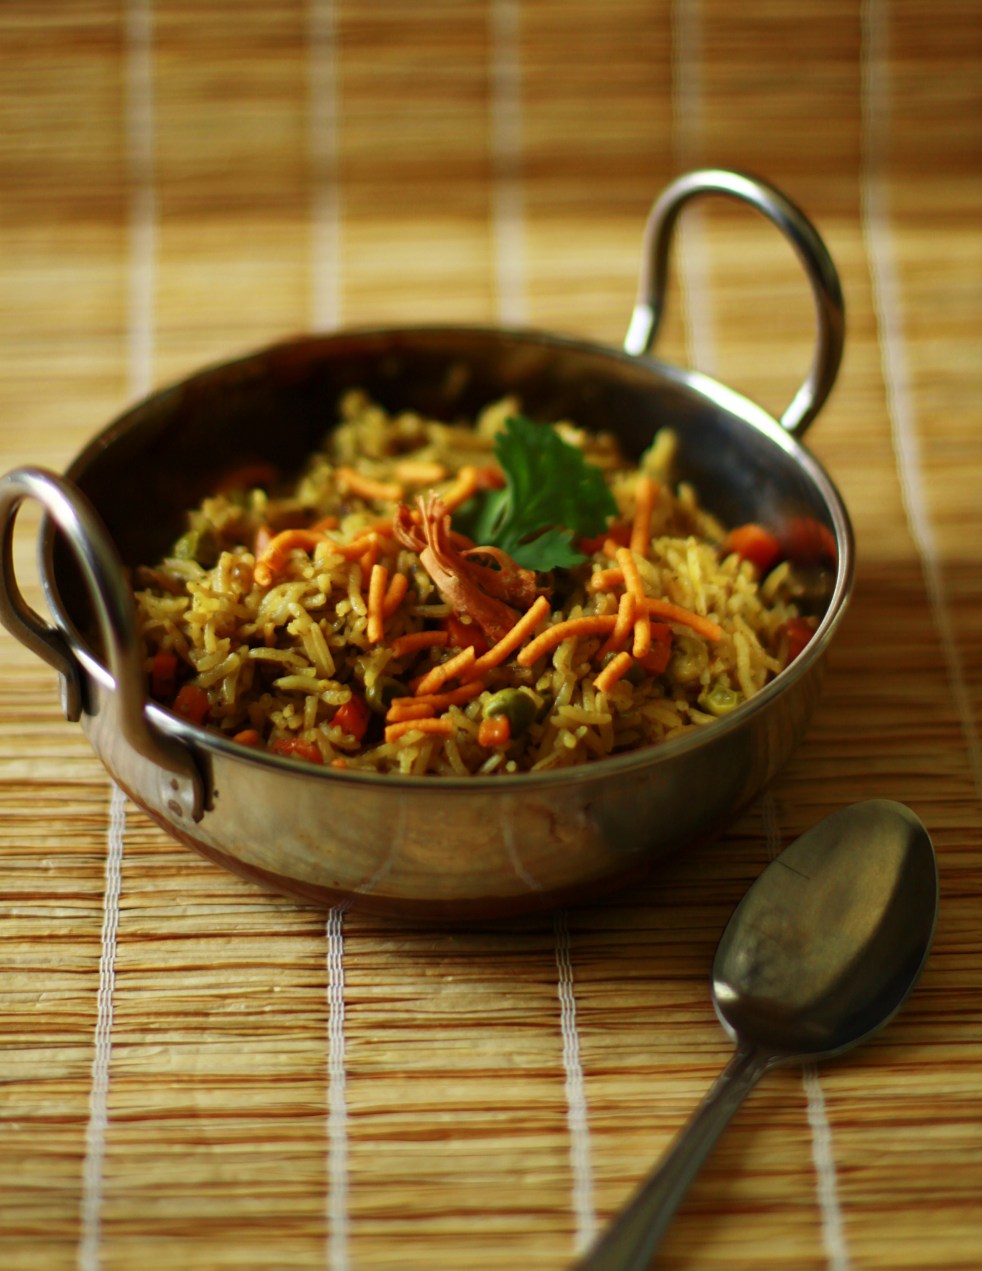
Fragrant Green Pulav – One Pot Dishes.

IMG_6606.JPG

It has been 7 years since Anubhavati was born and I must say it has been an amazing ride!  The journey has taught me a lot, not only in documenting what I cook for my family, but more in terms of photography, presentation and definitely my writing skills. Many of my readers mention that they enjoy the little titbit or narrative that comes before the actual recipe itself!!

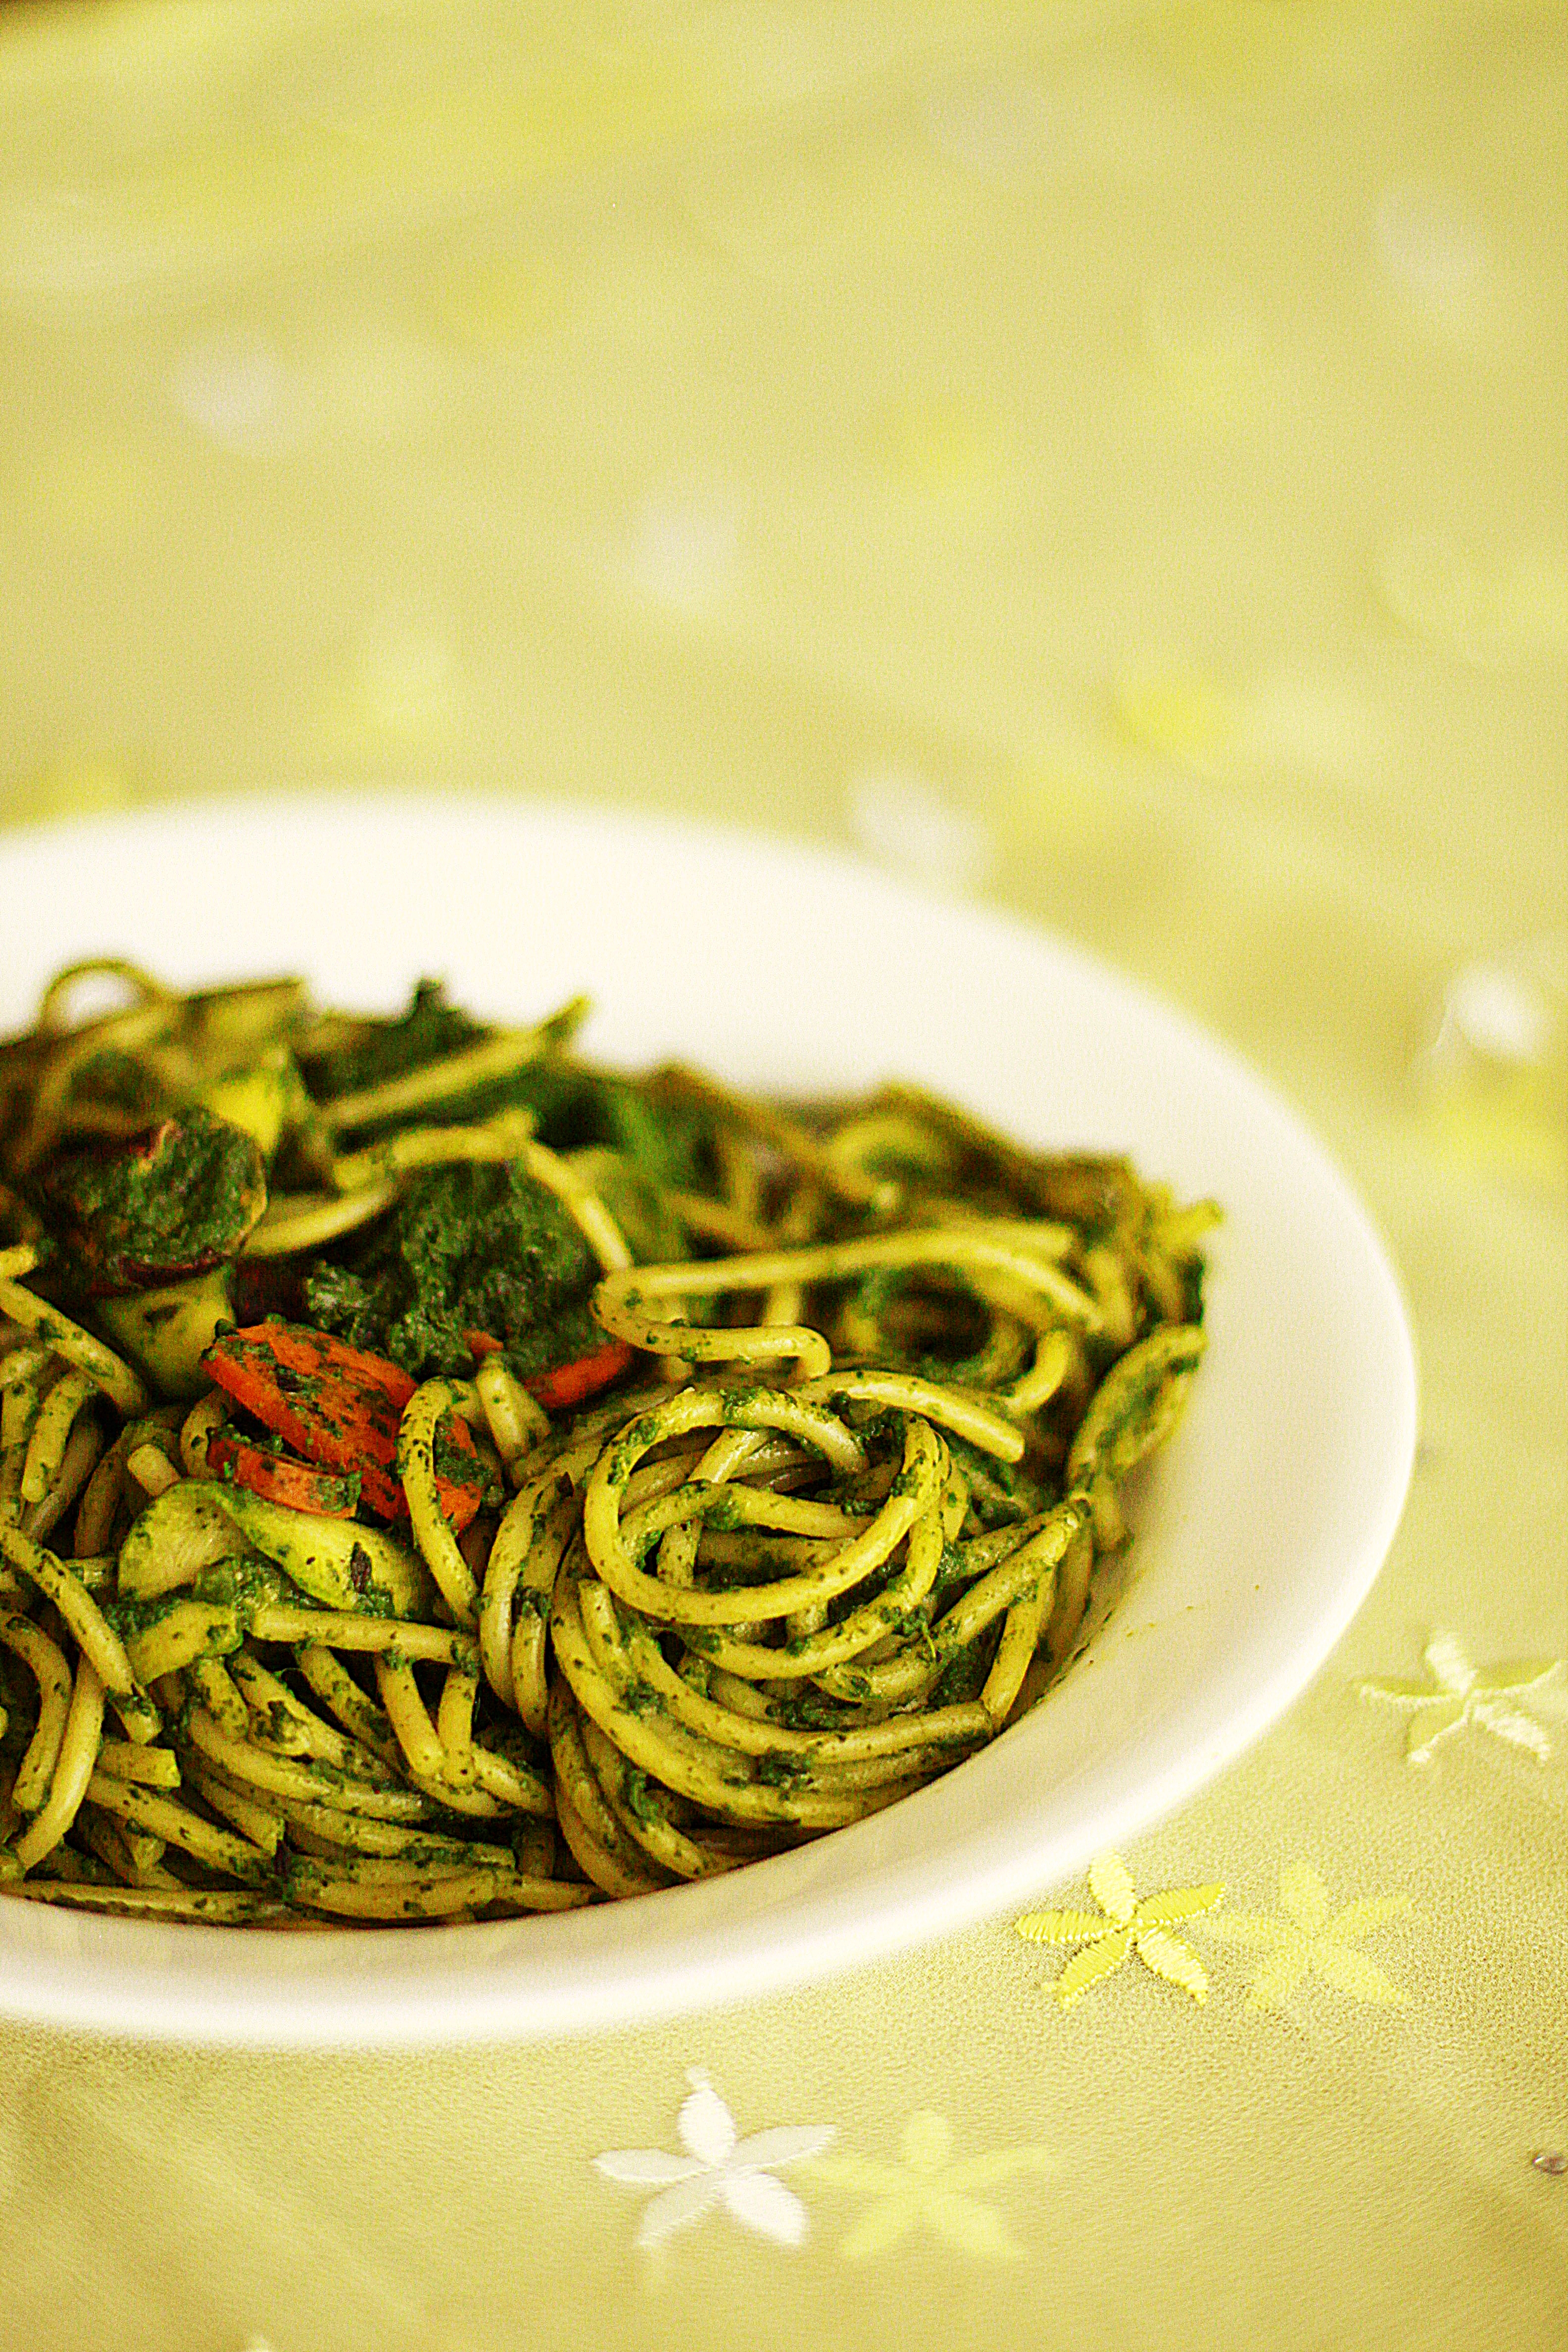
Pilafs and one pot meals are always a pleasure to cook up and serve as they enable to act as a source of carbohydrate, protein and vitamins all in one…not to mention the fact that they are fuss free and easy. One of my favorite has been my mom`s version of the mixed vegetable rice – Vegetable bhath. My kids love this version as the rice is pinkish red because of the addition of beetroot!  They also love my Mint Rice and the Tomato Rice that I make!

This one was passed on to me by a friend K and she was more than happy to let me feature it on the blog. The star ingredient of this rice is really Green Chillies. The heat and the spice is only from the chilies and the resulting flavour is unique and very delicious.

INGREDIENTS:

2 Cups Basmati Rice.

2 Carrots.

1 Cup Peas.

6-7  Green Chillies.(Reduce if needed).

1 Bunch Cilantro.

1/2 Tsp Garam Masala.

1 Tsp Dhania Powder.

Turmeric.

6-7 Cloves.

4-5 Cardamom.

1 Onion chopped.

Handful cashews.

1/3 Cup Coconut Milk Powder.

PREPARATION:

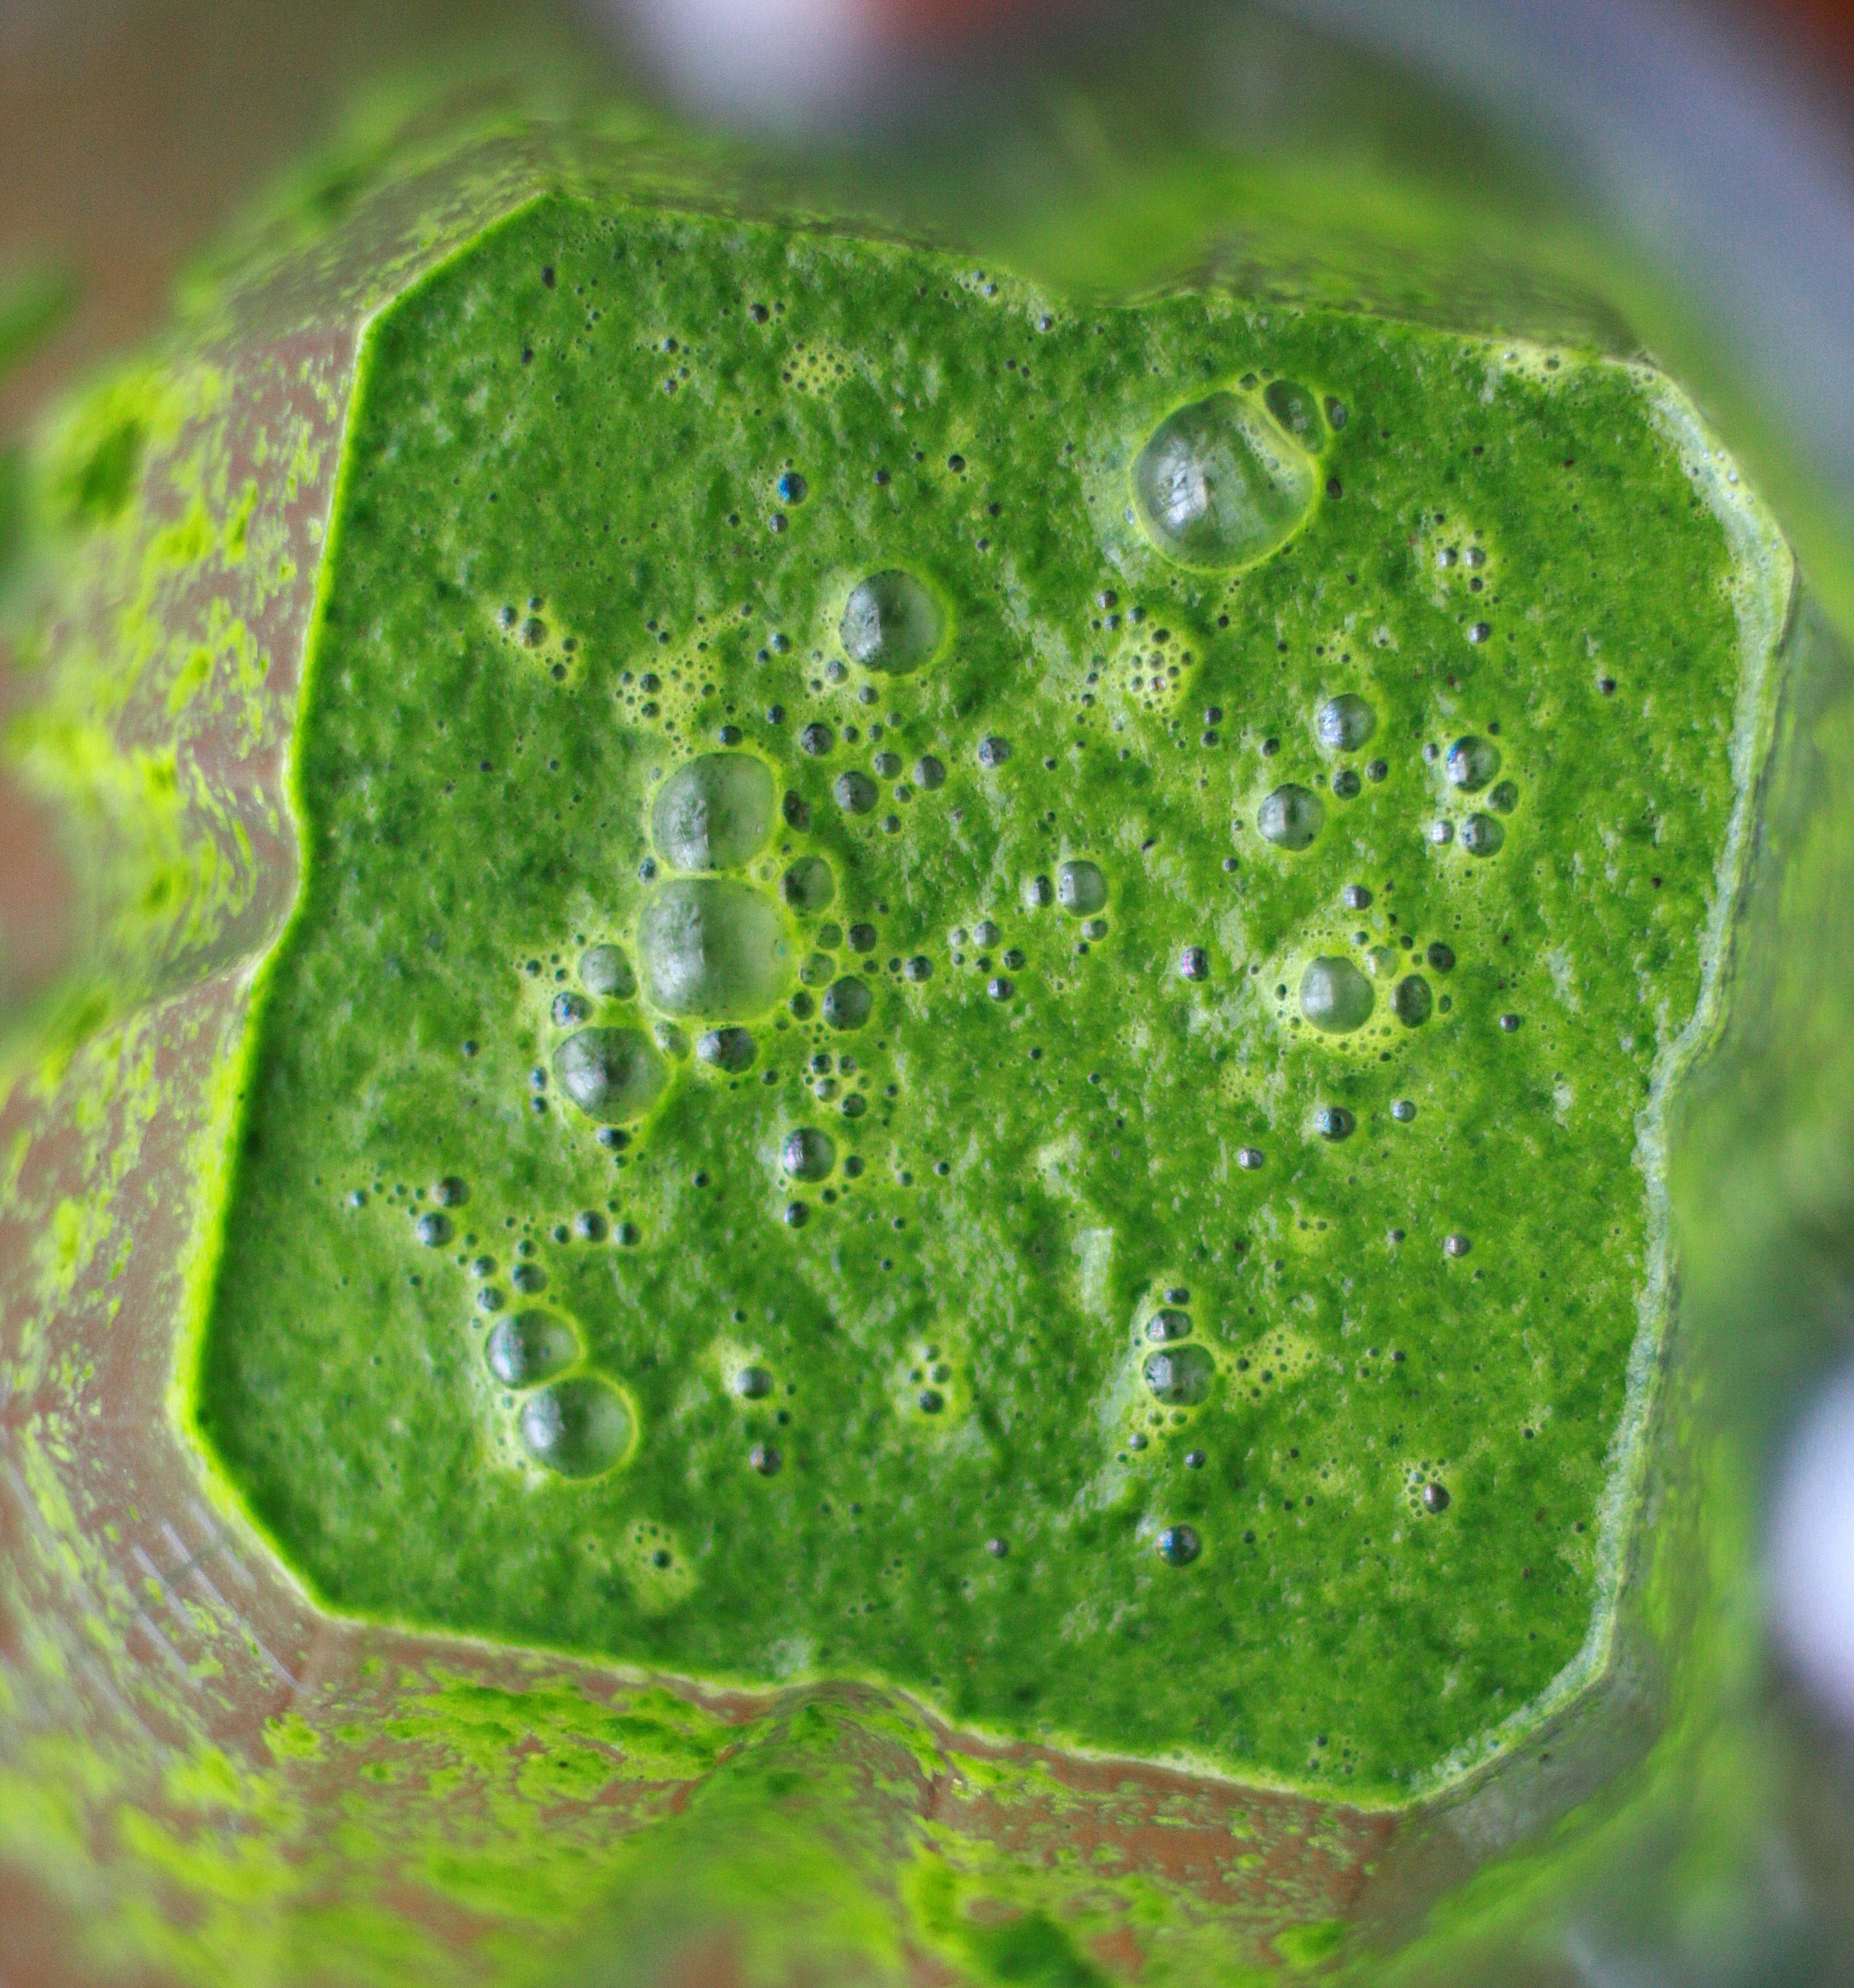
  • Grind the cilantro, cashews and the green chillies to a coarse paste adding NO water. The green chillies are the star ingredient here and the aroma and flavour is allowed to shine in the dish. We do not add any red chilli powder.
  • Dice the onions, carrots, and potatoes if needed, and thaw out the peas and corn if using.
  • Soak the basmati rice in water for about 30 minutes.
  • Take a pressure pan and add about 2-3 tsp of ghee or oil.
  • Season with bay leaf, cloves and cardamom crushed.  When the aroma starts wafting from the seasoning, add the chopped onions.
  • When the onions are sauteed, add all the chopped veggies, salt and allow it to cook halfway through.
  • Add the pulsed chilli-cilantro paste and mix it in. Now follow with all the dry spices – Turmeric Powder, Dhania Powder and Garam Masala.
  • The mixture has to get cooked and the raw smell from the spices should slowly disappear.
  • Now add the soaked and drained rice, coconut milk powder and about 2 1/2 – 3 cups of water depending on the final consistency. Add salt to taste. You could also add a spoon of ghee to facilitate the cooking.
  • Close the pressure cooker, place the weight and cook on low/sim for about 25 minutes.
  • If on opening, there is excess water, let it cook for a couple more minutes.
  • If its mushy after 25 minutes, switch off the stove and allow it to stay open until its ready to be served.
  • Fluff with a work and serve with a cup of Boondhi Raita.


Easy LunchBox Series. · Italian Cuisine.

Spaghetti in Basil Kale Pesto.

IMG_7223

Spaghetti has always always been a favored dinner entree in our home teamed always with plain marinara. There is something very comforting about a plate of spaghetti dunked in hot marinara sauce and topped with melted parmesan. No additions, nothing. The simpler, the better. On cold winter nights, the kids find it as comforting as a pot of Rasam and Alu Fry. This summer I had valiantly decided to grow a herb garden and bought Thai Basil, Sweet  basil and mint. The herbs were lovingly tended and spoken to and watered and it was amazing to see them grow and flourish. I had pruned the herbs and decided to make Pesto with the basil. I have a whole mason jar of pesto stacked away for the winter! This recipe is forgiving as you can substitute kale with spinach, collards etc.

INGREDIENTS:

1 Bunch Kale cleaned and roughly chopped.

1 Bunch Fresh Basil.

1/4 Cup Pine Nuts.

1/4 Cup Almonds.

3 Cloves Garlic.

1/3 Cup Parmesan.

Zest & Juice of one lemon.

Himalayan Pink Salt.

1/4 Cup Olive Oil.

Spaghetti Pasta/ Angel Hair/ Any pasta of your choice.

2 Zucchini sliced in to half moons/ rolled in to pasta form with a spiralizer.

One Carrot sliced in to half moons/ circles.

PREPARATION:

  • Add the nuts, salt, half the kale, all of the basil and the remaining ingredients in to a food processor and blend with 2-3 Tbsp  of Extra Virgin Olive Oil.
  • Add the remaining kale and blend again until almost smooth.
  • Store the Pesto in an airtight glass jar and you can use this for up to 3 weeks.

IMG_7210

  • Cook the pasta as per directions with a tsp of salt. Drain but reserve a little of the hot pasta water.
  • In a wok, add a spoon of extra virgin olive oil, and slip in the sliced veggies.
  • Toss, season with salt and pepper and then add all the pasta.
  • Top with as much pesto as necessary and  little of the hot pasta water to bring it all together.
  • Serve hot topped with grated cheese.

HINT:

  1. The Olive Oil in the pesto serves as a natural preservant. When refrigerated it stays fresh for about 2-3 weeks.
  2. Use this pesto as a spread on Sandwich Bread.
  3. Add a spoon of basil kale pesto to 1/4 Cup Greek yoghurt to make a cooling dip for Bruschetta.
  4. No Kale? Thats fine too! Just toss in a bunch of baby spinach leaves or collard greens.
Easy LunchBox Series. · Kid Friendly Recipes. · Snacks & Tiffin Items

Aloo Kathi Roll / Tibbs Frankie -Bombay Street Food.

IMG_5106


“Brilliant!!!” was the first word that came to my mind when I saw the Tibbs Frankies Counter right outside the Globus Store in Chennai. It was everything packaged in to one tiny roll of goodness. When I bit in to the hot veggie frankie, I attained instant nirvana. It was a combination of sorts – spicy, tart, chunky and crunchy. It was a match made in heaven. Since that day it has been something that makes me go weak in the knees. I confess to even choosing Globus over some of the other stores, simply with the knowledge that we would have the frankie. When we moved to the US, it was one of those things that I missed the most…well, apart from Woodlands Pongal, Sangeetha`s Pineapple Kesari, Madras Bhel Puri House Bhel Puri, Hot Chips Samosa Chat, Saravana Bhavan Parotta Kurma, and Mainland China`s Dumplings to say the least! I had to make my own version and the first step was getting the Frankie Masala. On my last trip to India, I got the Kapol`s Frankie Masala and I must say its a keeper.  My version is inspired by many on the internet and of course my own spin to it. Hope you enjoy it!

INGREDIENTS:

1 Medium Onion.

1 Tsp Frankie Masala.

1 Cup Wheat Flour.

1 Cup Unbleached Organic All Purpose Flour.

Salt to taste.

For the Stuffing:

2 Medium Sized Potatoes boiled with salt and mashed.

1 Tsp Cumin Powder.

1 Green Chilli Chopped.

1/2 Tsp Red Chilli Powder.

1/2 Tsp Chat Masala.

1/2 Tsp Garam Masala Powder.

Salt if needed.

1/2 Cup Bread Crumbs.

1/2 Tsp Sugar. (Optional).

For The Green Chutney:

2 Tbsp Thick Curd.

1 Green Chilli.

2 Tbsp Roughly Chopped Ginger.

1/2  Cup Packed Cilantro Leaves.

3-4 Mint Leaves. (Optional).

A few drops of lemon juice or 1/2 Tsp Kala Namak.

PREPARATION:

  • Prepare the outer dough just like you would for rotis. Add the all purpose flour,  maida and salt and using just enough water roll in to a pliable dough. Smear a thin layer of oil and cover tightly until use. You can also use whole wheat flour completely if needed.
  • Chop a medium onion in to thin long slices. Squeeze half a lemon on the onions and top with 1/2 Tsp Chat Masala. Set aside.
  • In a kadai add a tsp of oil and add the green chillies and the mashed potatoes. Follow up with all the dry spices – Cumin Powder, Red Chilli Powder, Chat Masala and Garam Masala Powder and give it a quick saute.
  • Remove from the kadai, trasfer to a bowl and add more salt if needed after tasting. Add about 1/2 cup  of bread crumbs and gently mix.
  • For bread crumbs just add one loaf of bread to the mixie jar and quickly pulse.
  • At this point the stuffing should have a thick cutlet dough like consistency. Roll in to cylindrical pieces and shallow fry until browned on all sides.
  • IMG_5092
  • Puree the curd, cilantro, green chilli, mint leaves and ginger to a smooth consistency. If you don’t want to use curd, just add a few drops of water.  Season with a pinch of kala namak (black salt) or lemon juice. Transfer to a bowl.
  • Kathi Rolls are pretty much assembled just before serving them so they dont get soggy.
  • Arrange all the ingredients required – Stuffing, warm rotis. green chutney, chopped cilantro, seasoned onions and optionally chat masala powder or frankie masala powder.
  • Lay out the roti and place two of the potatoe rolls on one side.

IMG_5101

  • Top with green chutney, chopped cilantro, and onions and sprinkle chat masala.
  • Gingerly roll tightly and pack one end in to a small sheet of aluminum foil.
  • Serve fresh!

 HINTS:

  1. You can sunstitute half the boiled potatoes and replace it with paneer instead.
  2. You can marinate the panneer / aloo in achari masala and then sear it to make Achari Panneer Kathi Rolls.
  3. Leftover stuffing can be easily reused the next day for kids lunchboxes in the form of sandwiches.


Continental Fare · Easy LunchBox Series. · Salads/ Recipes for the Calorie Conscious.

Grilled Cheese Sandwich with Peas, Arugula & Cilantro pesto.

IMG_7406

The best thing about a sandwich is that you dont need a spoon or a plate. All you need is your fingers and then one delightlful bite after another. Its  filling, non-messy and extremely versatile, all the time allowing for so many variations every time you make it. Whenever I feel like making sandwich, I simply look in to my pantry for any herbs that might be calling for help. Could be a wilting rosemary bunch, or tightly packed cilantro bought from the Indian store last week, or a box of arugula bought at Sprouts to try that amazing salad inspired by Giada De Laurentis. She swears by arugula, really!!!  This one was a quick fix on a week night with leftover ingredients from my refrigerator. Feel free to substitute kale f0r spinach or arugula for cilantro!

INGREDIENTS:

PEAS ARUGULA CILANTRO PESTO:

1 Cup Peas.

11/2 Cup Arugula.

1 Cup Cilantro.

2 cloves of garlic.

1 Tsp Salt.

1/4 Tsp Pepper.

1/4 Tsp Sugar.

1 Tbsp Lemon Juice.

1/4 Cup Extra Virgin Olive Oil.

Ingredients for Sandwich:

1 Cibatta Bread/ Sourdough Bread or 3 Regular white/ brown slices.

1 Tbsp Vegan Mayonnaise.

1 Tsp Tomato Ketchup.

3-4 Sliced Onion Rings.

1 Cheese Slice. (American/ Cheddar)

A few sprigs of Lettuce/ Kale.

Any veggie patty of your choice. ( I used home made Chickpea Burger Patty).

Salt & Pepper.

PREPARATION:

  • Add all the ingredients under “Pesto” to a food processor and give it a quick pulse. I realise it needs some moisture and I am just coming to that. The olive oil does the trick of getting them all mashed together. Imagine the aroma in my kitchen!!!
  • Transfer to a glass mason bottle and preserve tightly. This pesto can be used in pastas for a quick kids lunch, or thinned with vegan mayo / sour cream to make a dip, or a salad dressing, kind of like the Green Goddess dressing, if you know what I mean!
  • Now heat up the griddle/ tava and grease the bread that you are going to be using for the sandwich.
  • I used plain white bread and set them on the heated griddle.
  • Now slather some vegan mayo on the bread. Arrange the green lettuce on the mayo.
  • Place the veggie patty and add a dash of ketchup, slather the cilantro -pesto on top of the patty.
  • Now the goodness continues – one slice of cheese of your choice – the adventurous could try the pepperjack, I went with the cheddar cheese slice.
  • Add a few onion rings and if you want some more of the ketchup.
  • Place the second greased loaf of white bread and firmly close the griddle lid.
  • Sizzling Grilled Cheese Sandwich is ready to be served with a side of beans and ketchup.
  • This dish has it all – carbs from the white bread, protien from the patty, green kale or lettuce  and peas for the veggies.
  • ENJOY!!!
Brisk Breakfast · Easy LunchBox Series. · Snacks & Tiffin Items

Aloo Pohe/ Aloo Poha

Aloo Poha was one of my favourite dishes growing up. Poha was one of the most tastiest  yet easy lunch items that my grandmom used to make. Just the aroma was enough to make us go for seconds whenever she makes it. A couple of my readers have been requesting for Aloo Poha for quite some time and this was reason enough.  Today I had no cilantro, and no peas, yet I longed for recounting those beautiful memories, growing up!!!

INGREDIENTS:

1 Medium Onion.

3 Cups Thick Poha.

2 Potaotes steamed and cubed.

1 Tsp Sugar.

1/4 Tsp Turmeric Powder

1/2 Tsp Garam Masala Powder.

Salt to taste.

1 Tsp Lemon Juice.

Chopped Cilantro to garnish.

Seasonings:

1 Tsp Mustard Seeds.

1 Tsp Cumin Seeds.

A handful of peanuts (raw or roasted).

2 Green Chillies slit.

Curry leaves torn.

Hing.

PREPARATION:

  • Beaten Rice is a dehusked rice which is flattened to dry flakes. When added to any liquid like water, milk or buttermilk they swell up in size and volume.
  • Whenever I work with beaten rice, I am always reminded of Sabudhana which I use in making Delicious Sabudhana Khichdi.
  • Take your measured quantity of beaten rice and wash it in cold water. Drain away all the water by pouring the moist beaten rice on to a collander.
  • Add the required salt and mix it in lightly so as NOT to break the delicate grains of beaten rice. Sprinkle salt over the poha, mix and set aside until required and keep covered lightly.
  • Take a kadai and add 2 tsp of oil and allow to heat. Add mustard seeds and when its crackling, add jeera, slit green chillies, hing and the curry leaves.
  • Now add the handful of peanuts and then the finely chopped onions. Allow to saute and when its just beginning to brown add the cubed potaotes.  If the potatoes are raw, chop them in to small pieces  and pop them in the microwave for 3-4 minutes. This would speed the time spent on the stove and  quicken the total time taken to prepare the poha .
  • If the potatoes are cooked and then cubed, add them to the onions, add peas if needed  and then follow with turmeric powder and salt.
  • Cover and cook for a couple minutes and then add a spoon of sugar and mix it well.
  • Now add the moist poha and mix the onion masala to mix with the beaten rice. The beaten rice already has enough salt so if needed adjust this quantity.
  • Add 1/2 tsp garam masala powder and cook for a couple more minutes.
  • Finish off with squeezing fresh lemion juice and incorporate it in, Garnish with finely chopped cilantro.
  • Cover for at least 5-10 minutes before serving. Sometimes If I make this for kids, I add a dash of ghee and I must say I have been rewarded with requests for seconds!!!
Easy LunchBox Series. · Snacks & Tiffin Items

Grilled Cucumber Sandwich

Everyday lunch for my older one has to be a creative, in bite size pieces, healthy, proportionate to her palate, seasoned, yet not filled with curry powders and masalas.  It has to be healthy, but not loaded with veggies and stay crisp yet soaked in the sauces. It has to hold shape until afternoon, yet not get too dry that you would need to wash it down your throat. I love making grilled sandwiches, as they slightly tank up the taste and hold on to their filling. As far as the fillings are concerned, really sky is the limit and is well governed by what is leftover in the refrigerator.

INGREDIENTS:

4 Slices of Bread.

Cucumber round slices as needed.

Egg Free  Mayo.

Salad Veggies diced.( i used a combination of cabbage, brocolli and lettuce as available in the Asian Kit)

Salt.

Pepper

cheese

Hummus as needed.

Chopped cilantro.

PREPARATION:

  • Warm the griller/ toaster and slather the bread slices with a layer of egg free mayo. PLace them face up on the sandwich maker.
  • Arrange sliced cucumbers over the mayo and top with cut salad pieces.
  • Now place another bread slice with hummus spread on them.
  • Add more veggies like cucumber and top with chopped cilantro.
  • Place a layer of American cheese slice and finish off with another slice of bread.
  • Grill and serve HOT with a side of marinara sauce or ketchup.


Easy LunchBox Series. · Snacks & Tiffin Items

Stuffed Bread Rolls – Quick Fix Lunch Box for Kids!


Stuffed Breaad Rolls.

Quick fix snacks and lunch options have always been welcome everywhere and my home is no exception. A quick scan of the refrigerator and pantry is almost always the basis for deciding a side dish, a snack or sometimes even lunch options for the kids!  Every time I make a filling for a “roti” it doubles up as a stuffing in a bread or a kati roll. Sprucing up a “filling” with some spice powders almost always makes it for me. A dash of pav bhaaji masala or amchur transforms the original subzi on to a totally new avatar. This is one such idea that was borne out of a lazy monday morning and an idea in the back of my head, from whatever I could remember reading in an old Indian magazine. Its pretty much “do-your-own-thing-from-whats-in-the-pantry”  kind of a filling and it promises to be quick and easy and innovative!!!


INGREDIENTS:

4 Slices of Regular White Bread / Whole Wheat Bread.

1 Boiled Potatoe mashed.

Sweet Tamarind Chutney ( Use Ketchup if not available)

2 Slices of American Cheese. (Optionally use  Shredded Paneer / Cheddar Cheese ).

Pinch of salt.

Pinch of Punjabi Chaat Masala.

Cilantro to garnish.

PREPARATION:

  • Add a dash of oil in a kadai and drizzle some jeera. Immediately add the mashed alu and allow to mix well.
  • Smoosh the mix using the back of your ladle to get a smooth mixture. Now add a little salt, chaat masala and garnish with chopped cilantro. Set aside.
  • Slice out the corners from your bread slices and set them aside.
  • With the help of your rolling pin, flatten out each slice , making them stretched, soft and pliable. Sprinkle 2-3 drops of water to help if the bread is not fresh.
  • Now arrange them neatly one after the other.
  • Smear a spoon of sweet tamarind chutney on each of them to serve as a sticky base. I always have them stashed in my refrigerator for a quick dollop.
  • Use tomato ketchup if you run out of the sweet chutney.

  • Dabble the prepared alu stuffing on to the bread slices.
  • Add a lettuce leaf, and then the sliced / shredded cheese on top.
  • Slowly fold it so one edge is over the other and seal.
  • Place a tava on the stove and grease it with butter/ghee.


Stuffed Bread Rolls ready for getting shallow fried!
  • Saute the bread rolls on all sides until they turn a lovely golden brown.
  • Remove and serve warm with Sweet Chutney and lettuce garnish.

Easy LunchBox Series. · Rice Varieties.

Express Lunch – Delicious Alu Methi Pulav.

Alu Methi Pulav
Alu Methi Pulav

The Green Blog Project had set me thinking on my own little contribution to taking  this world, in to little baby steps towards a greener tomorrow and a pesticide free tomorrow. I had planted little methi seeds in my own little patio garden in my apartment and I got lovely green tender methi leaves. I had been wanting to use those tiny leaves and this was my chance. I had some leftover rice from dinner and I decided to make Alu Methi Pulav as an express preparation for my husband`s lunch for the morrow.

All the ingredients would ber definitely available in your pantry at all times. The only two spices that are a must are Star Anise and ShahiJeera or Somph. These cant be substituted as they constitute the base flavour for the whole pulav, of course apart from the methi.

INGREDIENTS:

1 medium onion sliced long.

2 Potatoes chopped to fine pieces.

3-4 Star Anise.

Small piece of Cinnamon.

2 cloves.

1 tsp of Shahi Jeera or Somph.

1 Bay Leaf.

Turmeric

1/2 spoon Red Chilli Powder.

Garam Masala to taste.

Freshly chopped Methi seeds or 1 Tbsp of Kasuri Methi.

4-5 Cashews sliced in to halves.

Salt to taste.

Ghee for garnish.

PREPARATION:

  • Pop the chopped pieces of potatoes in to the microwave after sprinkling a little salt on them. Cook for 3 mins on HIGH. Set aside.
  • Take a wok or kadai and add 2 spoons of oil. Add the Star anise, shahijeera, cloves, cinnamon and cashew  and allow to saute for a couple of seconds. The jeera and the anise give out a very delectable aroma.
  • Now add the chopped onions and saute for a few minutes until the onions turn a little pinkish brown.
  • Now add the semi cooked potatoes, turmeric, red chilli powder, salt, garam masala and stir it all in quickly.
  • Allow a few more minutes for the spices to sink in to the potatoes.

DSC02767

  • Now add the chopped fresh methi/ kasuri methi and stir in well.
  • After a few more minutes, add some chopped cilantro and mix well.
  • Now add the cooked rice , more salt as required and gently mix it taking care not to break the rice particles.
  • Finish off by dolloping a spoon of ghee.
  • Serve HOT with raitha. Excellent option for LUNCH along with Raitha or just plain curd.

DSC02771

Brisk Breakfast · Easy LunchBox Series. · Snacks & Tiffin Items

Onion Ragi Rava Dosa – Healthy & Tasty Tiffin Options.

Ragi Rava Dosa
Ragi Rava Dosa

Rava Dosa is always my husband`s most favourite breakfast/tiffin/dinner entree. Any day is Rava Dosa day even if I am not able to make his favourite coconut chutney to go with  it. Add  a dash of finely chopped onions and his day is made. Last night I was pretty much stumped on what to make for dinner and when I was rummaging in the pantry I saw the unopened packet of Ragi Flour that my husband had bought from the Indian Store. I gave him an option of Rava Dosa adding ragi flour for health and he welcomed the idea. I had some shallots that I had peeled earlier so I chopped them in to tiny pieces and set them aside. Ragi Rava Dosa with onions was a great healthy dinner/tiffin option. With Molagapodi or Chettinad Onion Tomato Chutney, it was simply divine.

INGREDIENTS:

1 cup Roasted Rava.

1/2 cup Ragi Flour.

1/2 cup All Purpose Flour.

1/2 cup Rice Flour.

1/4 cup of Sour Buttermilk if available.

Approximately 4 cups of water.

2 spoons of Jeera.

1 spoon of Whole Black Pepper .

4-5 Green Chillies finely chopped.

Curry leaves.

1 Tsp finely grated ginger(Optional).

Curry Leaves.

Hing.

Salt.

PREPARATION:

  • Mix all the dry ingredients – the flours in a wide mouthed vessel. Add salt and set aside.
  • Add requisite water and the sour buttermilk(if available) and use a whisk to mix it in to a smooth watery batter in pouring consistency.
  • Keep a seasoning kadai on the stove and add 2 spoons of oil. When its hot add jeera, black pepper, ginger, curry leaves and hing.
  • When this is well roasted in the oil add this to the  watery batter and mix well.
  • Put the Dosa tava on the stove and pour requisite oil.
  • Now sprinkle a little bit of the onions and then pour the dosa batter over it.
  • The dosa cannot be spread as in the case of a regular dosa. The ends should be poured first in a circle and the rest of the dosa filled in by pouring.
  • Add oil around the edges and slowly turn over to the other side after a few minutes.
  • When the dosa is flipped allow a couple of seconds to cook on this side.
  • Fold and serve on the plate with Chettinad Tomato Chutney or Coconut Chutney.
Brisk Breakfast · Easy LunchBox Series. · Kid Friendly Recipes. · Snacks & Tiffin Items

5 Minute Tomato Cilantro Cheese Sandwich!!!

Onion Tomato Cheese Sandwich

I distinctly remember the first time ever I made a sandwich using a sandwich maker. My aunt had got us a Rowenta Sandwich Maker from the US some fifteen years ago…when it was still unheard of in India. My mom was not too keen to switch to alternate ways of making bread. In her mind, it was pretty satisfactory to toast the bread on a tawa and have it with butter once in a blue moon. My sister was way too young. The others could simply not muster enough time to sit through the ardous task of getting a pin converter and reading the instructions to even start operating it. I had rememberd seeing litttle gadgets in the Home Life Exhibitions, where they had a little bread shaped steel thing, where you could place the bread with the filling and manually toast it over the flame, holding it with the handles provided. It was a novel way of presenting the mundane bread. So I set aside a sunday morning to experiment…and my cousins were only too happy to sample the results of my venture!!!

The first time, I greased the electric plates, placed the bread slices on both sides and wondered what to fill in? I simply pulled out an onion and a tomato and sliced them in to very thin pieces and gingerly placed them on the bread. Sprinkled salt and pepper and some cilantro and covered the filling with the second slice of bread. We all waited with bated breath and were rewarded with the sweet smell of the onions and tomatoes and cilantro roasting in the little apparatus. Three minutes later, the red indicator light switched off and I used a pair of tongs and retrieved the sandwich pieces which were already sliced in to two by now. Crisp on the sides, yet cooked on the inside, it was a tasty treat that morning. From then on it was my own little piece of work as I would find creative fillngs for sandwiches. Bread now had a new intonation in our home….The sandwich had finally arrived!!!

INGREDIENTS:

4 slices of bread.

1 tomato sliced very thin.

1/2 onion sliced thin.

Salt.

Pepper.

Cilantro chopped fine.

A handful of Part Skim Mozzarella Cheese.

Sandwich Maker.

PREPARATION:

  • Grease the 4 electric plates with cooking spray and allow to preheat for a few minutes.
  • Place the bread slices and arrange the tomato and onion slices alternately.
  • Sprinkle salt and crushed pepper and then generous helping of Mozzarella Cheese.
  • Sprinkle the cilantro and then place the second slice of bread and close.
  • After about 3 minutes, take out golden brown, crusty on the sides, Tomato Cilantro Cheese Sandwich.
  • Serve HOT with yummy tomato ketchup.

HINT:

Serves as an excellent breakfast and quick snack for kids when they come back from school.

Great for packing for short trips and Picnic Lunches, as they are easily eatable with no fuss.

Variations in the filling give an almost completely different taste to the sandwich.

Use peanut butter, apple butter, Alu Masal, Cheese, fruit slices, grilled veggies etc for fillings.

Packing away some, for the Cooking for Kids Event hosted by Divya of Dil Se and brainchild of Sharmi of Neivedyam.


cookingforkidslogo