Sweets

Deepavali Sweets – Soft Badam Halwa

How to make soft Home made Badam Halwa

Ingredients:

1 Cup Almonds soaked

1 Cup Sugar

¾ Cup Ghee

¾ Cup Milk

Pinch of salt

Saffron

Remove the skin from almonds and grind them to a coarse sandy paste adding just a few drops of milk.

Take  a  heavy kadai and add the measured amount of milk and saffron

And in a few minutes add the ground almond paste and stir in

As it cooks add some ghee and then the sugar.

The mixture loosens but keep stirring on medium low flame and add all the ghee little by little.

When the paste starts to pull away from the sides, switch off and allow to cool

Serve warm Badam Halwa!

My favorite memory of Badam Halwa is when my grandmother made it for Diwali and waiting to taste it on Diwali morning after bursting crackers,,Whats your fav Diwali memory?

ENJOY

Cakes / Pastries / Cookies/ Bread/Muffins. · Low Carb Desserts · Sweets

Low Carb Vanilla Cake with Raspberry Cream Cheese Frosting.

The best thing about this cake is that its fuss free – dump ALL ingredients in to a bowl, mix, bake and you are done! Its best eaten plain and is a great snack to have after a spicy meal when you crave for something sweet. At the same time its not overly sweet and that’s one of the best things that I love about this cake. I cannot eat more than a mouthful of cake that’s too sweet. Try this and its perfect sweetness, balanced with the moistness of the cake definitely make it a keeper.

INGREDIENTS:

1 ¾ cup of almond flour

¼ cup of all All Purpose Flour

¾ cup of Sugar/ Erythritol / Monk fruit.

1 tsp of baking powder

½ tsp baking soda  

2 large eggs

¼ cup olive oil

½ cup butter (1 stick) brought to room temperature

1 cup buttermilk

1 tsp vanilla extract

A pinch of salt.

Raspberry Cream Cheese Frosting:

8 Oz Softened Cream Cheese
4 Tbsp Butter
¾ Cup Powdered Erithytol
1/4 Tsp Salt
1 Tsp Vanilla Essence
1 Tsp Raspberry Extract
A few pieces of finely diced Raspberries.

  • Whip the cream cheese and butter in a stand mixer until light and fluffy, scraping down the sides as needed.
  • Add the powdered erythritol. Mix for 2-3 minutes until fluffy. Scrape down the sides and mix for another minute.
  • Add the raspberry extract and mix.

PREPARATION:

  • Sieve the Almond Flour to air it.
  • Add all the ingredients of the cake in to a bowl –  Almond flour, All purpose flour, sweetener / Sugar, eggs, baking powder, baking soda, butter, olive oil , room temperature buttermilk and  vanilla extract.
  • Use a silicon spoon and mix everything together.
  • No need to beat and over mix.
  • Preheat the oven to 350 degrees F , grease a 9 inch round baking pan and line with parchment paper.
  • Pour the cake batter and bake for 35-40 mins or until a toothpick that’s inserted in to the cake comes out clean.
  • Allow to cool.
  • This cake is very tasty and not too sweet and resembles a basic sponge cake. You can eat this cake as it is.

ASSEMBLING THE CAKE:

  • I was celebrating a birthday and wanted to go all fancy with icing and two layers!
  • I doubled the quantity and make 2 9” inch round cakes.
  • When cooled, place one cake on a stand.
  • Add Raspberry cream cheese icing layer ( This step can be omitted).
  • Decorate with small pieces of chopped raspberry.
  • Place second 9 inch cake and cover with icing.
  • Decorate as required.

Frosting flavors that I have used:

  • Coffee Whipped Cream Icing.
  • Orange Icing.
  • Pineapple icing.
  • Lemon Icing.
  • Chocolate Icicing

Festivals & Significance · Sweets

Dry Kaala Jamuns.

IMG_5470

Life is uncertain.  Eat dessert first.  ~Ernestine Ulmer

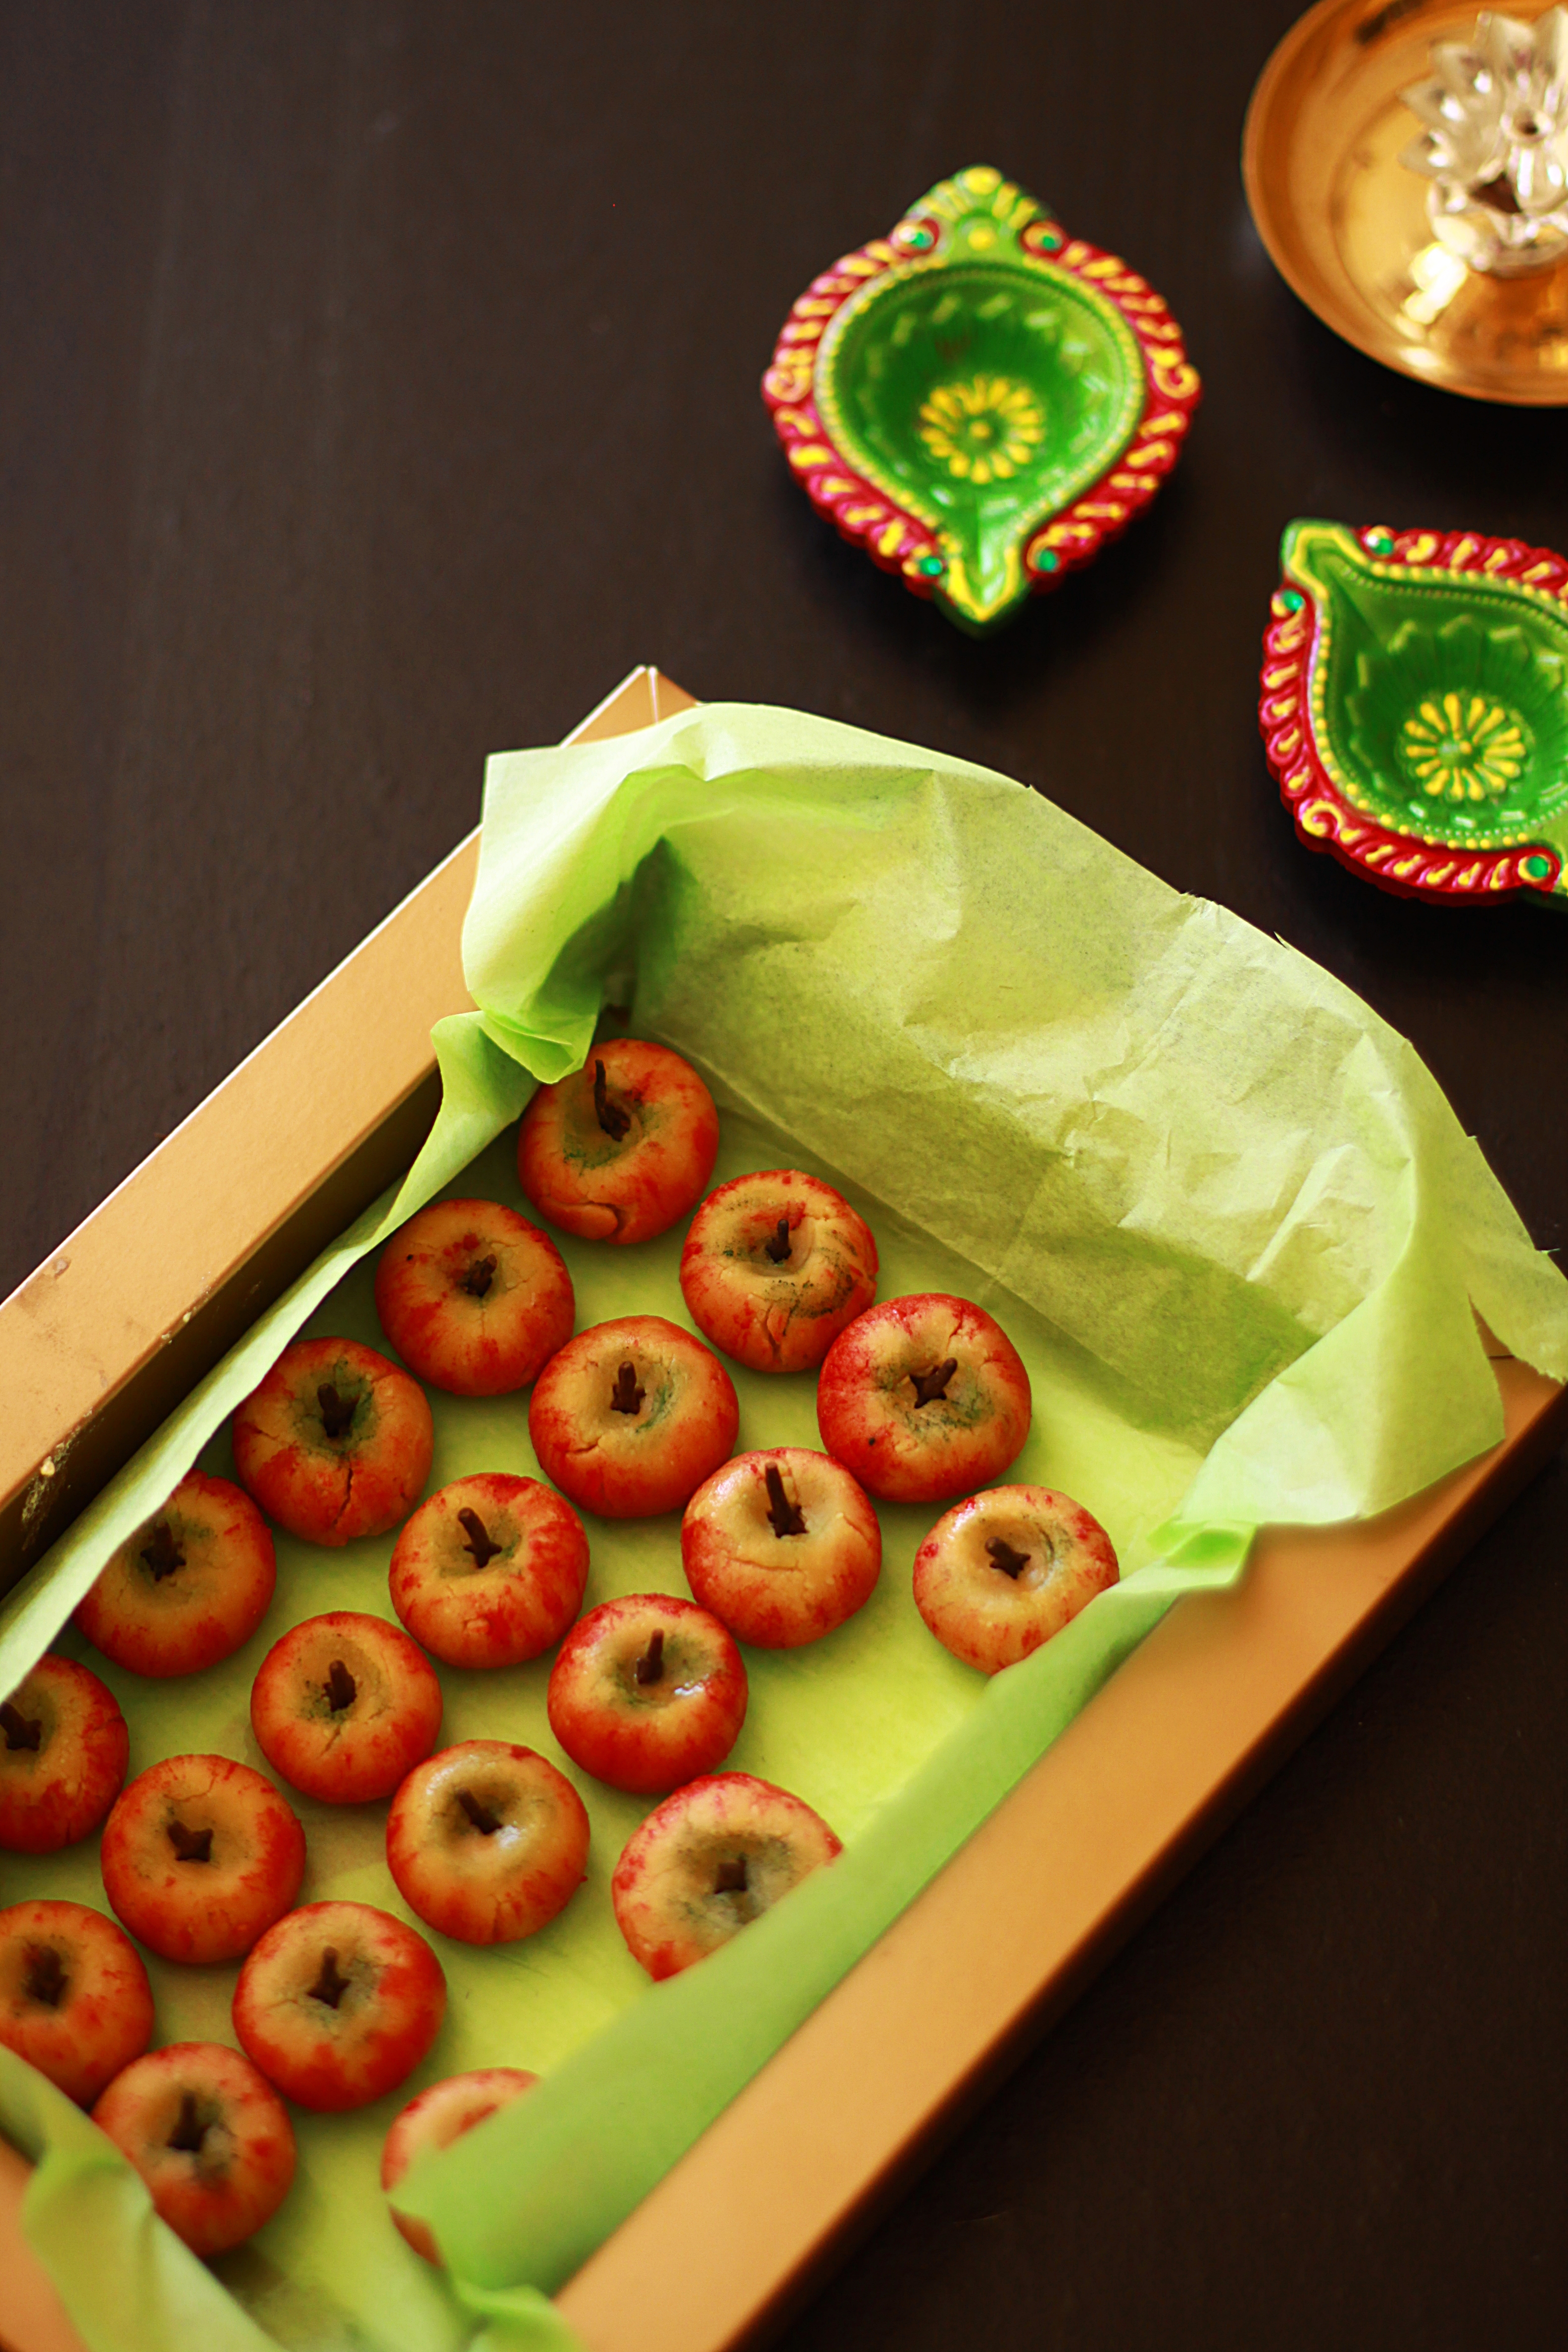
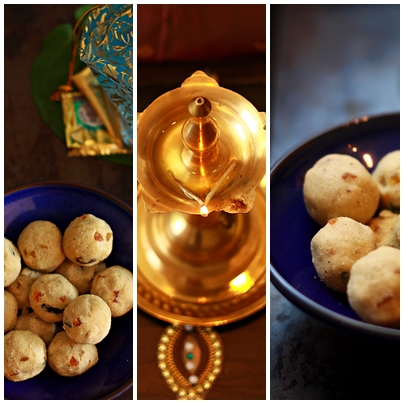
Gulab Jamuns have always been a very very common yet very delicate dessert. It can be paired with Vanilla Ice Cream for a great summer time dessert for weddings and parties. Gulab Jamuns are a definite addition to our Diwali Day breakfasts along with all the other sweets and savories that Madurai Amma makes…Gulab Jamuns were always made by me. It was not very easy for her to bequeath her right in the kitchen to me. When such opportunities presented themselves, I would take them up with elan and come up to speed. She would be pleased I presume, but she would never articulate her feelings.It would be an awesome feeling, to get up, have oil bath, wear new clothes and burst firecrackers on Diwali morning. The next best thing was of course the breakfast – It was always hot steaming idlis, hot steel tumbler filled to the brim with coffee and a plate full of Diwali Sweets and savories made at home.

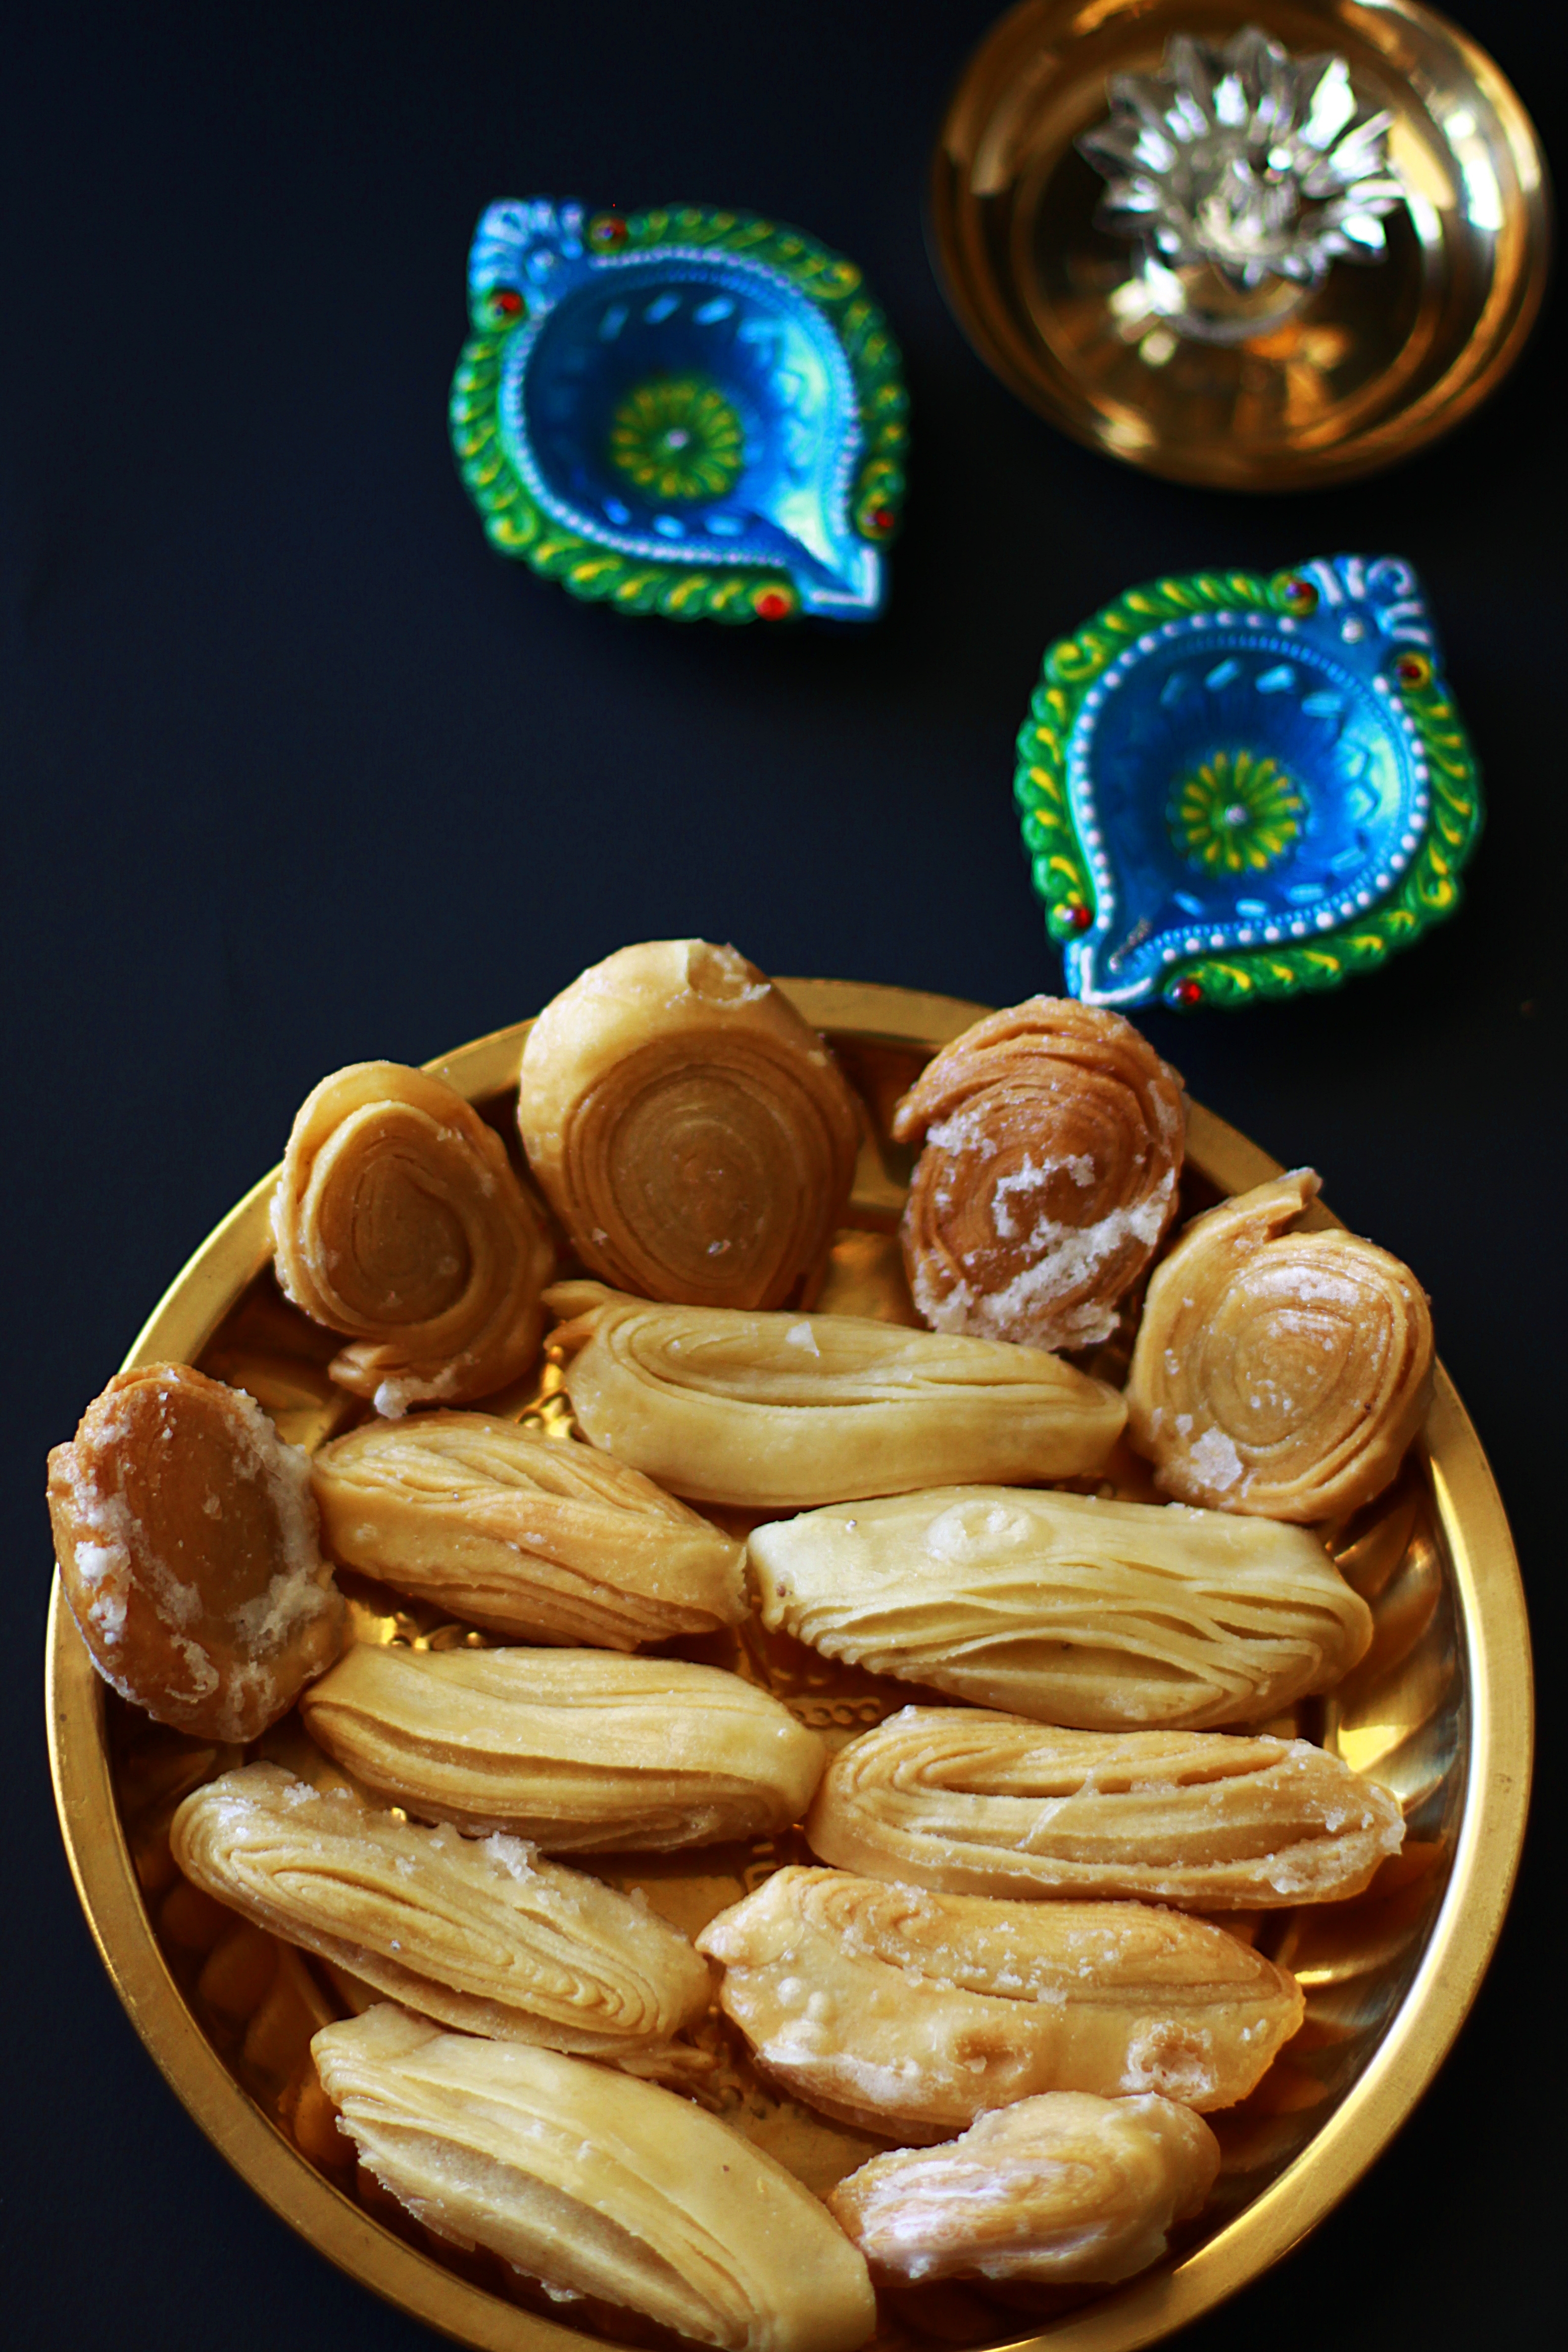
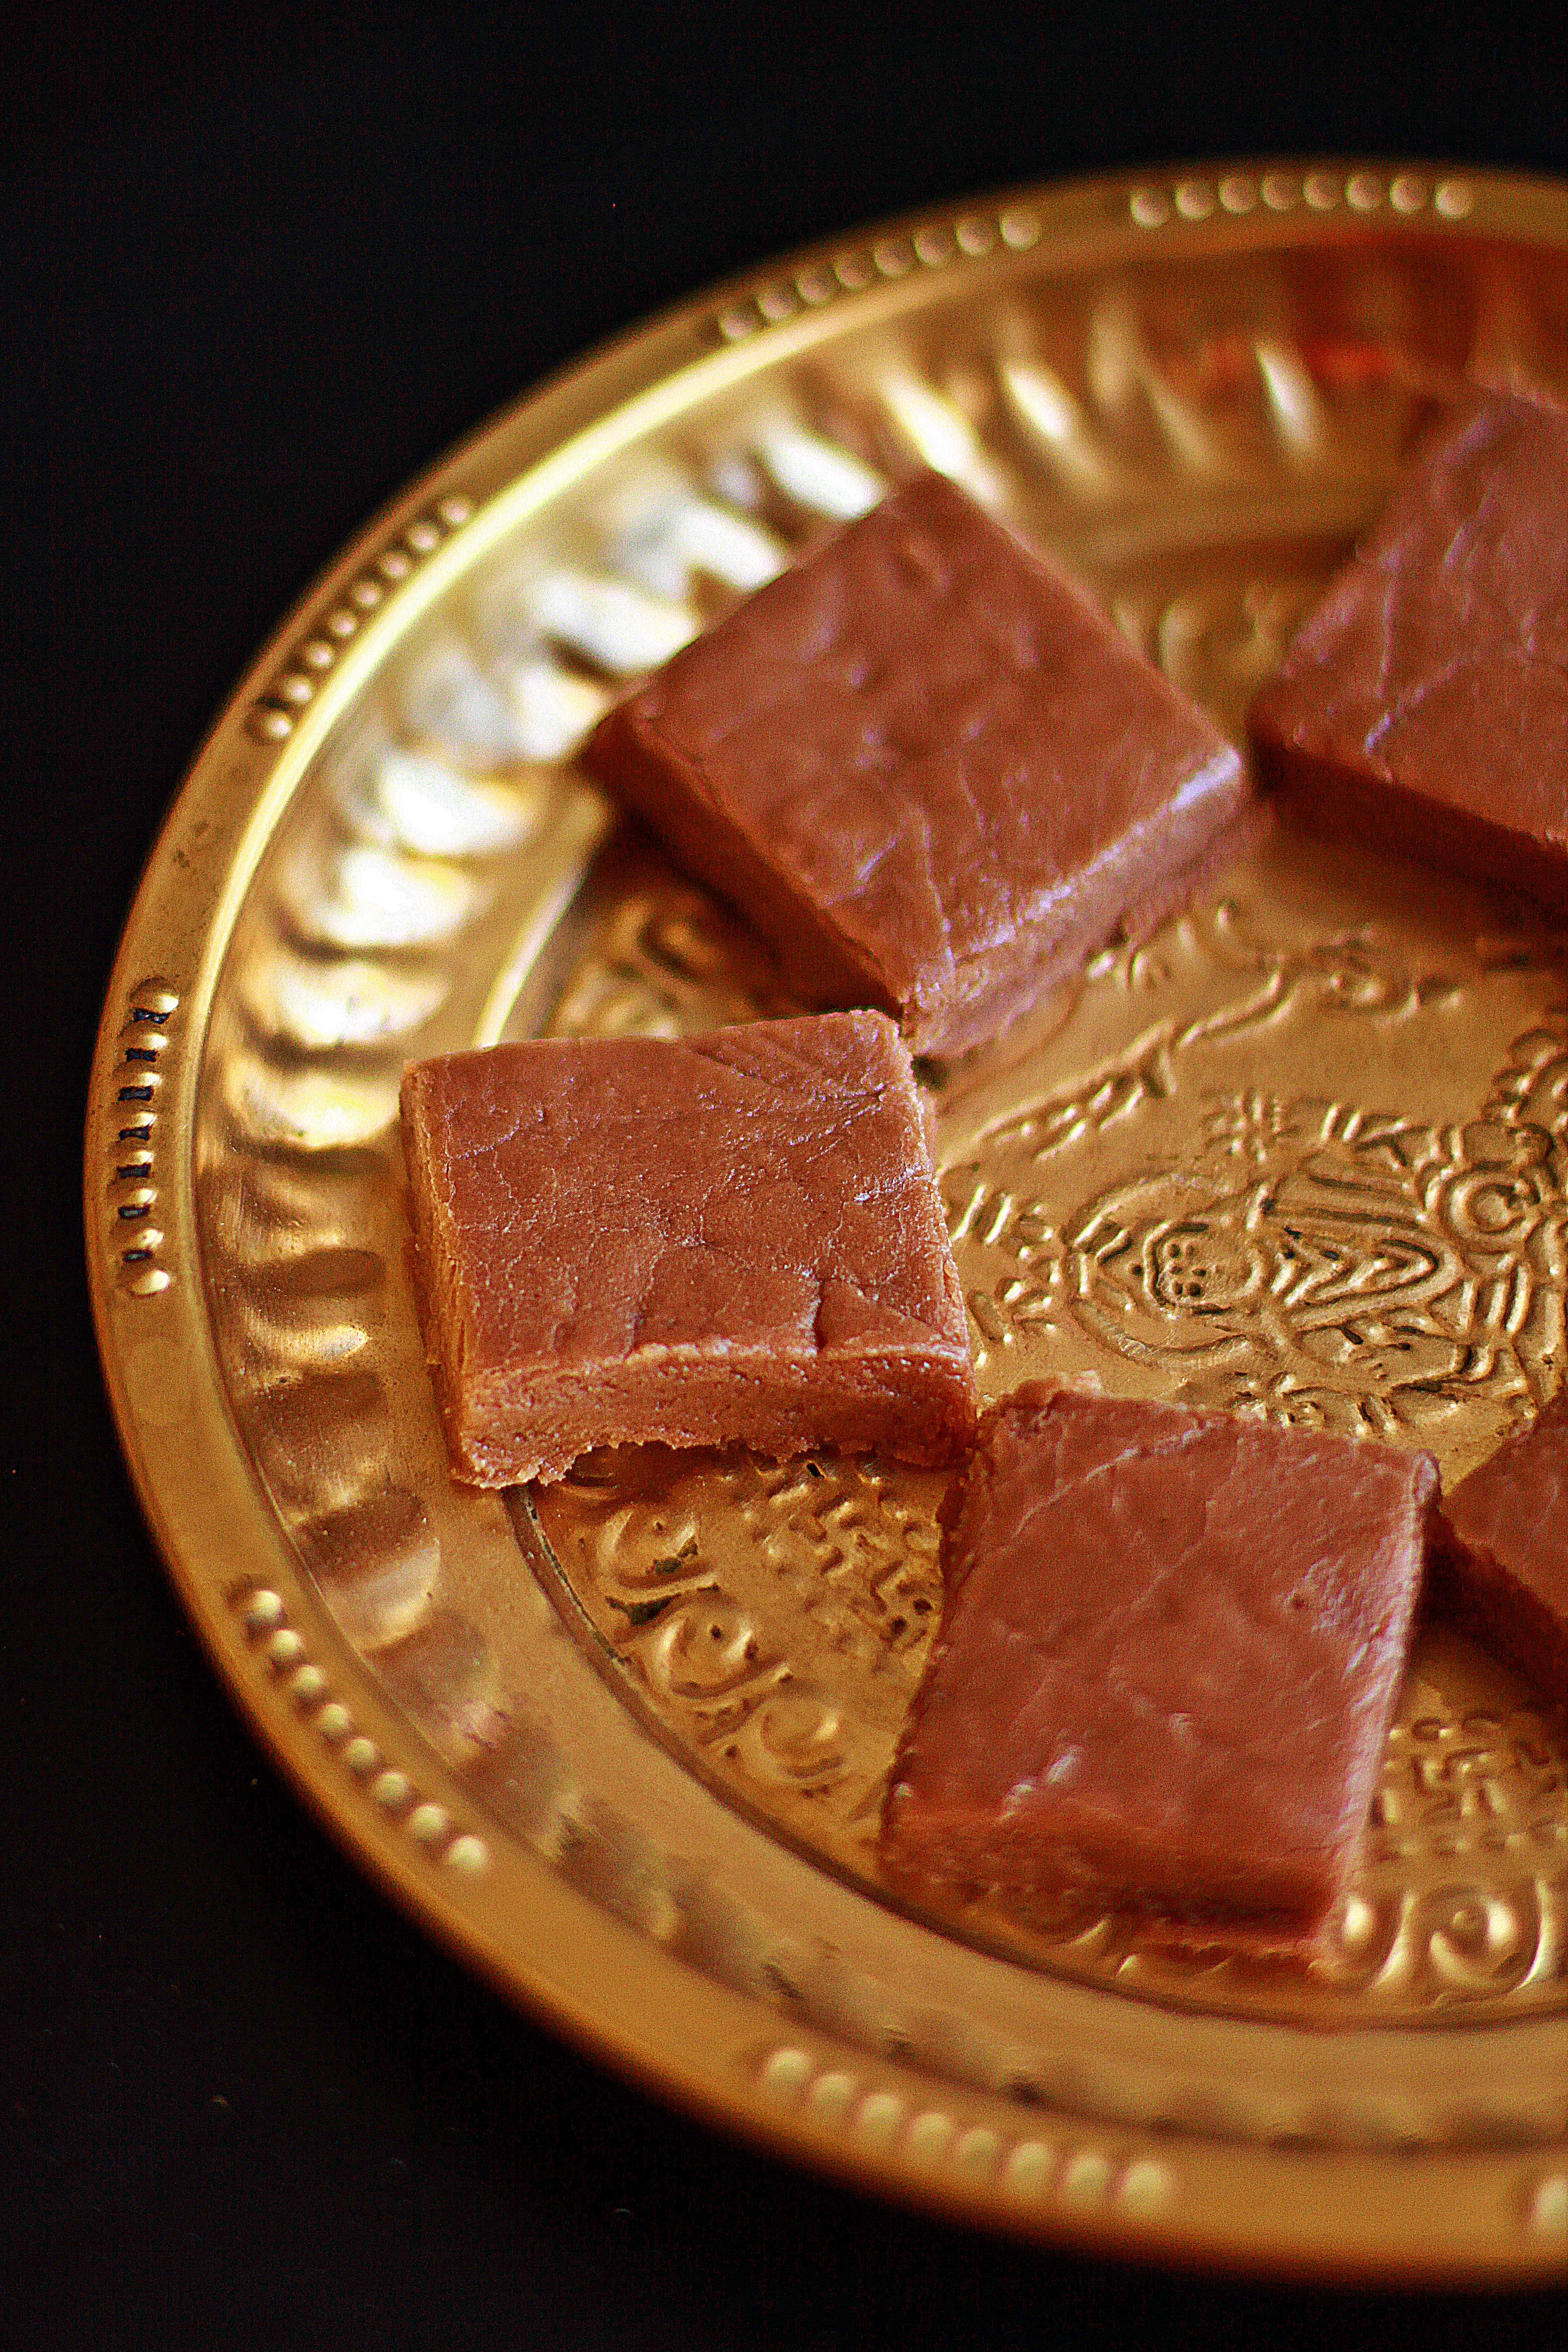
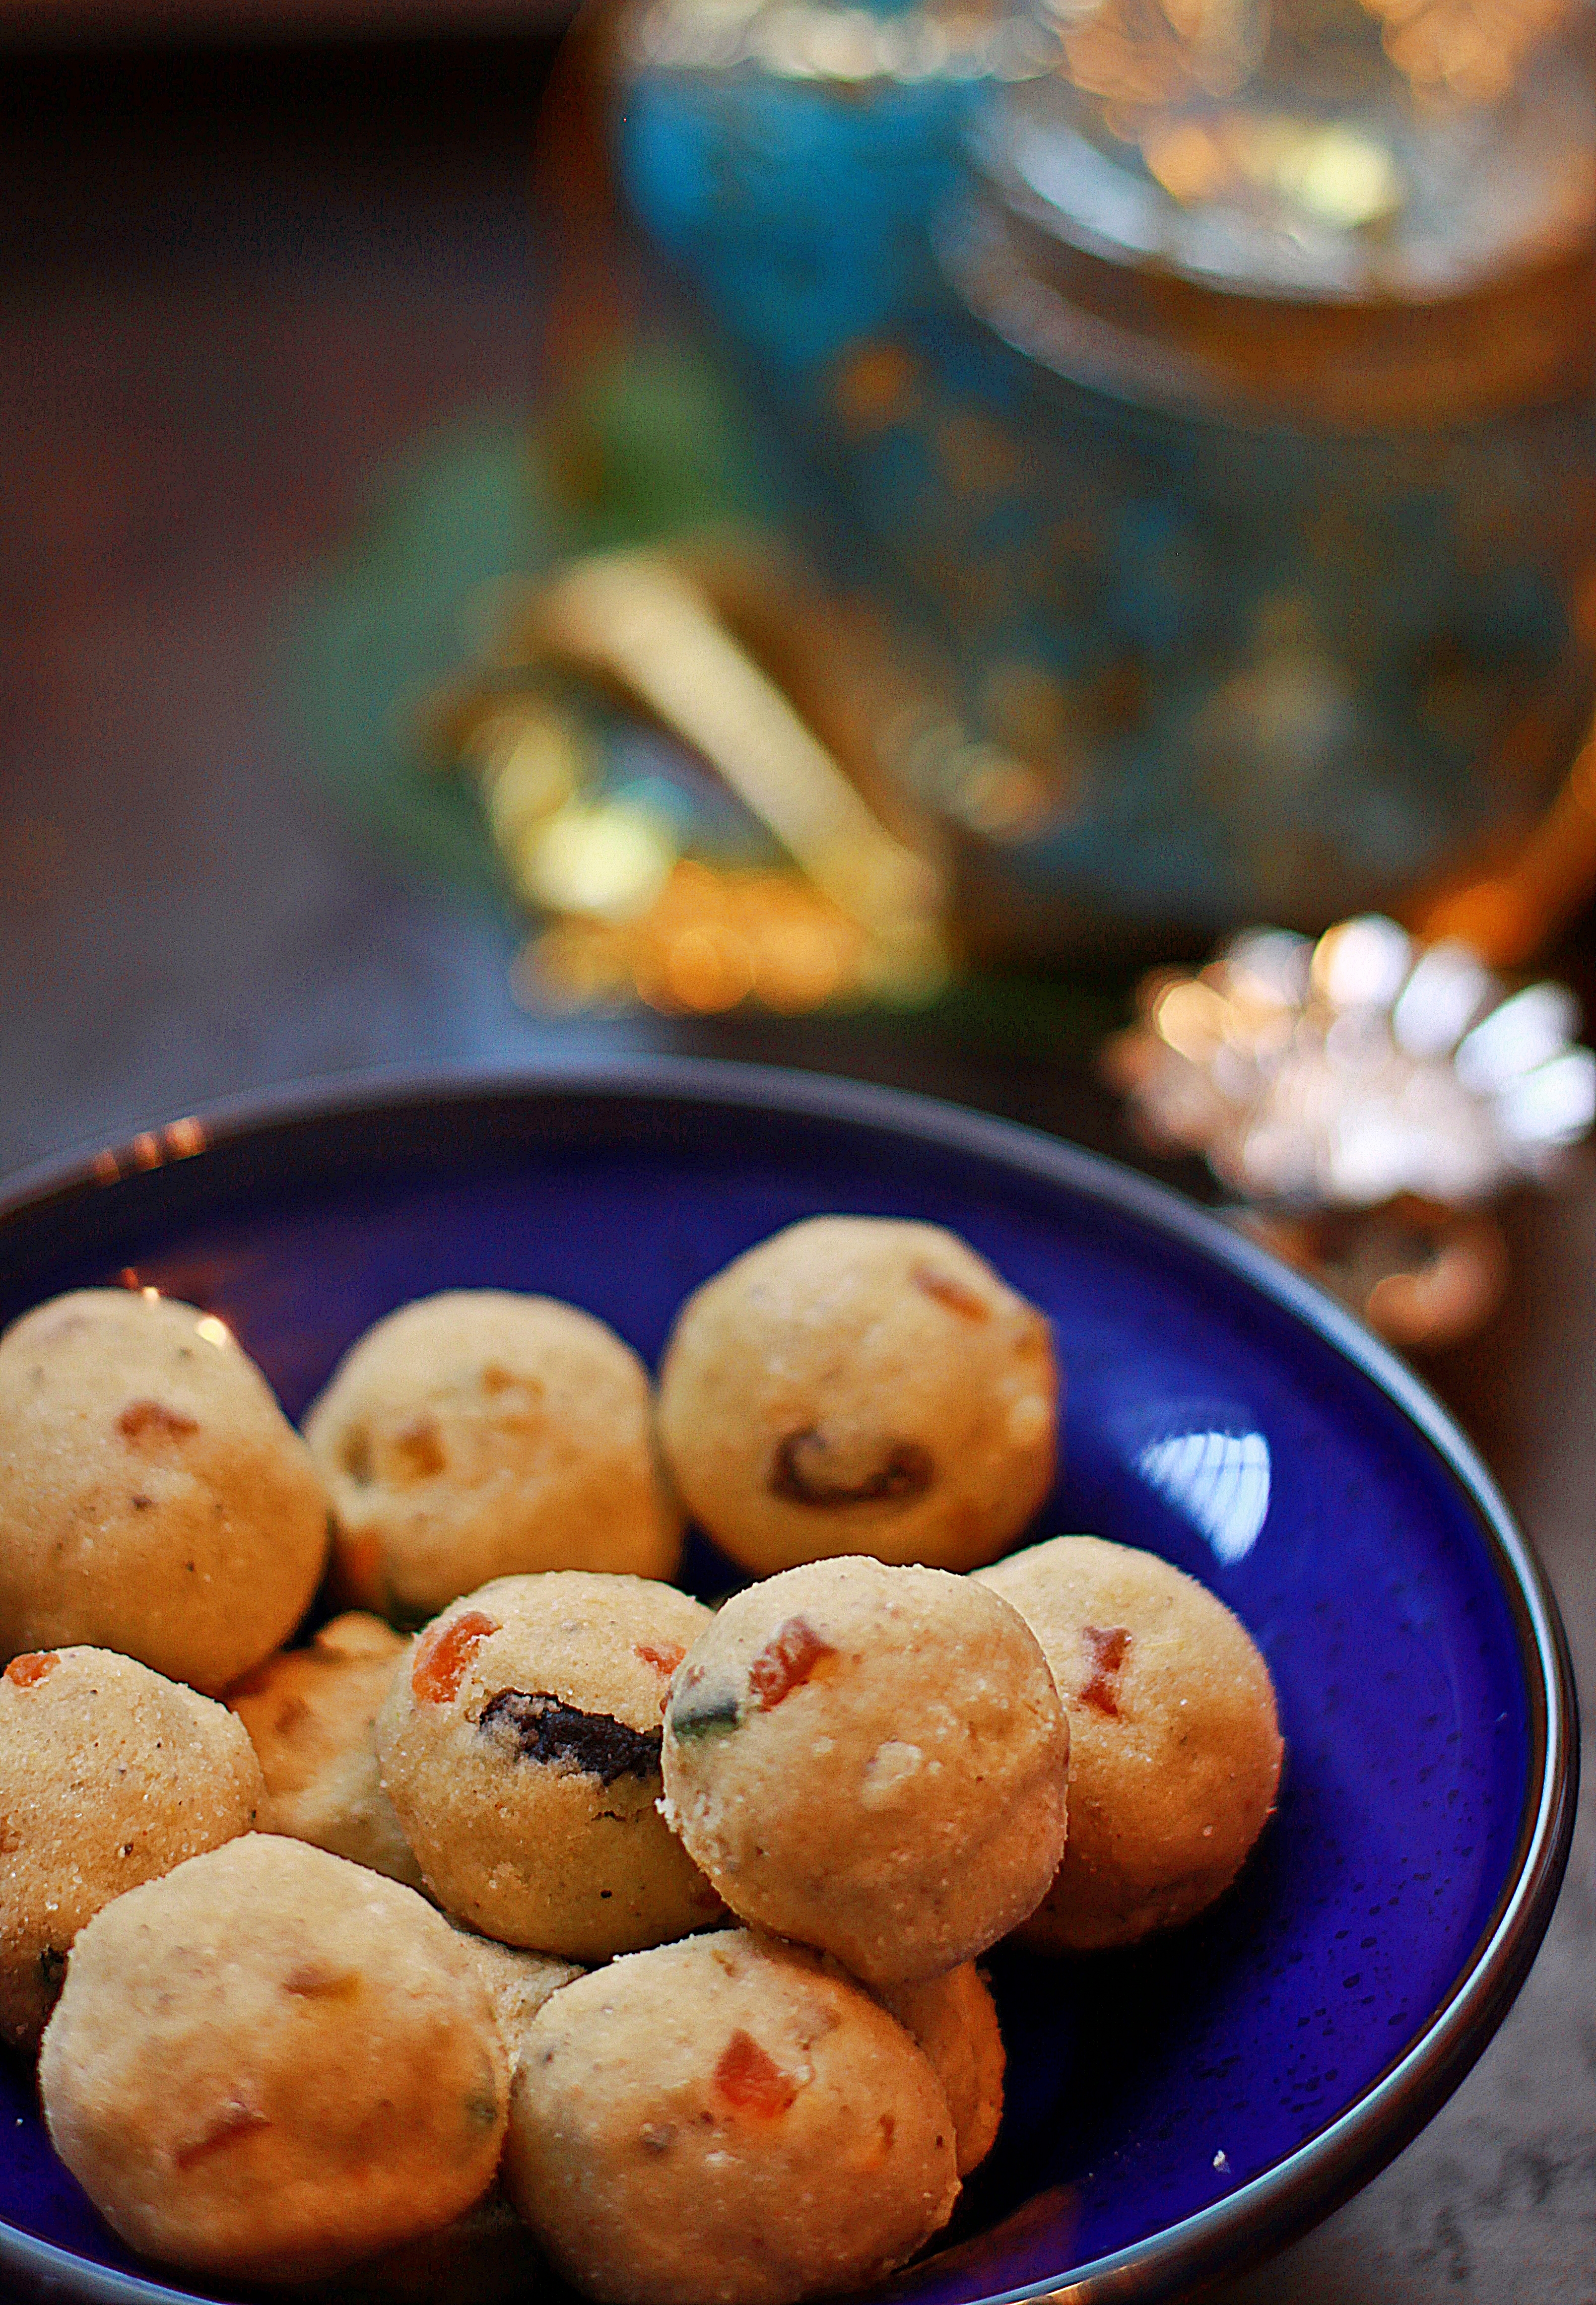
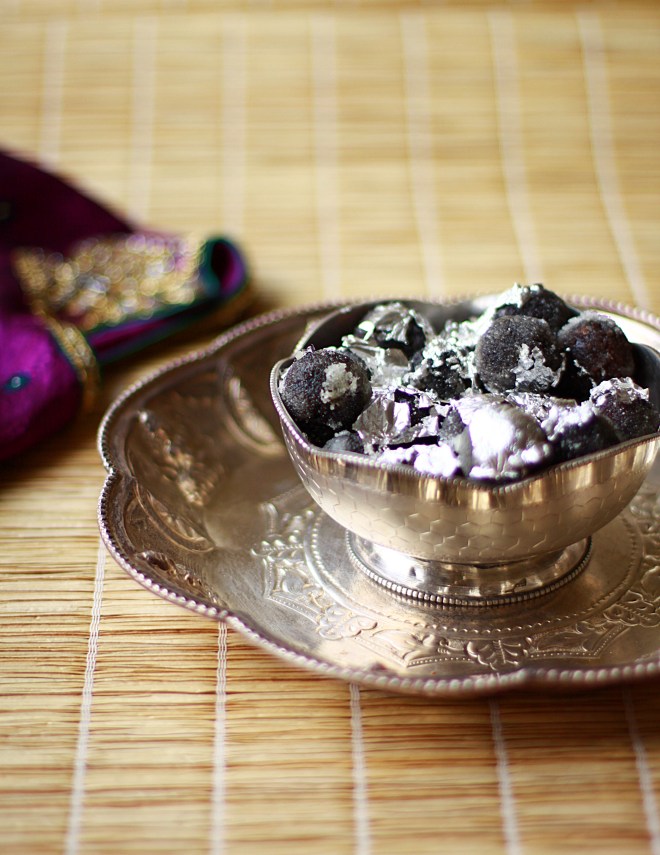
I had always managed to pull in customs from both families to add to my own, and I enjoyed doing that a lot. I would try to recreate the dishes staple in my husband`s home for numerous occasions, during his childhood days. Sometimes I brought customs from my own childhood all the while telling stories to the kids, about anecdotes and incidents during those times. It always managed to comfort me…This time around, I wanted to make the Dry Jamun version which my kiddo, and my nephew loves. Hope you try it and like them too!  The ingredients are few and minimalistic and the procedure is also very simple. This is inspired by Nisha Madhulika`s version, with a few adaptations of my own.

INGREDIENTS:

For Making Khoya/ Mawa:

1/4 Cup Butter.

1/2 Cup Milk.

1 Cup Non Fat Dry Milk Powder/ Full Fat Dry Milk Powder/ Milk Mawa Powder.

For Jamuns:

Prepared Mawa.

4 Tsp Maida/ All Purpose Flour.

Pinch of Baking Soda.

3-4 Tsp Milk.

For the Sugar Syrup:

1 1/2 Cups Sugar.

3/4 Cup Water.

1/2 Tsp Cardamom Powder.

A few drops of rose essence.

PREPARATION:

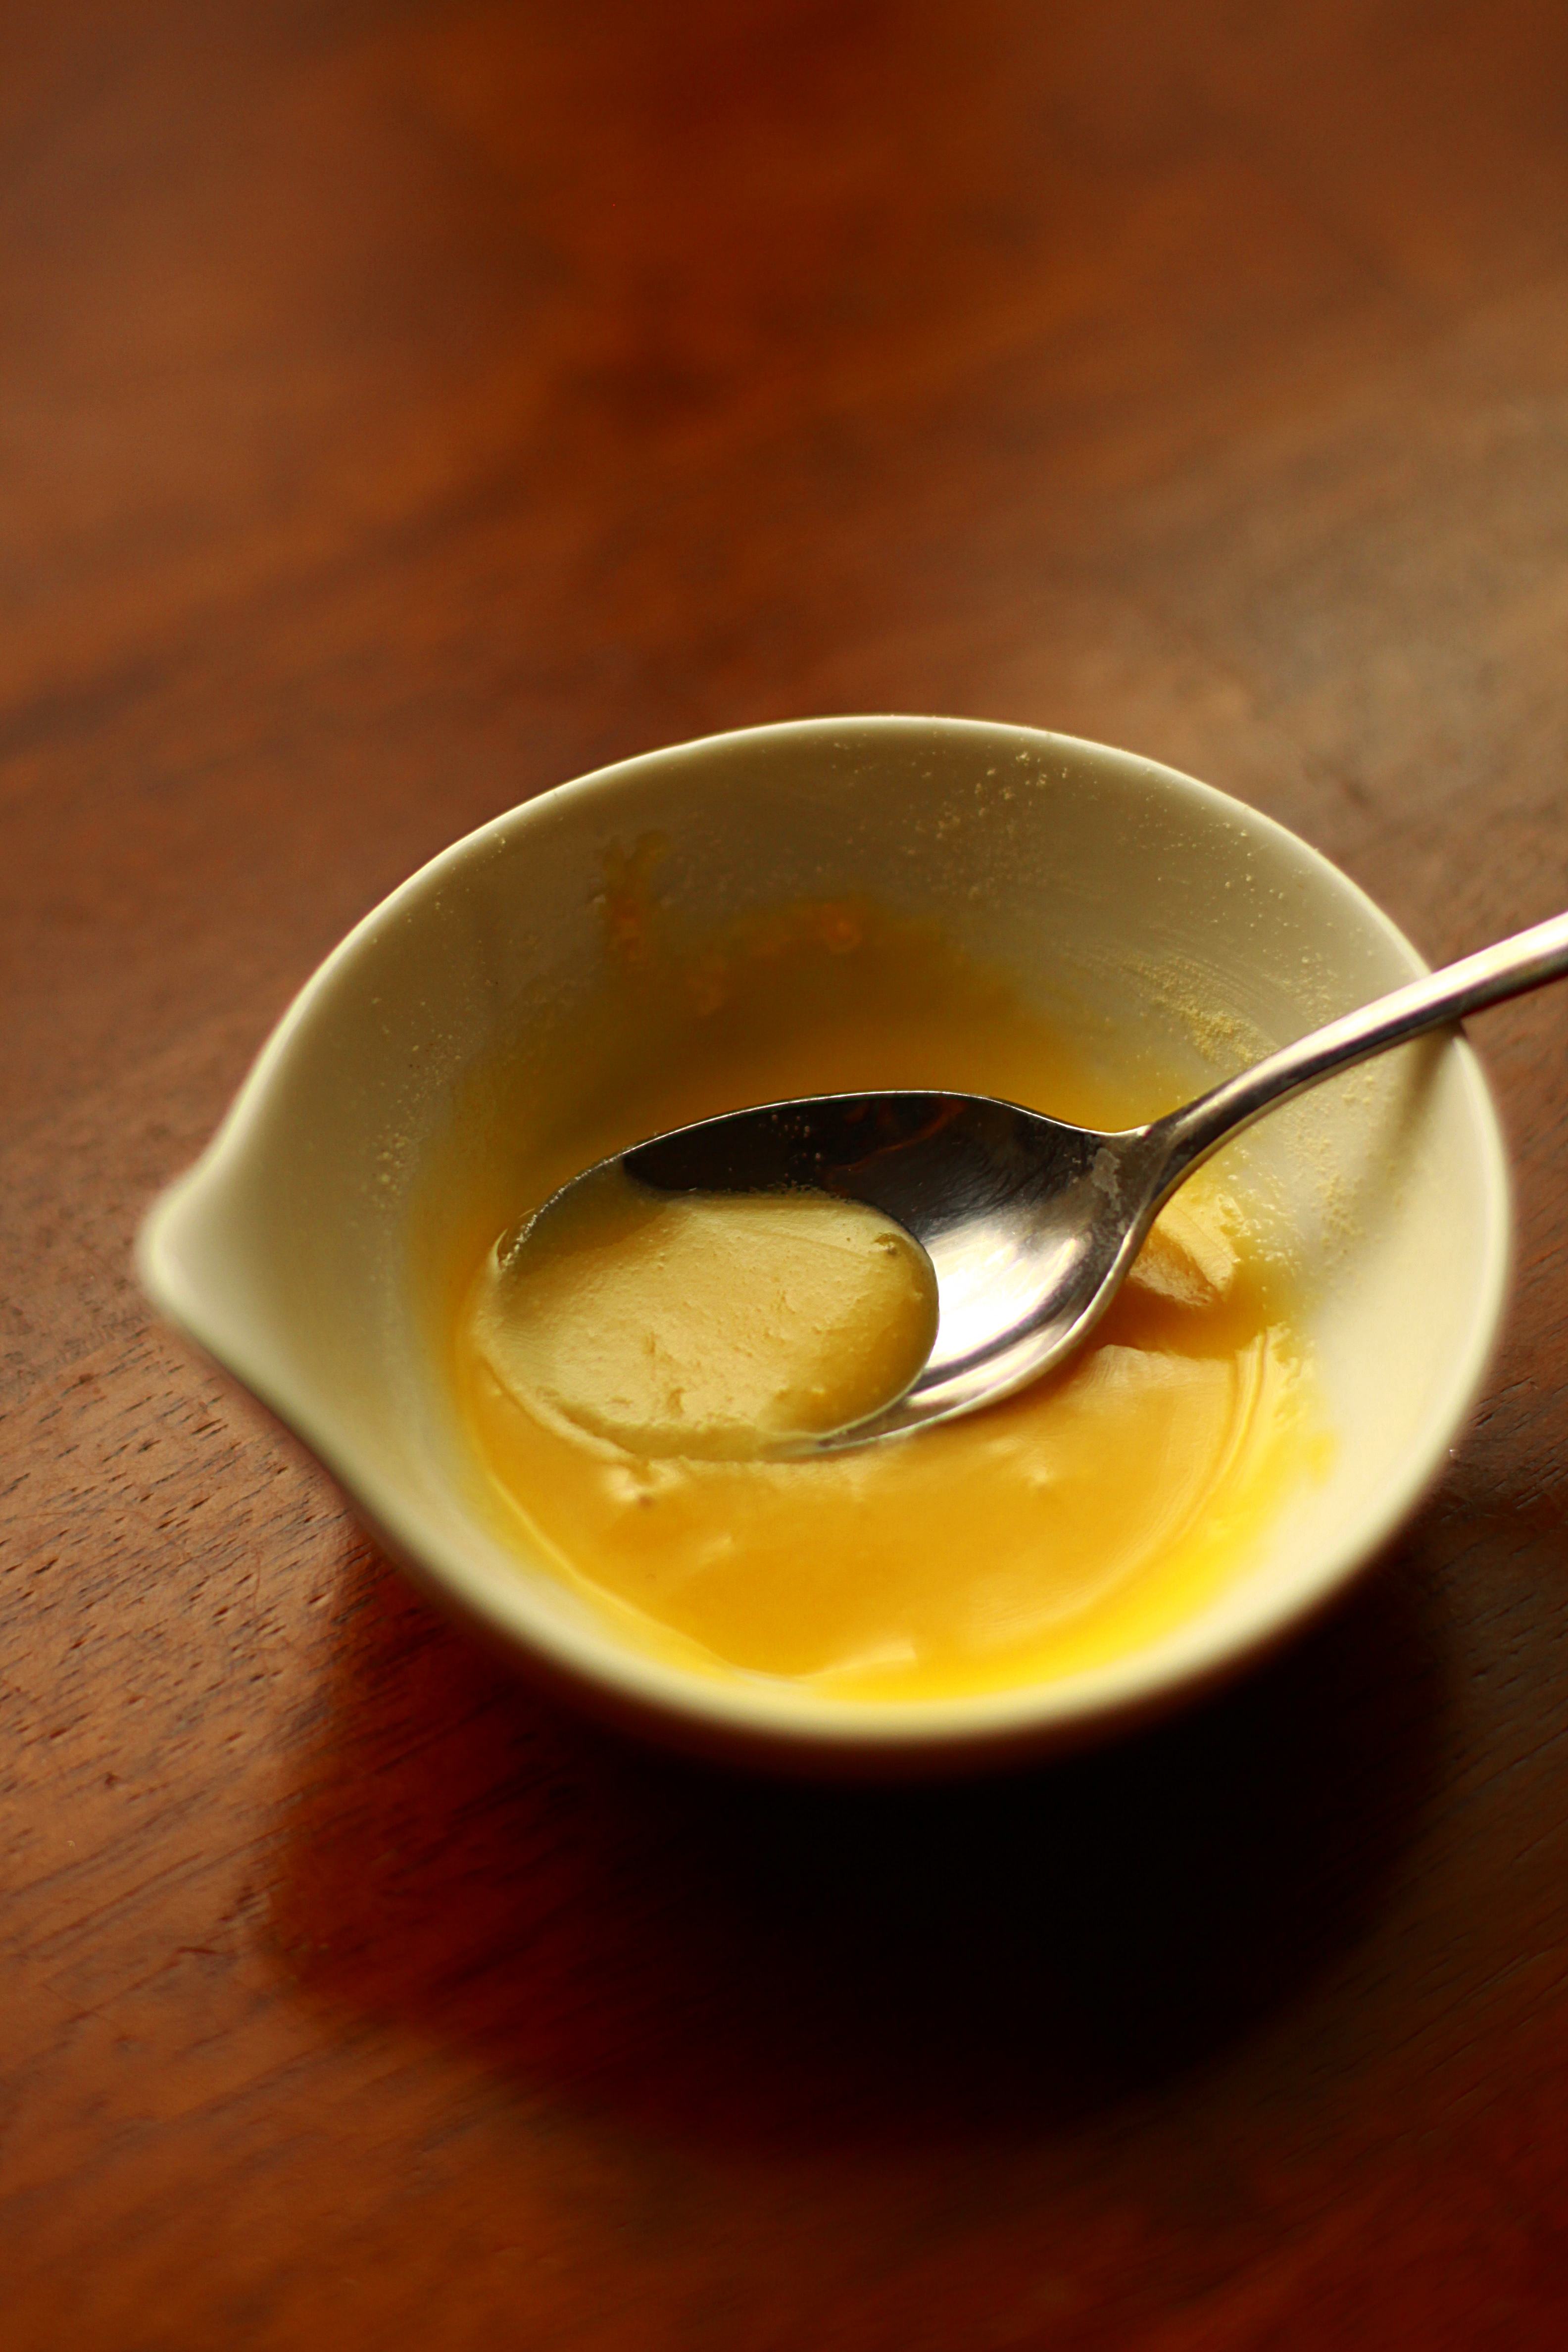
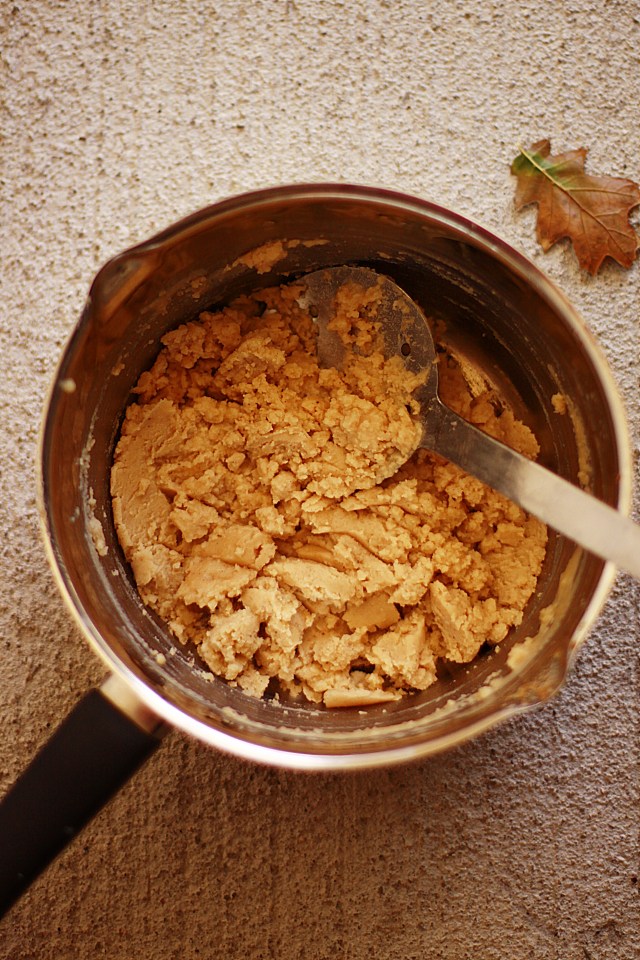
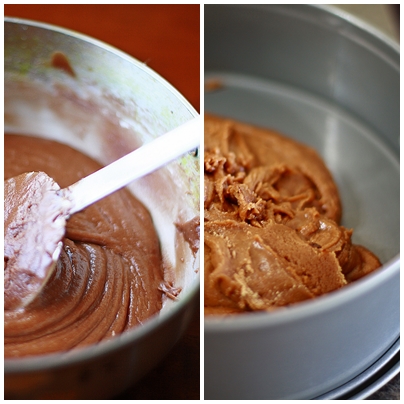
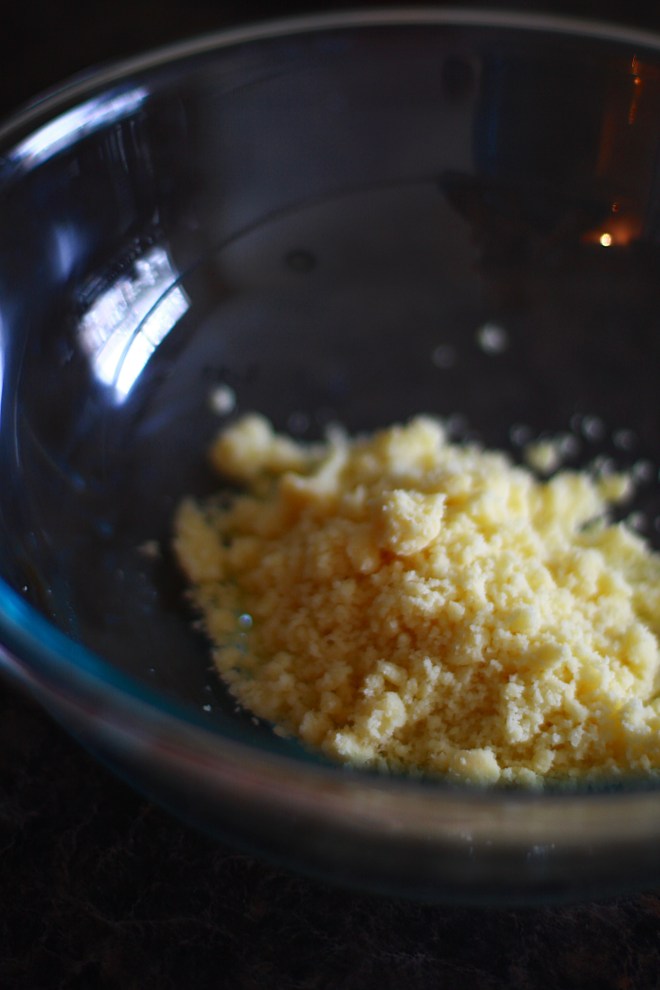
  • The first part of the process is to make Mawa which is the base for the Gulab Jamun. Add butter to a pan and switch on the stove on medium heat.
  • Pour in the milk and whisk it gently. Once its mixed well, slowly add the milk powder and whisk to bring them together. Keep the flame on medium low and keep mixing it now and then. It should NEVER catch the bottom, so this is possible only if you continue to mix on medium flame. The runny mixture will slowly start getting together until it pulls away from the sides of the pan. Switch off the flame and transfer to an air tight container. This is the base for the Gulab Jamun. It will be a mass that holds together.IMG_5410
  • Prepare the Sugar Solution as per the directions below. Set aside.
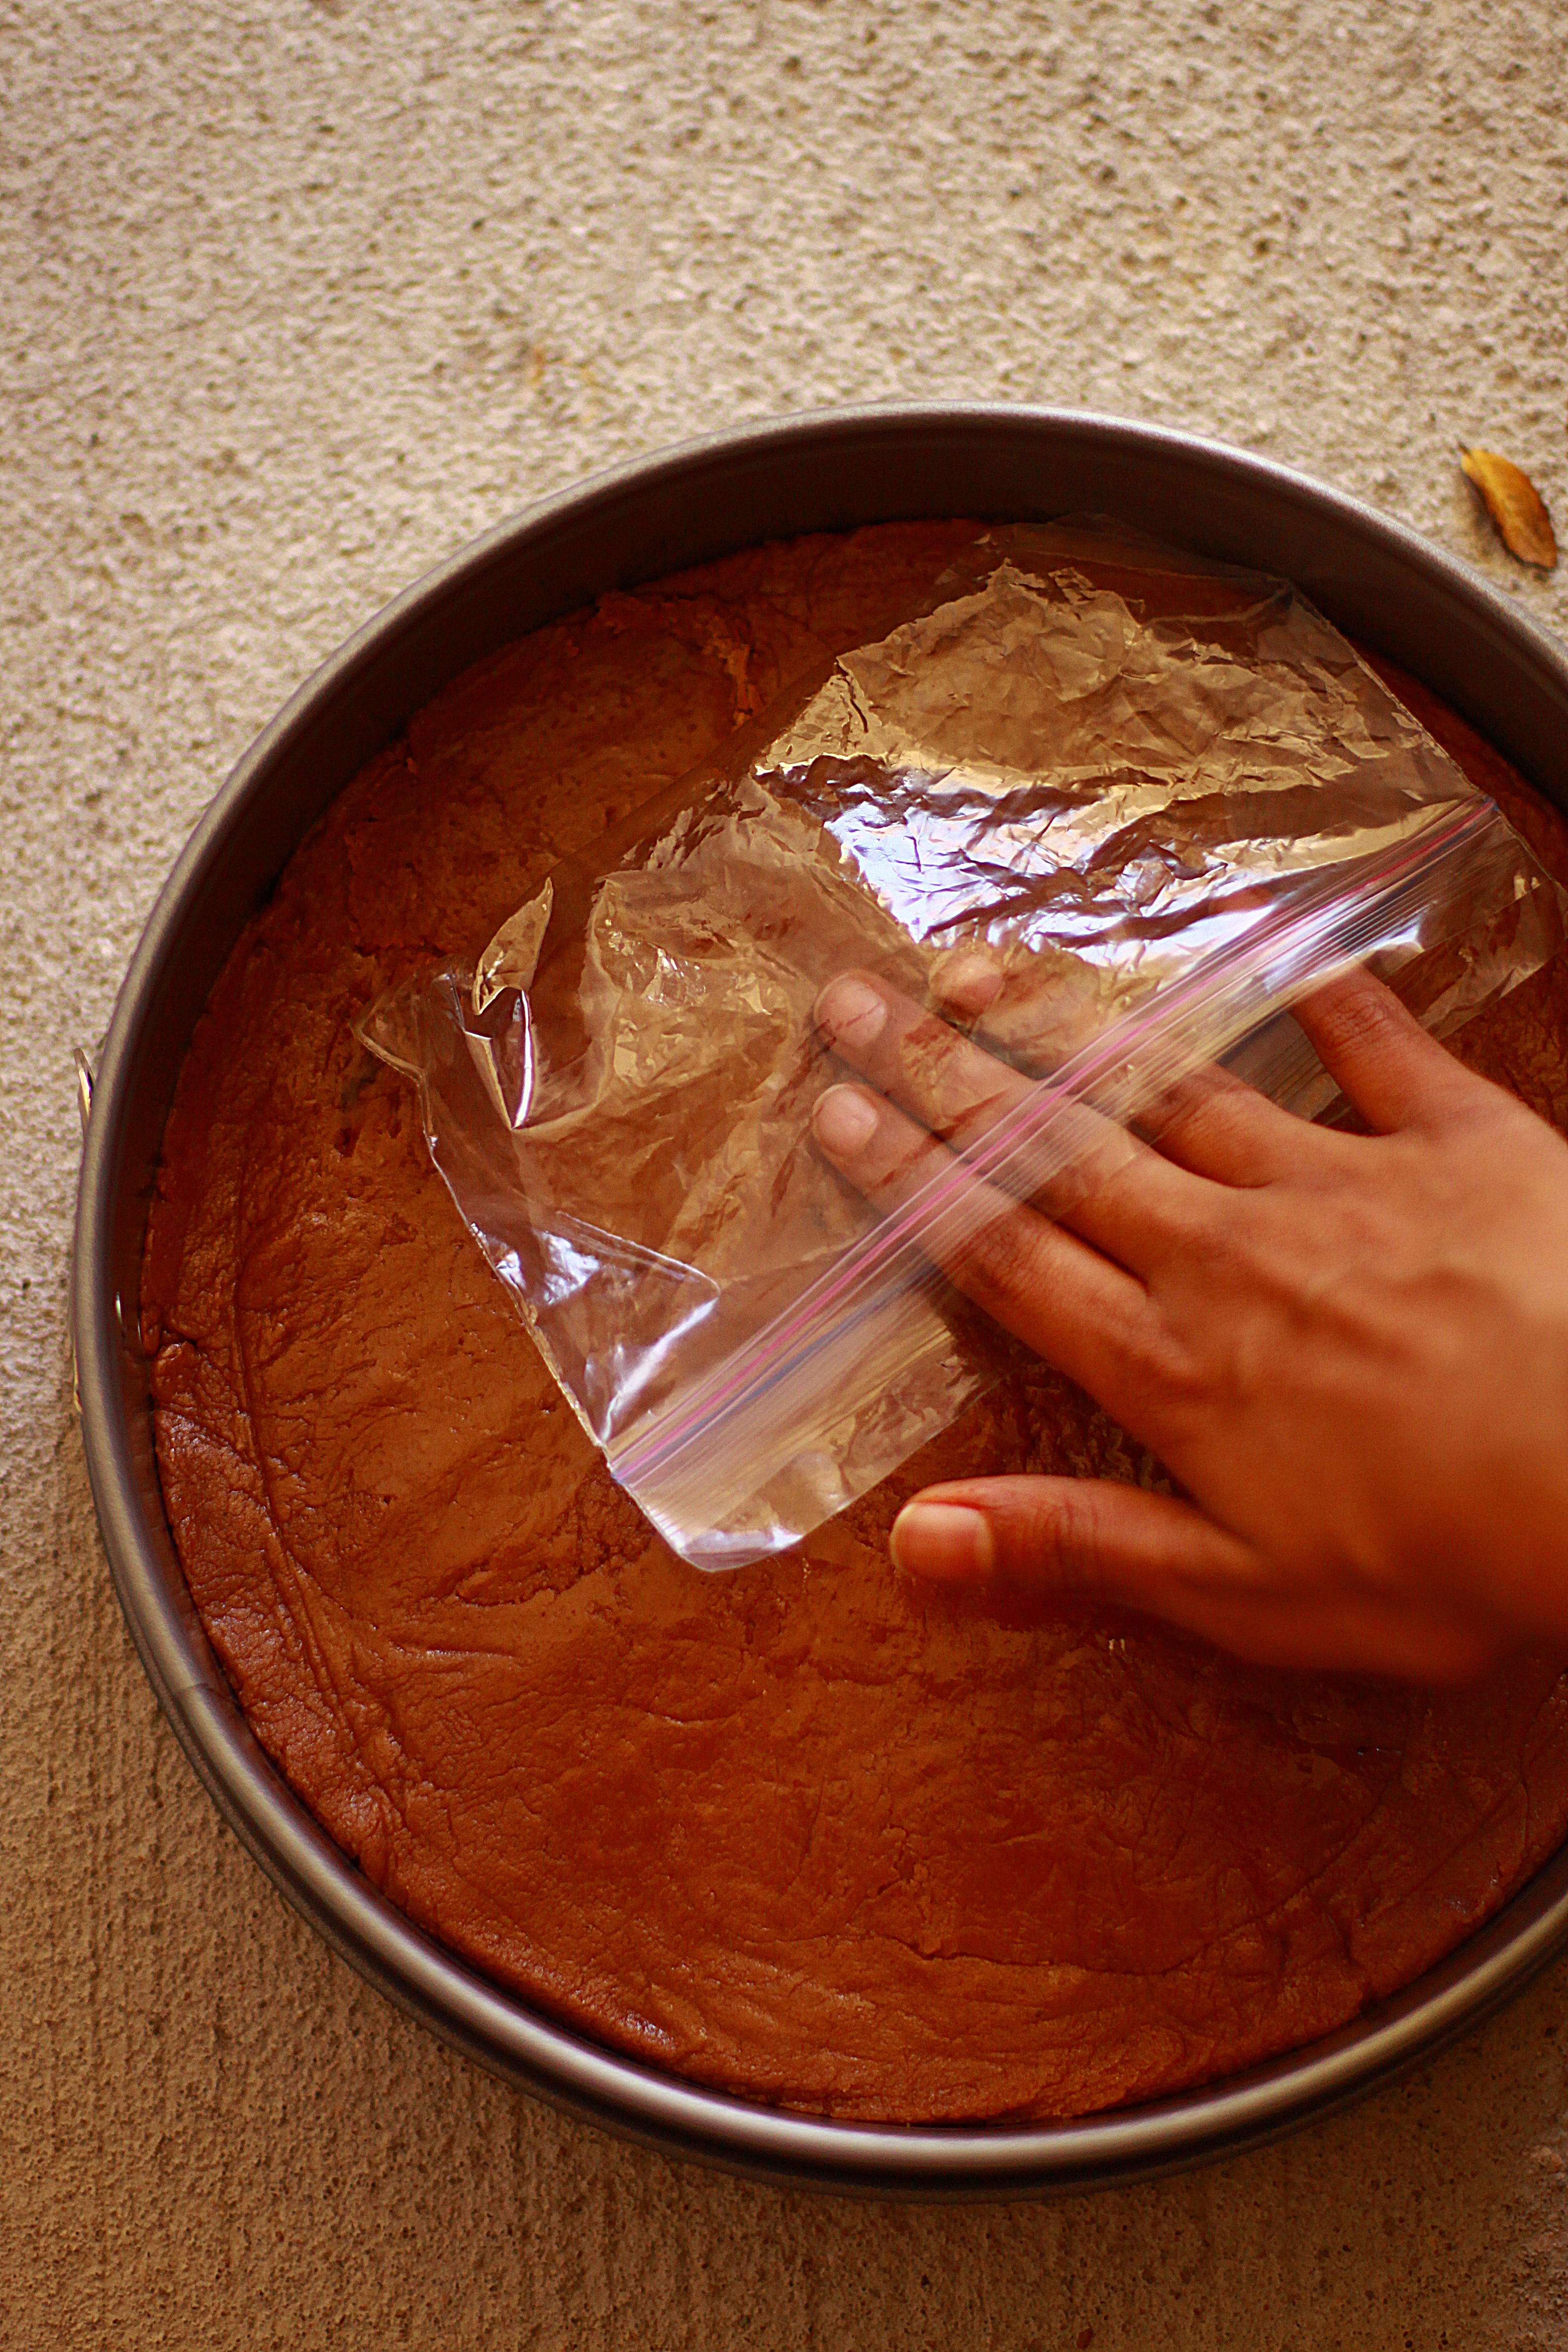
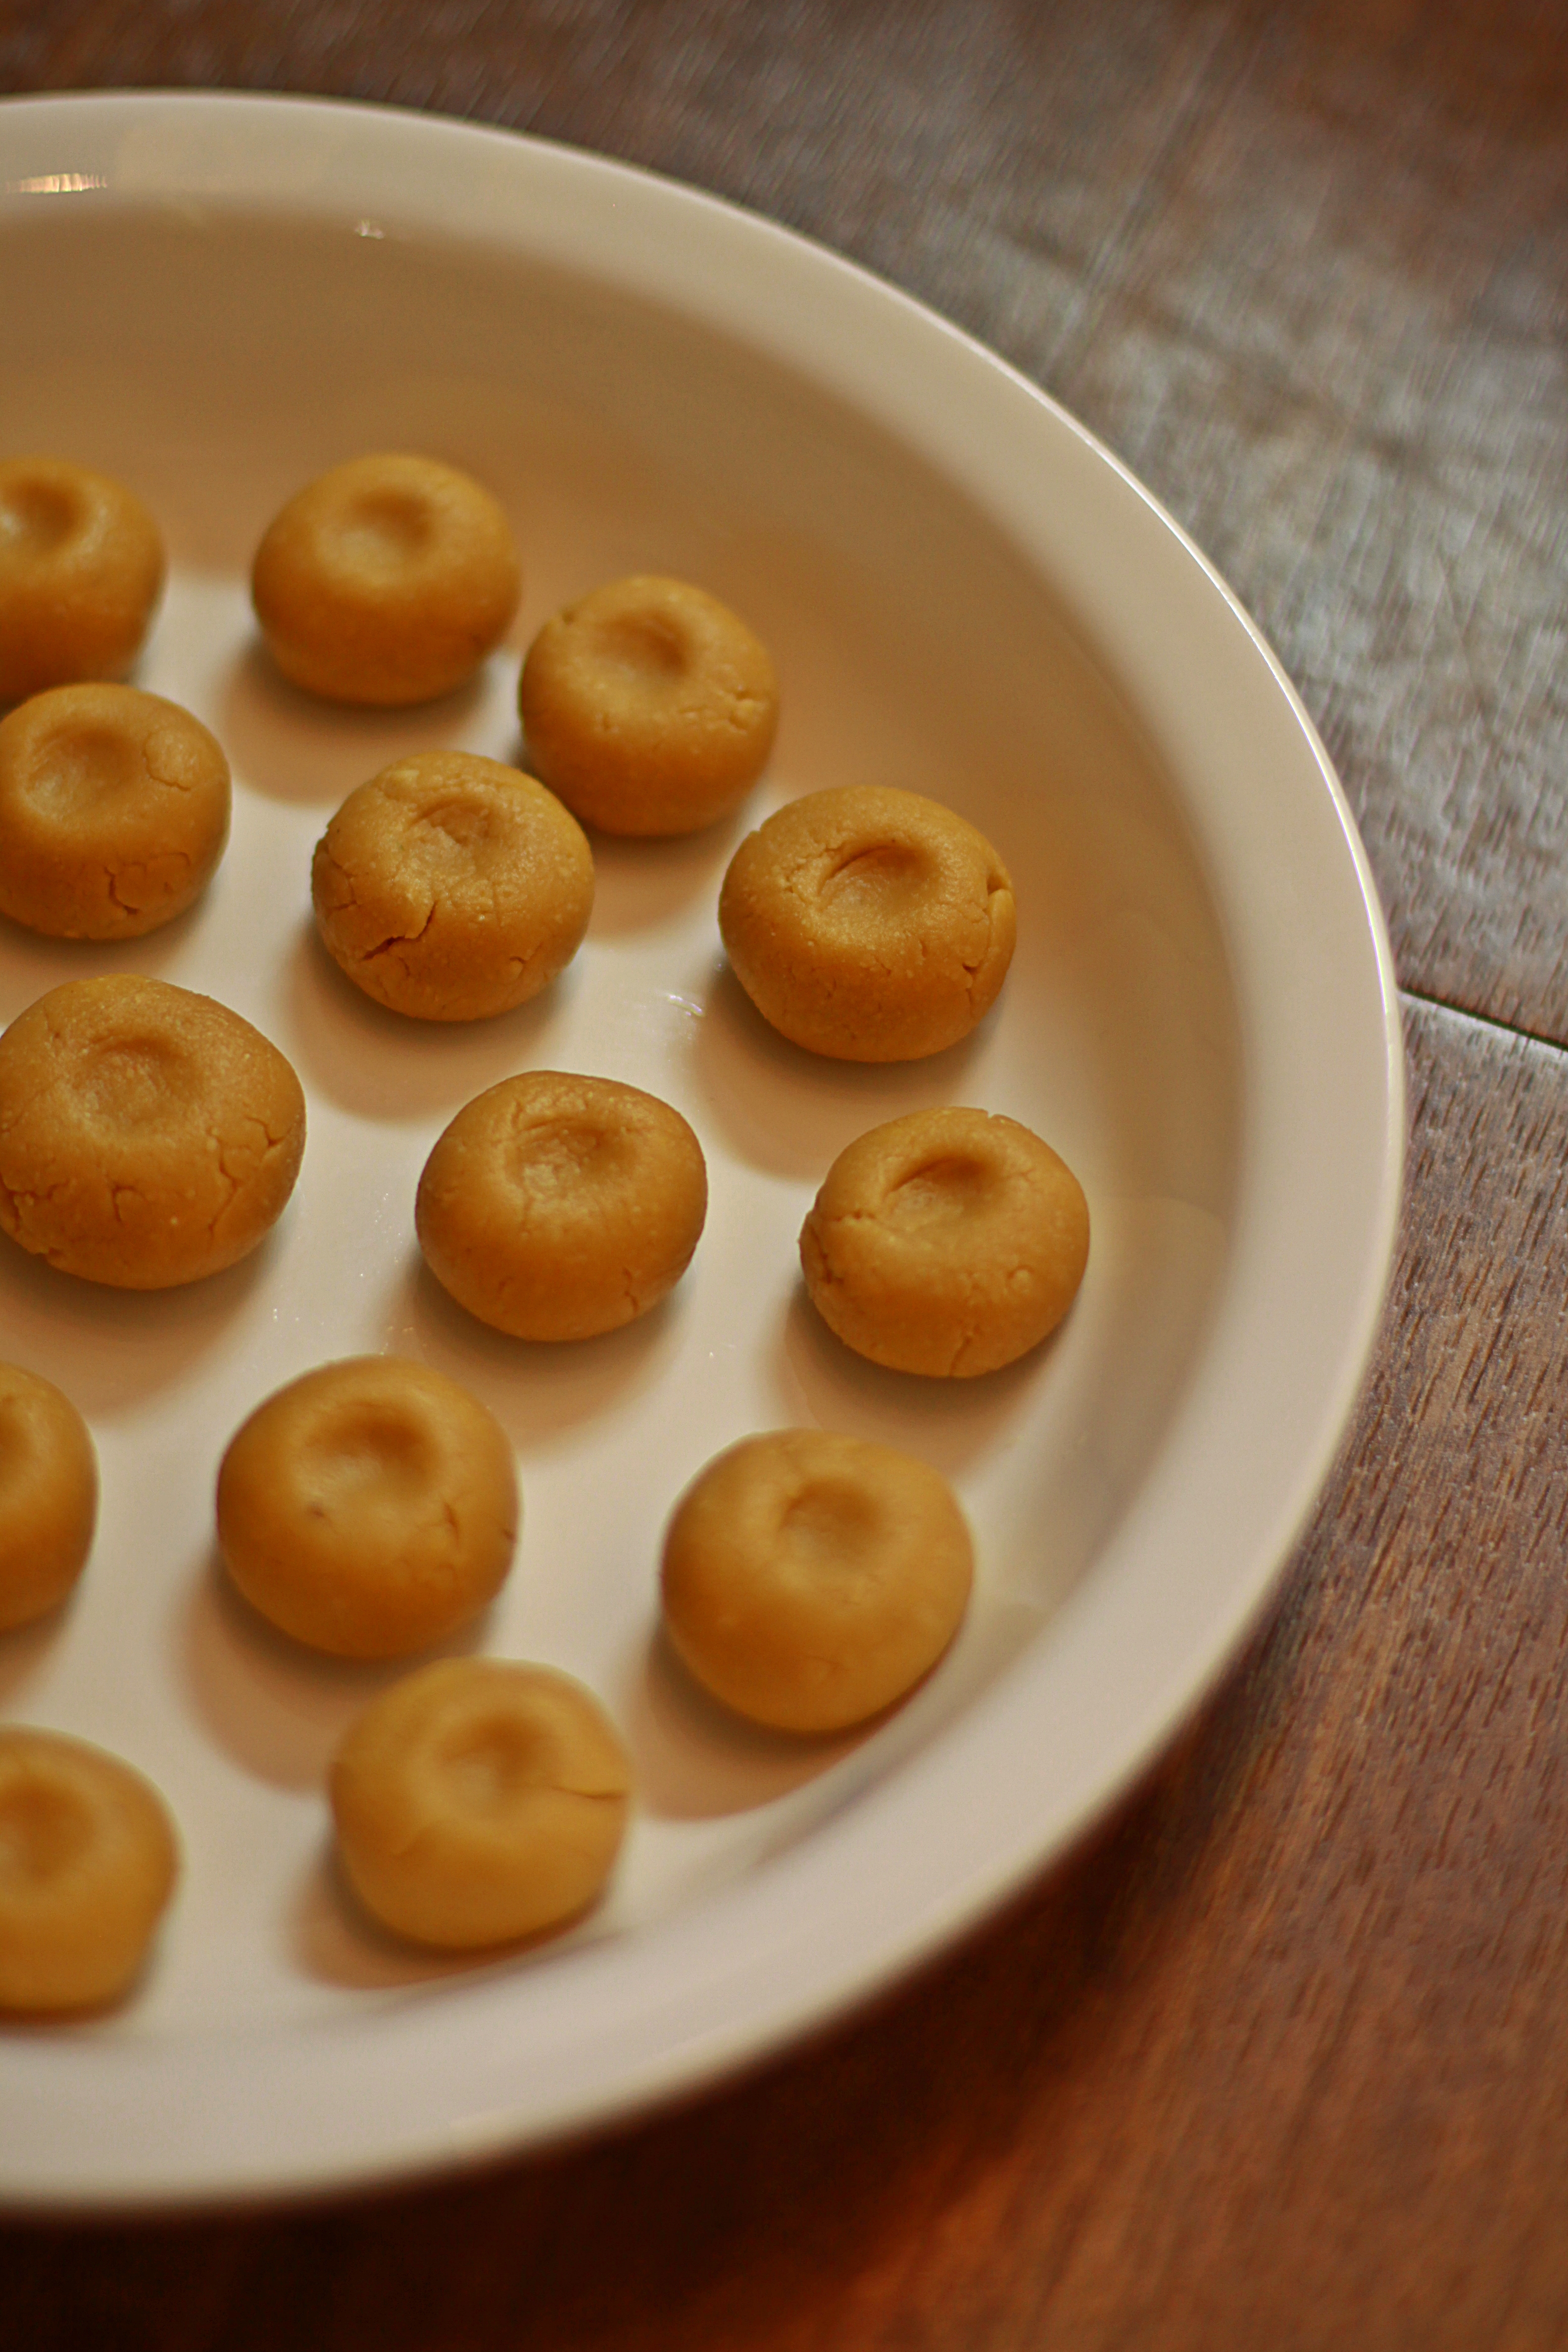
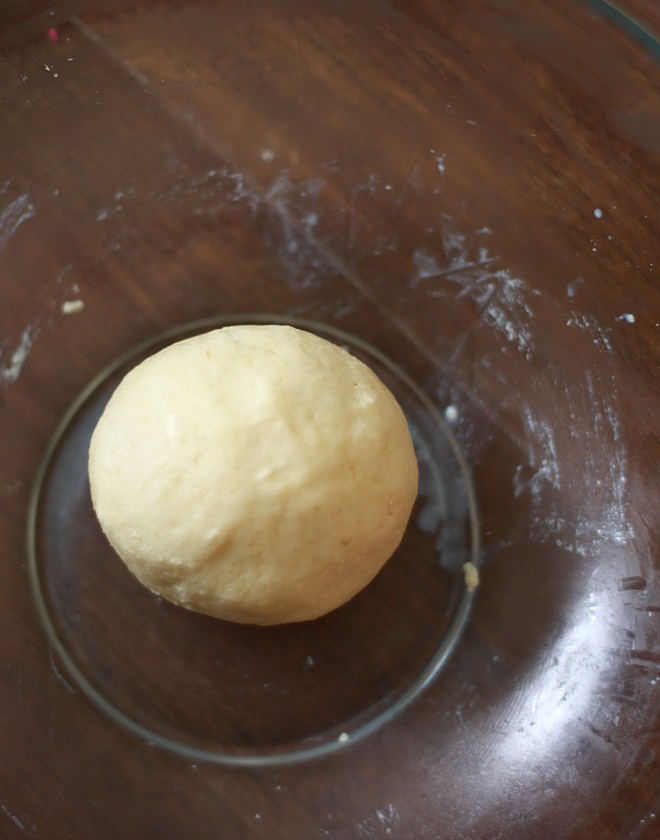
  • Take a large bowl, topple in the prepared mawa, add about 4 tsp of All Purpose Flour, a pinch of nutmeg and a pinch of baking soda. Knead the dough by pressing with your palm and mixing it all in. The Mawa gets crumbly but because  the oil content in it, the warmth from your hands allow it to soften and bend easily. Keep kneading and if required add a few tsp of milk, a Tsp at a time. Once the dough is smooth and without any cracks keep covered for about ten to twenty minutes.
  • IMG_5417
  • Pour out enough ghee/ oil (enough to completely submerge the jamuns ) in a heavy bottomed kadai.
  • Keep the flame strictly on medium and allow it to get hot enough.
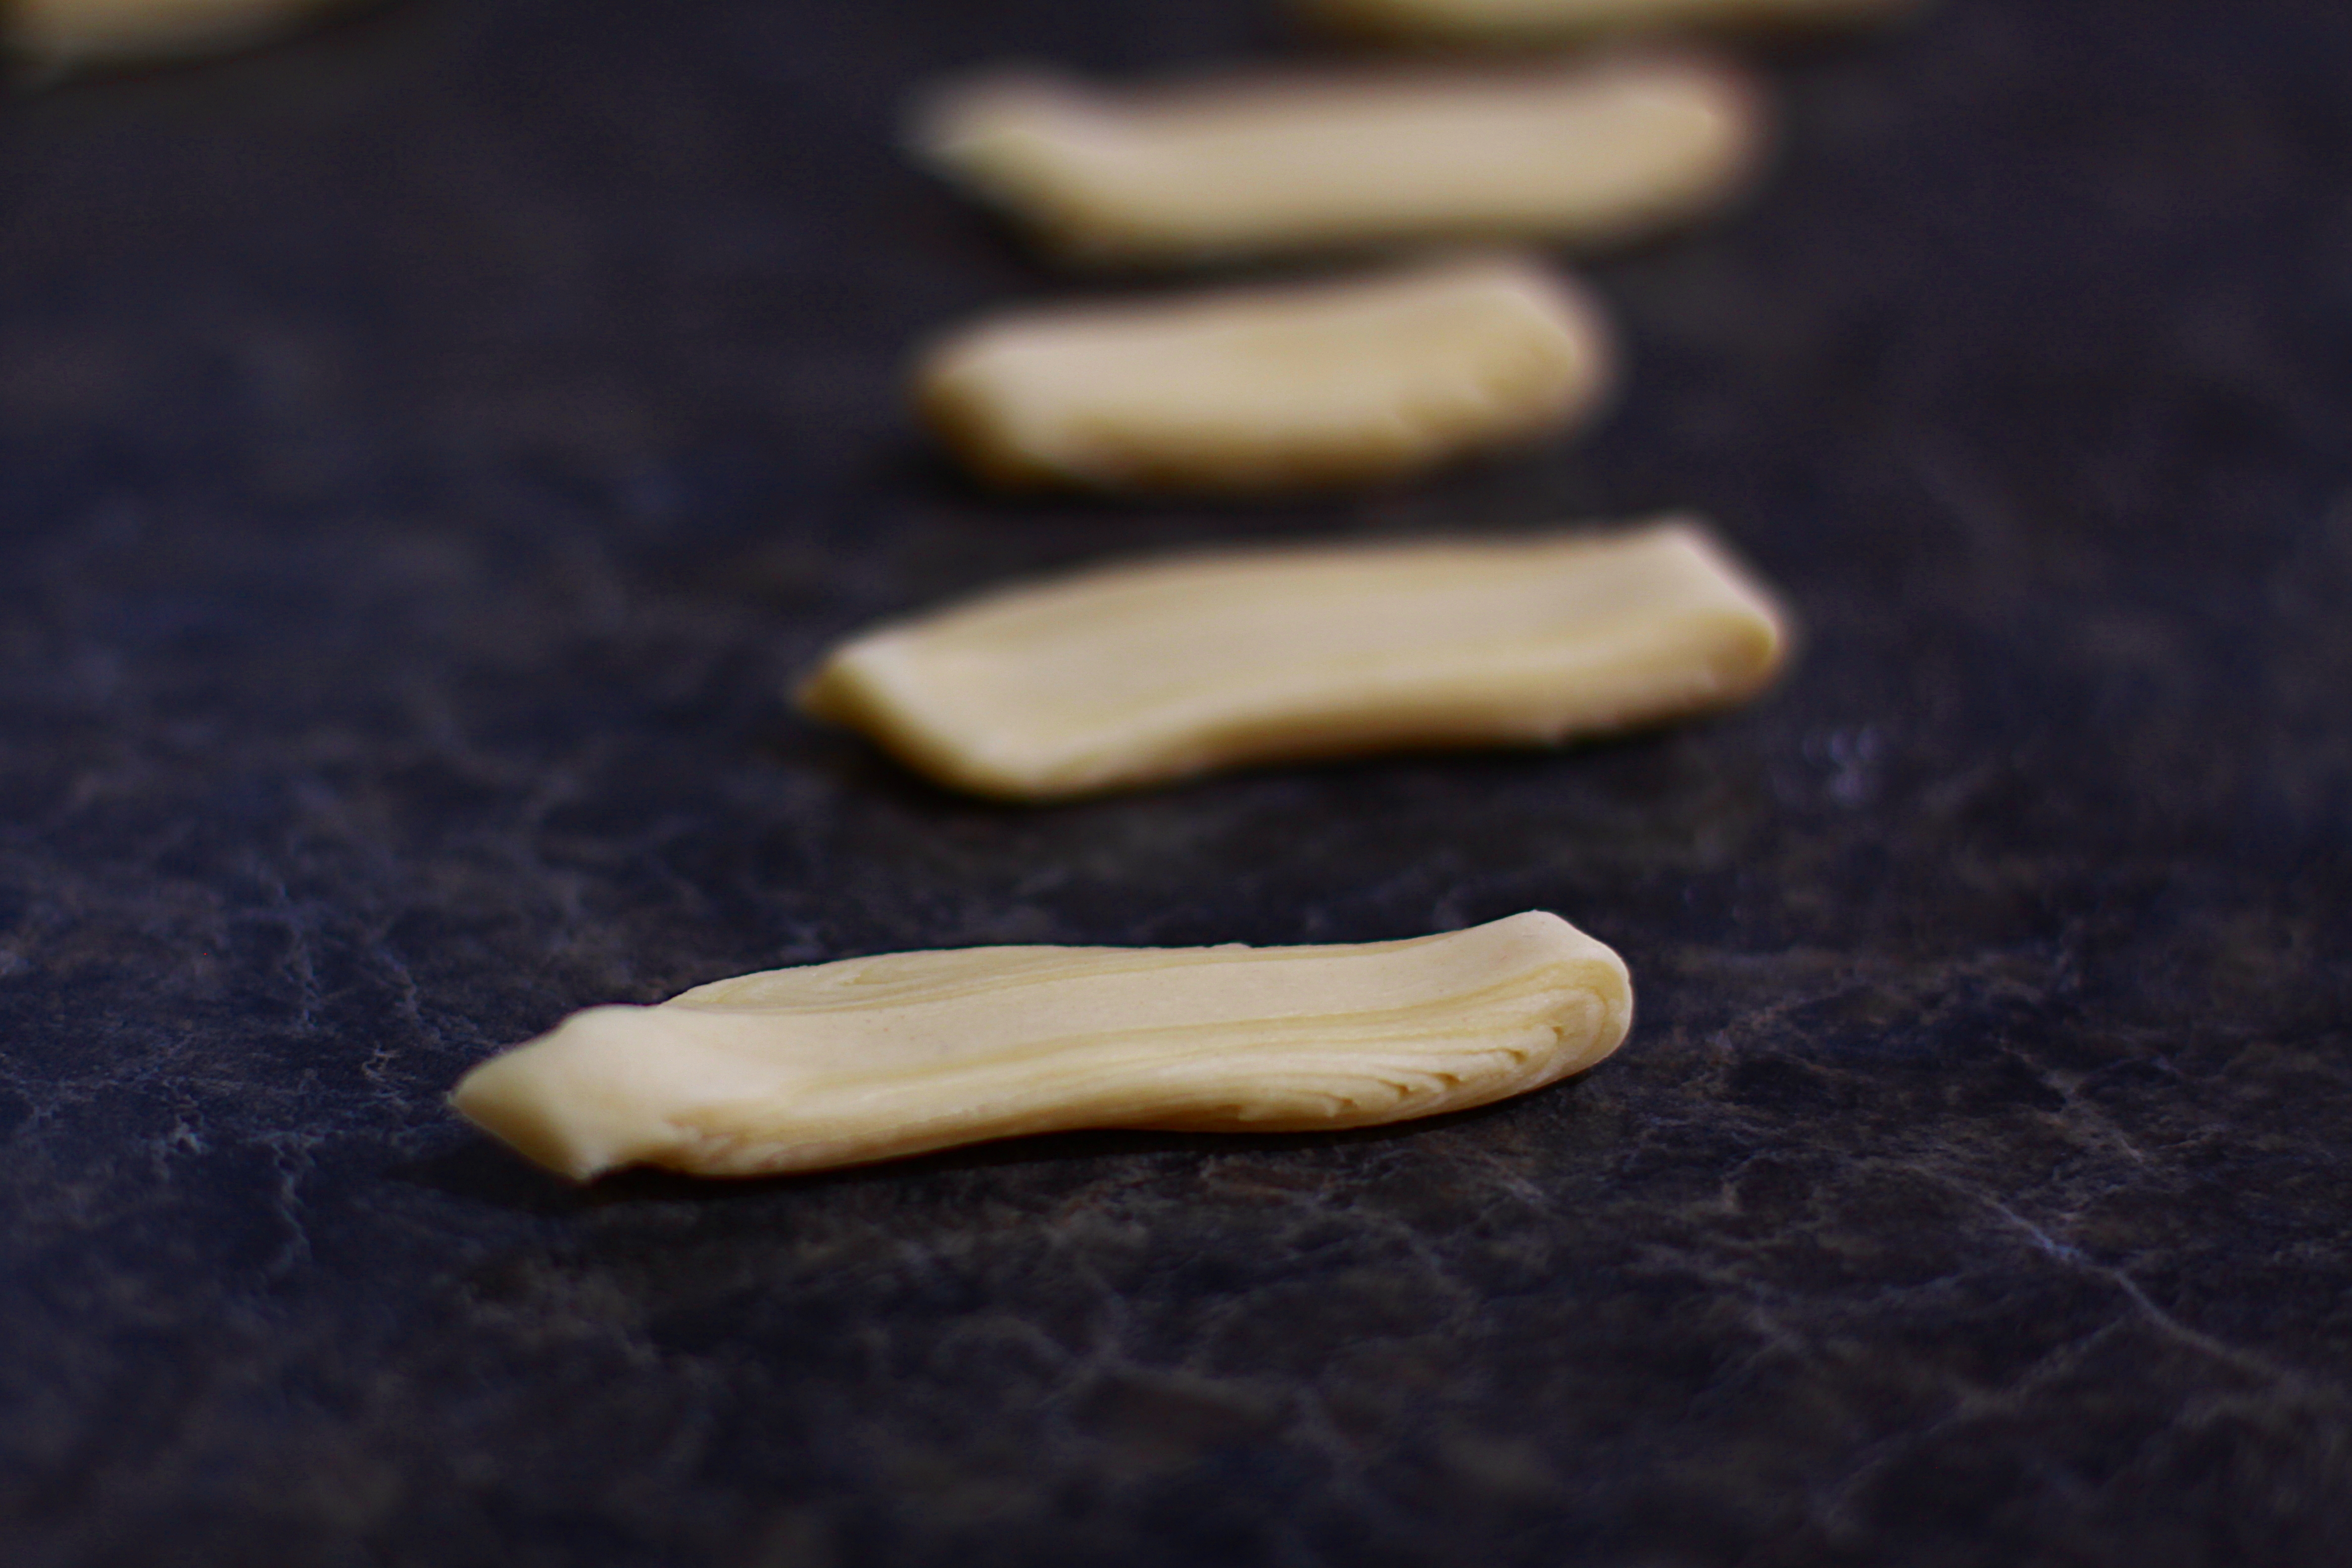
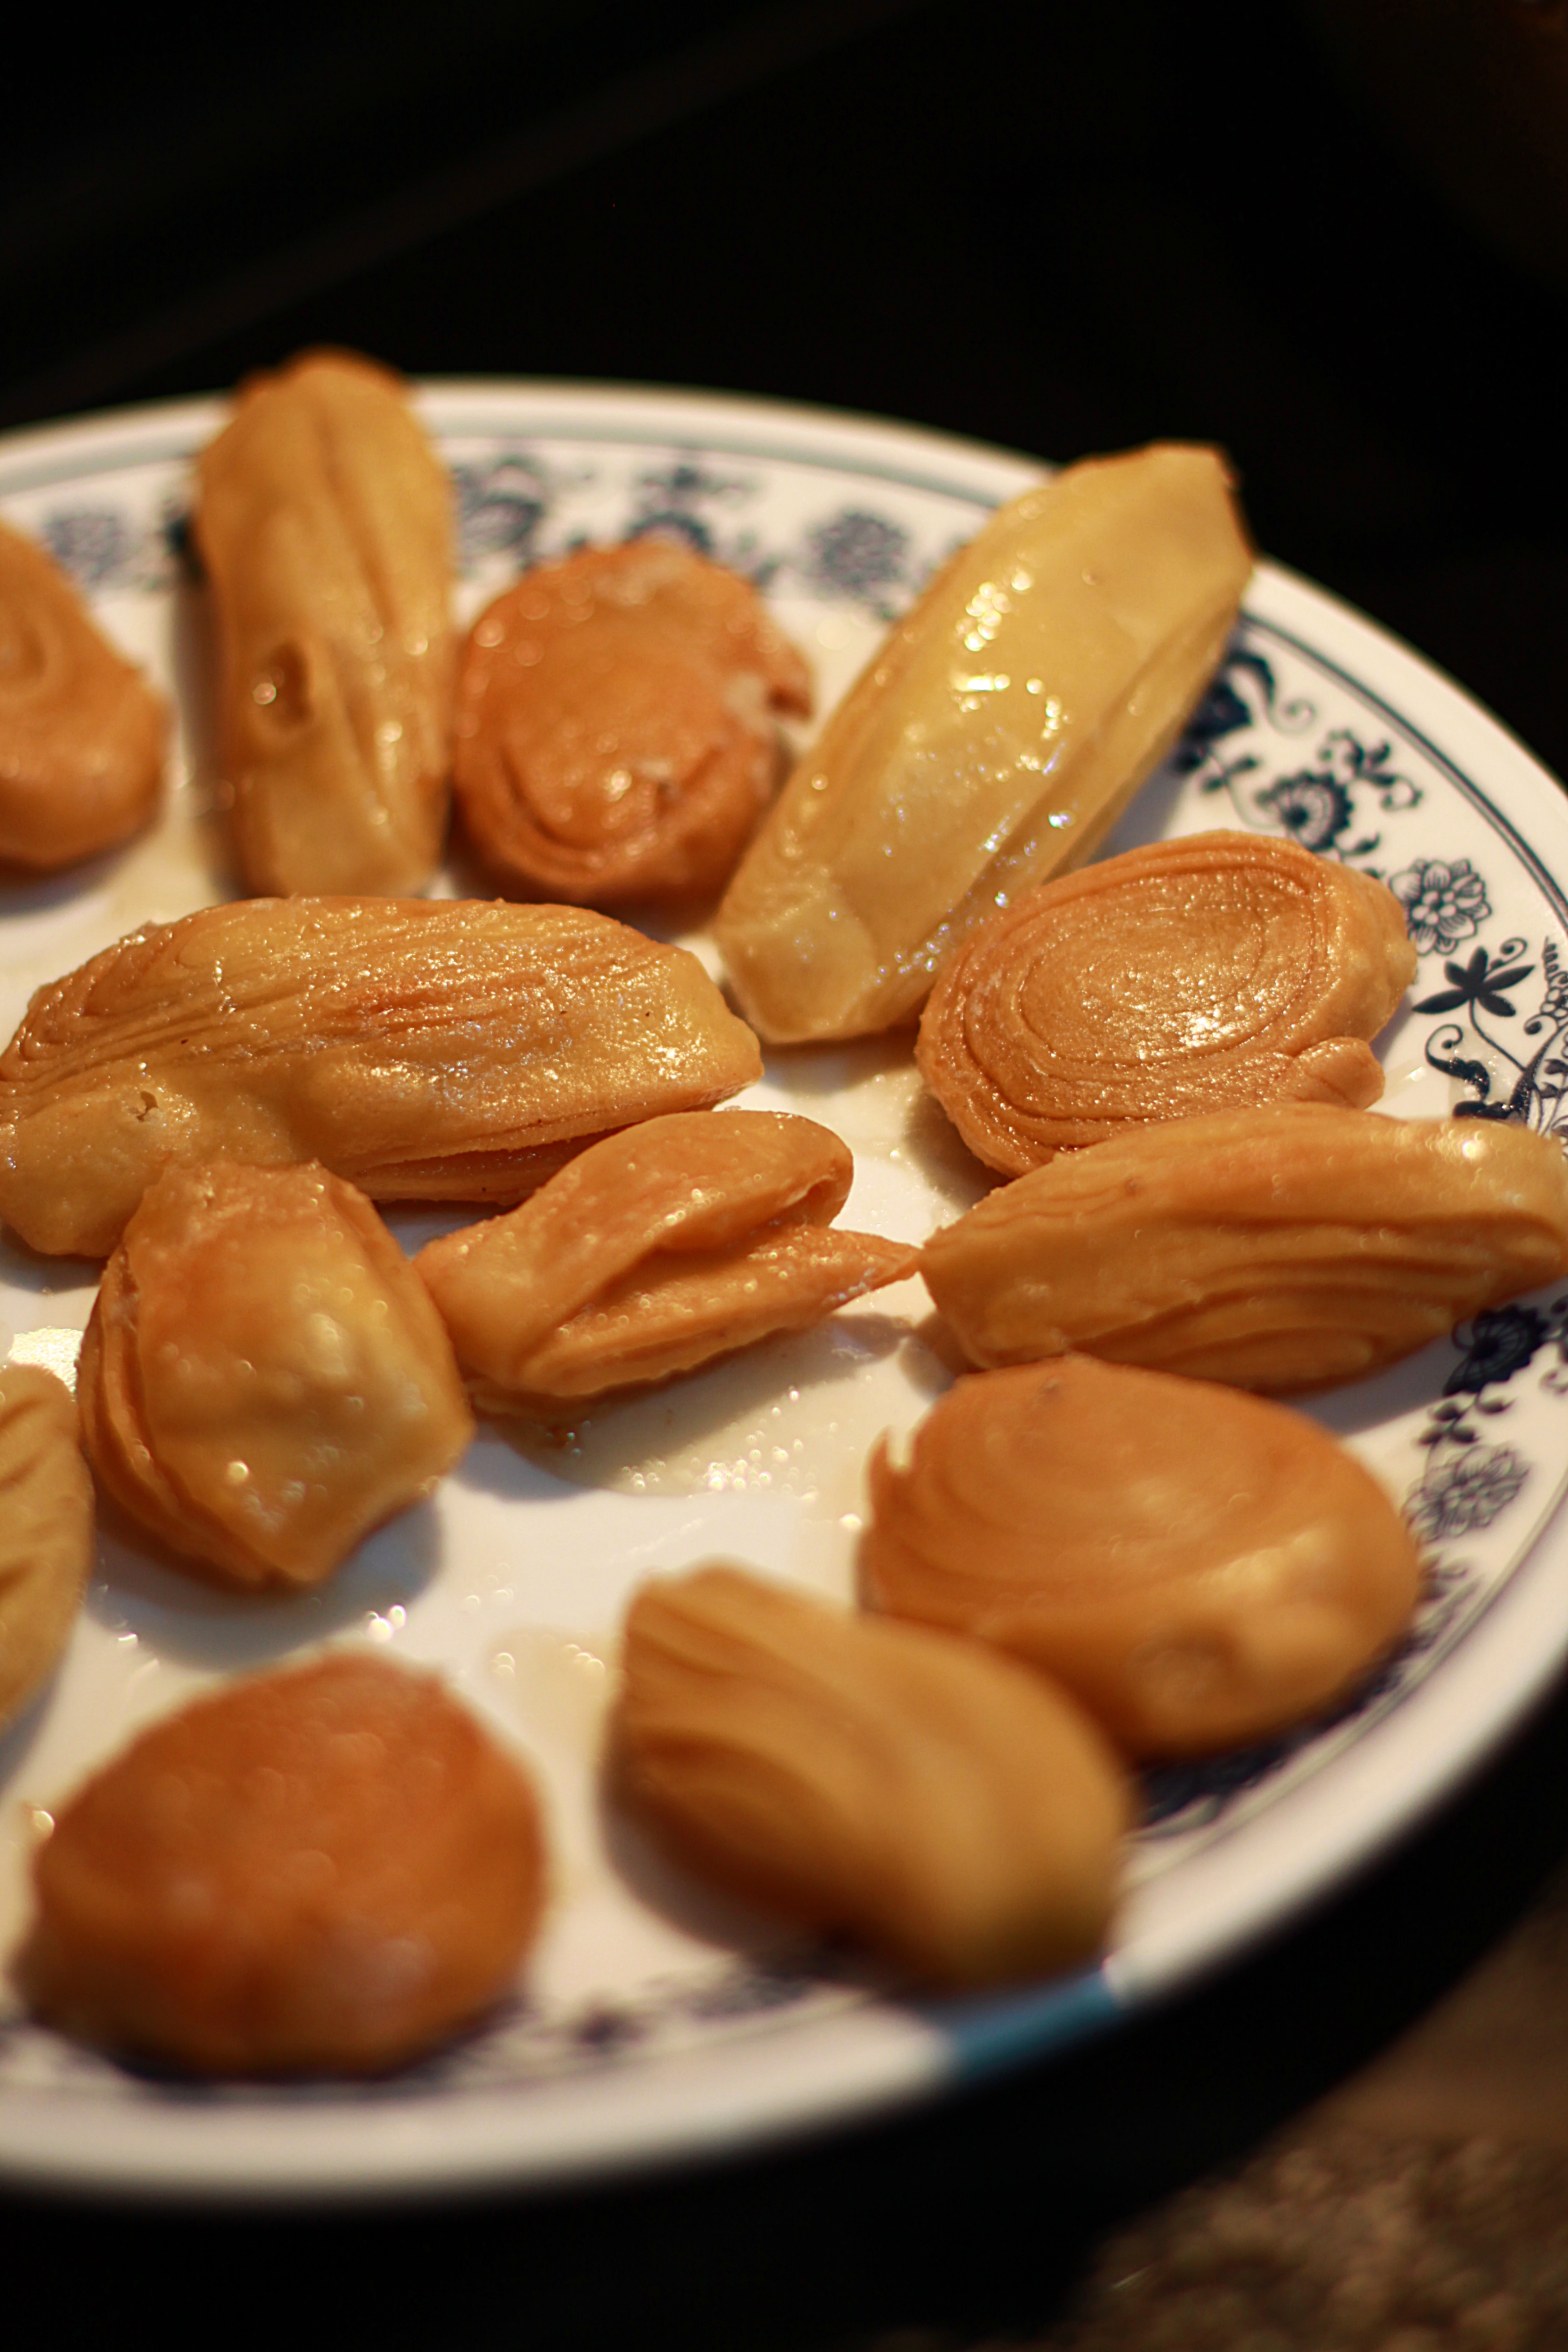
  • Start rolling out smooth balls and slowly drop them in to the kadai. Keep the rest of the dough covered with a moist kitchen cloth. Keep moving the jamuns on medium heat untitl they are uniformly fried on all sides, almost to a dark brown. Drain out the oil and place the jamuns in a dry bowl lined with paper towels.
  • After a few minutes, add it slowly to the sugar solution.
  • Continue and complete all the prepared dough and allow the jamuns to soak for about twenty minutes.
  • Take a dry plate and spread granulated white sugar.
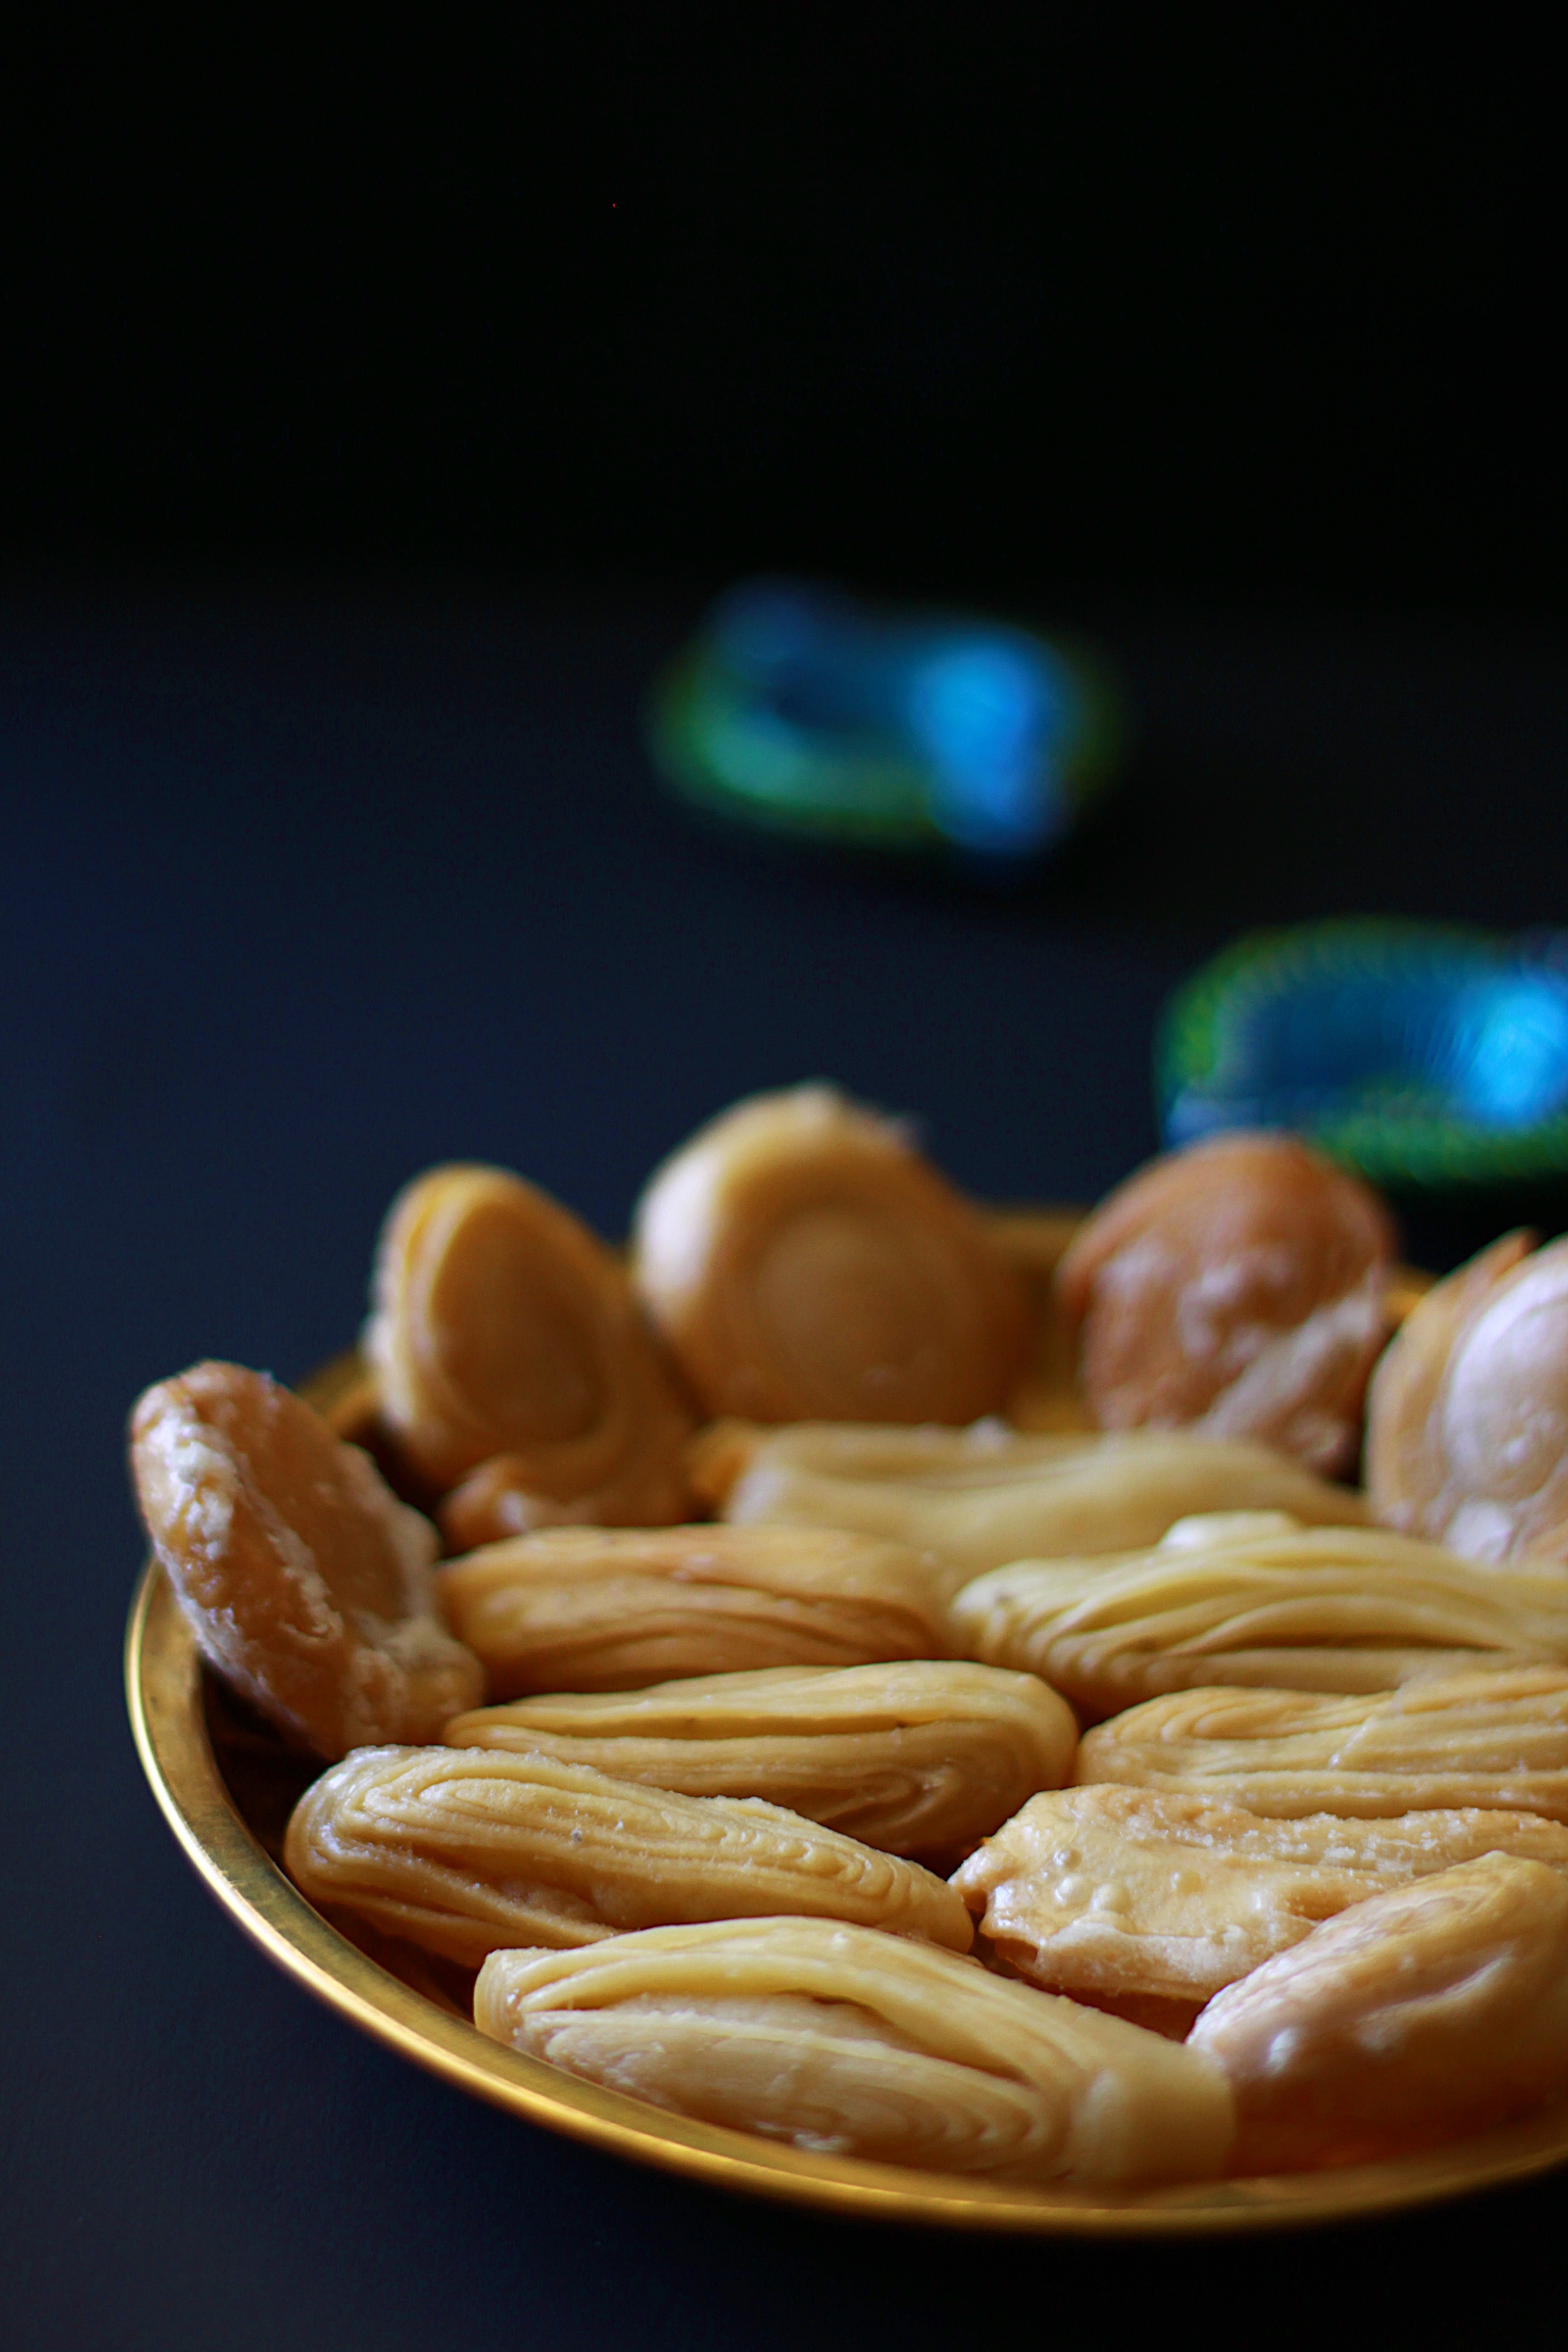
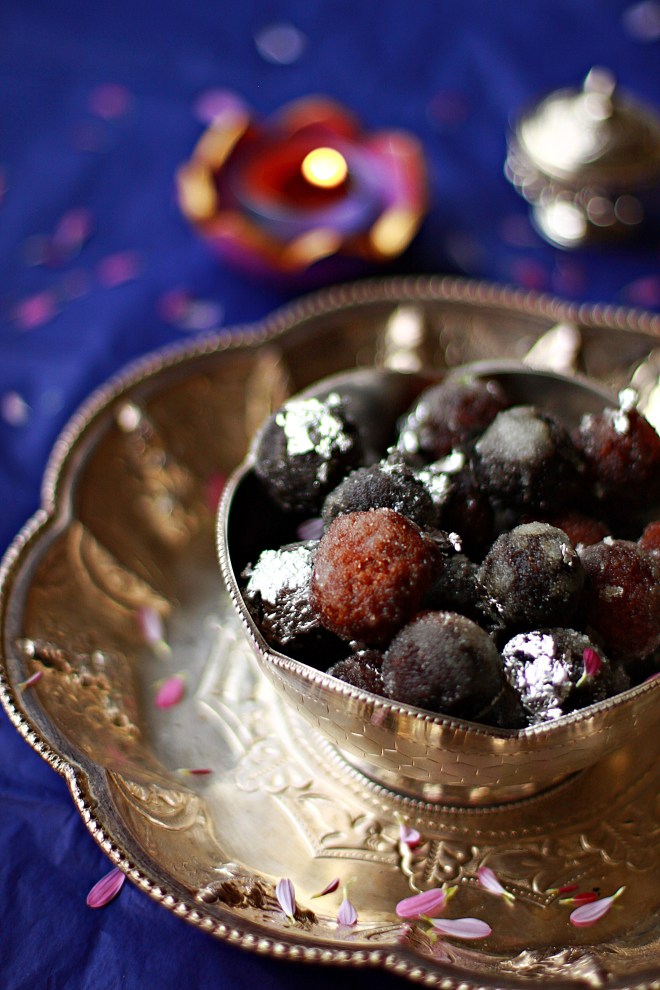
  • Take the jamuns one at a time, roll completely in the sugar and place on a parchment sheet. The residual syrup o n the jamuns help in the sugar coating, Allow to dry.
  • Garnish with silver varq and store in a dry air tight container in the fridge.
  • IMG_5428

Preparation of Sugar Solution:

  • Take 1 1/2 Cups of sugar in a heavy bottomed vessel and add half the water.  Keep stirring on medium flame until the sugar is completely dissolved and it gets slightly syrupy. When you drop the syrup with the ladle, it will slightly fall in a stringy line…but still stay watery. It does NOT need to become one string consistency. Flavor with cardamom powder and  rose essence and still aside.
Naivedhyams/ Festival Offerings. · Sweets

Jangiri/ Emarti – Sweets for Diwali, Holi and pretty much any occasion!

IMG_4982

As a kid I was never too fond of sweets and would shy away from anything that was too sweet and dripping with syrup. The only exception was of course Gulab Jamun, but even that I could never have more than two at any one point.  My all time favourite sweet was always the soft Badushah with flaky centres and sugary yet crunchy exteriors.  Later when we moved to Bangalore, I had the opportunity to visit Adyar Anandha Bhavan and saw the cute mini jangiris and I instantly fell for their size and color! Strangely from that day I was hooked. I enjoy having one of those mini bite sized soft yet sweet jangiris for my instant sugar fix compulsions which would happen right after a heavy sunday lunch! Strangely my kids are like me – one of them loves Jangiri and the other loves Badushah, so I make them both every year for Deepavali.  Jangiri/ Emarti is also a famous delicacy prepared in the Northern parts of India for Holi – the festival of colours.

INGREDIENTS:

3/4 Cup Whole Urad Dhal.

A pinch of Salt.

Orange Food Colour as needed dissolved in 1 Tbsp of Water.

1 Tsp CornFlour.

1 Tsp Rice Flour.

SUGAR SYRUP:

2 1/2 Cups Sugar.

1 Cup Water.

1 Tsp Rose Essence.

1 Tsp Cardamom Powder.

1 Tsp Lemon Juice.

PREPARATION:

  • Soak the Urad Dhal for about a minimum of 3-4 hours at least with sufficient water.
  • Grind in wet grinder/ food processor with as little water as possible.
  • The batter should be light and airy as it would be when you make Dahi Vada.
  • If you feel its a little too runny, add rice flour and corn flour. Mix well as if you are beating the batter so its stays light and airy.
  • Add the orange food color to the urad dhal and  and mix gently.
  • Start making the sugar syrup to single string consistency.
  • Measure out the sugar, add water and keep on stove in medium flame.
  • Keep stirring and the solution will start to boil.
  • In a few minutes, the syrup would have reached single string consistency – When you pick up the ladle and allow the syrup  to drip, it will form a small stretchy thin string.
  • The other option to ascertain single string consistency is to dab a small drop of sugar solution on to your index finger and try to make a string with the thumb. If its stretches in to a thin line, you are done.
  • Switch off flame and add cardamom powder and rose essence and a few more drops of food colour.
  • Add a few drops of lemon juice to the syrup.
  • Set aside.
  • If you have a piping bag for using on cakes, use the medium nozzle and it should work fine.
  • Else take a large ziploc bag and open out completely.
  • Heat up an iron nail and make a hole in the middle of the ziploc bag. We use a heated nail as it would sear the sides of the ziploc and seal it from tearing on pressure.
  • Scoop the batter on to the ziploc and slowly pipe jangiris on to the oil.
  • The oil shd be on medium flame on a constant temperature.
  • Use a skewer and cook on both sides.
  • Remove when crisp and dunk in sugar syrup.
  • Wait for about 5 minutes at least before removing from syrup.
  • Continue and complete until the batter is done.
  • Gorgeous Jangiri/ Emarti is ready to be served.

HINTS:

  1. One of the most important aspect here it to make sure that the urad batter is light and fluffy. This makes the Jangiri/ Emarti absorb more syrup and gives you the right consistency.
  2. Sugar Solution Single String is also extremely  important so if required try it once before on your stove to note the settings. You can make so many different sweets with this consistency – Badushah, Kaju Katli, Boondhi Laddoo, Madatha Khaaja etc.IMG_4976
Sweets

Madatha Khaaja

IMG_4920

Madatha Khaja is  a very new delicacy to me, comparitively as I grew up in Madras all my life. My encounters with any sweets began and ended at home. Madurai amma always made Boondhi laddoo every Deepavali along with Badam Halwa and sometimes rarely Carrot Halwa.  Sometimes a guest who comes home would get us Badushah or Jangiri or  Krishna Sweets Mysurpa and we would all relish it. When Sri Krishna sweets opened up their first branch in Chennai , at T.Nagar near my home, I was super excited. I remember we went there and they offered Badam Milk to all their customers  for at least a week! It was a totally new concept – to allow sampling! You could point to any sweet you wanted, and they would oblige with a small sample. Imagine my joy! I tasted each and every one of them and of course fell in love with each of their unique tastes. I specially remember being totally amazed with their Mysurpa and its instant rich creamy melt in the mouth taste. Their Badam Halwa is also unique in its flavor and color, tainted with the rich aroma of saffron and slathered with generous portions of clarified butter!

Moving to the US after marriage, allowed me to try out unique dishes from other cultures from my own diverse country. I had friends from Andhra Pradhesh, Maharashtra, Rajasthan, Kerala etc and along with that came insights in to their own tastes and delicacies. My good friend L once made Khaja during Deepavali and I fell for its flavour and its flaky layers soaked in sugar syrup! I had to get more of them I knew. Around the same time I saw that many sweet stores in Chennai also started stocking Khaja. It was amazing! But I knew that I wanted to make my own some day! This version was taught to me by a good friend and I was literally sold. It was flaky, sweet, bite sized and looked very cute! Try it and I am sure  you`ll love it!

INGREDIENTS:

1 Cup Maida/ APF

1 Tsp Rice Flour.

1 Tsp Besan.

2 Tsp Ghee/ Oil/ Vanaspati.

A pinch of salt.

6 Tsp Ghee.

Sugar Syrup:

1 Cup Sugar.

1 Tsp Cardamom Powder.

A few drops rose essence.

1/2 Cup Water.

PREPARATION:

  • A wide bowl works best for making this dough – Add all purpose flour, the 6 tsp ghee, a pinch of salt and using enough water, mix into a smooth dough. This dough must rest and stay moist, so cover with a moist kitchen towel/ napkin. Set aside.
  • Prepare the sugar syrup to single string consistency – Add the 1 cup sugar and half the water (1/2 Cup) to a vessel and keep stirring on medium flame. In about 8-10 minutes, you should see that the sugar solution turns slightly syrupy and when you try to drip the solution from the ladle, it forms a string. This is the right consistency. Its imperative that you reach the right consistency for the solution to get syrupy enough to coat the khaja and render it sweet and crystallise over the sweet. This is exactly the same that you would do for the Badushah or Shakkarpara.
  • Flavour the syrup with rose essence and cardamom powder as needed.
  • Combine 1 Tsp Rice Flour, 1 Tsp Besan and 2 Tsp Ghee to form a paste.

IMG_4889

  • Divide the rested dough in to three equal parts and roll them all out in to thin rotis.
  • Use the rice flour besan paste to coat the maida roti on the bottom. Spread it evenly with your finger or a silicon brush.
  • Place the second roti over the first and press uniformly to remove any air bubbles trapped.
  • Coat the second roti also with the rice flour ghee paste.
  • Place the third roti over the second and firmly press to allow uniform surface.
  • Roll the 3 latered roti tightly to form a long log.

IMG_4896

  • Slice about 1 inch pieces from the log and using the rolling pin, press each roll length wise or breadth wise as needed.
  • Fry on medium low heat until the khajas turn golden brown.
  • Dunk the fried khajas in the sugar solution for a couple minutes and set on a clean sheet of parchment paper/ wire rack to cool.

IMG_4901

  • When the khajas cool up, the sugar coating on the top dries up to give it a beautiful sheen!
  • Enjoy Madatha Khajas for Sankranti.

IMG_4911

Sweets

Almost Fudge Like Chocolate Burfi in 15 Minutes or less!

IMG_0939

Chocolate Burfi is one of the easiest, most amazing, kid friendly Diwali Sweets that I have ever made. Although I make Boondhi Laddoos, Badushah, Badam Halwa, and Kaju katli, the kids all time favourite is the Chocoalate Burfi,  the most simplest, most easiest sweet of all. Of course I have no doubts that this is because of a certain ingredient – Cocoa Powder with a capital C! I have tried different versions of it, as its mostly influenced by the Bournvita Burfi! I love the creaminess of the burfi, and sometimes I add tuitty fruity, or rice krispies just for the added crunch! This version is made by my friend Raji from Raks Kitchen and its my all time favourite too! The best thing that it uses the items available in your pantry at all times.

INGREDIENTS:

1 Cup Maida / All Purpose Flour.

1/2 Cup minus 2 Tsp Ghee / Vanaspathi.

2 Cups Sugar.

2 Tbsp Cocoa Powder.

1/2 Tsp Vanilla Essence.

1  Cup Water.

PREPARATION:

  • Grease a tray/ springform cake pan/ stainless steel plate  and keep it ready. The entire sweet takes hardly 15 minutes from start to finish so its easier and prudent to keep all your ingredients ready.
  • Heat a heavy bottomed kadai and add the measured ghee to it.  When its hot, add the all purpose flour/ maida and fry it briskly for a couple minutes. The maida soakes up the ghee and gets fried. Add the cocoa powder and mix. Set aside.

IMG_0911

  • In another heavy bottommed kadai, add the 2 cups of sugar and the 1 cup water. Keep boiling on medium flame until the sugar solution reaches SINGLE STRING consistency.
  • This means that when you lift the ladle and allow the syrup to drop, it will drop to the kadai below in short strings. Another option is to slightly cool the index finger on an ice cube, and deftly swipe the back of the ladle for the syrup, and check the string between your index finger and the thumb. If a string forms, the syrup is done.
  • Switch off the flame and add the fried chocolate maida and a few drops of vanilla essence(optional).
  •  Stir for about 2-4 minutes and you will see that the mixture slowly thickens.

collage1

  • When its resembles a soft chappathi dough, pour on to the greased spring form cake pan/ brownie pan/ stainless steel plate and smoothen with a ziploc cover as shown.
  • Allow it to set for a couple minutes and then cut in to squares.

IMG_0927


IMG_0931

  • Decorate with a cashew/ pista/ walnut.
  • Easy Fudge Like Chocolate Burfi is ready!

IMG_0941

HINTS:

  1.  The same sweet can be made by making it completely Plain Vanilla or splitting it Half Chocoalte and Half Vanilla. One Halloween, I simply used orange food colour on the Plain Vanilla portion that made it look very festive over the brown chocolate layer.
  2. Achieving single string consistency is very important as if you dont reach the right consistency, the burfi would never harden. In case that happens, simply put the whole batter on the gas for a couple more minutes and then transfer to the brownie pan.
  3. If you go over the single string consistency, the batter solidifies very very fast. The best thing would be to see how the consistency of the dough is, and based on that to transfer to the plate.
  4. Keep a timer to see what time it takes on your stove on a medium flame for this quantity of sugar solution to reach single string. If your burfi comes out perfect, note down the time taken and the setting on your stove for future use. We use single string consistency for so many sweets – Badushah, Boondhi Laddoo, Motichoor Laddoo, Kaju Katli etc.
Sweets

Easy Kaju Apples – Elegant & Appealing Desserts!

IMG_4967

Deepavali is always a wonderful time to spend with family, relax and be thankful for all the blessings that we have in our life. It`s a celebration of good over evil and one which is celebrated in all parts of the world.  I remember the times we used to pitch it and help with my grandmother to prepare all kinds of swweets and savouiries. I always had the role of rolling the boondhi in to Boondhi Laddoo balls. I also had the job of cutting out the diamonds for Special Madras Mixture. It was awesome to be able to partake all the festive feeling in the home. Now, far away from Madras, albeit only in spirit, I try to relive those moments with my kids. My daughter S helps me with rolling Laddoo Balls, and with making Kaju Katli. I had been wanting to make this Kaju Apple as a slight change from the regular Kaju Katli. You pretty much do the same thing, except that you shape these in to beautiful little apples, and involve the kids in painting them red and placing the cloves as the little stalk. Your own Deepavali DIY Project! Cute yet elegant!

INGREDIENTS:

1 Cup Cashew Nuts.

1/2 Cup Sugar.

1/4 Cup Water.

1-2 Drops Apple Essence(Optional)

1 Tsp Ghee to grease your hands before kneading .

1 Tbsp Saffron/ Yellow Food Colouring.

A few drops of Red Food Colouring.

A few drops of Green Food Colouring.

Handful of Cloves.

One Paint Brush.

PREPARATION:

  • The first step is to pulse room temperature  cashews in to a fine powder. In many places, people store all their nuts in the fridge or freezer to prevent it from becoming rancid. When you plan to make Kaju Katli or the Kaju Apples etc,  keep the cashews out for at least 1-2 hours so they come down to room temperature. When they are ground cold, the heat from the mixer causes them to stick together and the powder is not as free flowing and fine.
  • Take the measured quantity of cashew nuts and pop them in the mixer jar. Grind them steadily until it becomes a fine powder.
  • Take two small glass bowls and add a few drops of red food colouring in one, and a few drops of green food colouring in the other.
  • Soak the saffron strands in the 1/4 cup water required to make the sugar syrup.
  • The next important step is bringing the sugar solution to “single string” consistency. This is needed for Boondhi Laddoos, Kaju Katli, Badushah, Mysore Pak  and many other sweets.
  • Take a wide mouthed heavy bottomed kadai and add a heaped 1/2 cup of organic/ regular white sugar. Top it with 1/4 cup of water( filter out the saffron or if you dont prefer the smell of saffron simply add just a few drops of yellow food colour) and set it on the stove on medium flame. Keep stirring the mixture on and off and after about 5 minutes you should see it bubbling and frothing. Slowly the sugar solution moves to a single string consistency.  To check if the sugar solution has reached the required consistency, take a little of the syrup in the back of your ladle and try stretching it between your index finger and thumb. If this forms a fine string, then the required consistency is reached. This is a very important step and the coming together of the katli rests on the single string consistency.
  • Add a few drops of the sugar syrup on to the cup with the red food coloring. Add about a tsp of canola to it and mix.
  • Lower your flame to SIM and tip the ground cashew powder in to the kadai and keep on stirring until it reaches a slightly thicker mass. It would be still a little sticky but will the sugar will start hardening rapidly, so do not worry. It should look like sticky chappathi dough.
  • Switch off the gas and remove from the heat. Wait for about 4-5 minutes.
  • Clear a clean surface to work on and grease it with a little ghee.
  • Now transfer the cashew dough to the greased surface and knead it gently with greased palms. This step is important to get a shiny smooth pliable dough. It just needs a little time to work on the dough. If you feel its still sticky, try adding a few drops of ghee and continue working on it. You could use disposable gloves if you feel its too hot to handle.
  • The dough should get smooth and shiny on the outside and get in to a pliable round ball.
  • Keep the following ready near your work station: – Cashew Dough Ball, Red Food Color Syrup, Green Food Color mixed with a few drops of oil, cloves, ghee, a skewer and a greased plate to set the “apples”.
  • Shape the cashew dough in to round smooth ball and set aside on the plale. Continue and complete the dough by shaping them in to balls.
  • Press a small depression on the head of each apple.

IMG_4947

  • Pick up an apple with the skewer and paint the red food colour all around the apples saving the depression on top.
  • Colour the depression with a hint of the green food colour.
  • Gently stick the cloves on to the hole created by the skewer.
  • Just before serving, brush them all with melted ghee/ oil for a natural shine.
  • Easy Kaju Apples are ready and make an excellent dessert for a Diwali party, or a birthday party.

HINTS:

  1. There are little tips and tricks that are part of any cooking process and they sometimes can make or break the dish. In this case, having room temperature cashews are important.
  2. For first timers, the sugar solution sometimes can get tricky, Its better to make this over a medium low flame when there is more time to check and react.
  3. If you have gone over the single string, there is less time to work on the dough as the sugar in the cashew dough solidifies very fast.
  4. The last tip is to make sure that the dough gets smooth and pliable. IF the sugar solution is single string then this should not be a problem. Knead the dough well with a few drops of ghee when its still warm.
  5. Keep all ingredients ready by your work station ass the whole process is done when the cashew dough is still warm.
  6. Please leave your comments on this post, with your observations and here`s to wishing you a Happy Deepavali.

IMG_4964

Sweets

Aval Laddoo / Poha Laddoo ( Beaten Rice Laddoo flavoured with cardamom and nuts.)

IMG_4783

Deepavali, is one of the most important festivals all over India and every community have a different way of celebrating the festival of lights. It signifies new beginnings for many in the northern part of India. In the southern part, Deepavali is celebration, new clothes and of course so many many varieties of sweets and savouries. Families make sweets and share it among their friends and relatives. I always make Madras Mixture as its a family favourite.  Boondhi Laddoo, Jangiri, Badushah , Kaju Katli, Badam Halwa and Gulab Jamuns almost always figure on our list to make for Deepavali. This time I am adding a very simple easy sweet thats super easy and quick to make. It`s a great idea to make it for potlucks and dinner gatherings during Deepavali.

INGREDIENTS:

1 Cup Beaten Rice/ Poha/ Aval Thick.

1/2 Cup Sugar.

2 Tbsp Broken Cashews.

2 Tbsp Pistachios.

6-7 Cardamom Pods.

1/4 Cup Tuitti Fruiti.

To Fry:

1/4 – 1/3 Cup Melted Ghee.

6-8 Dried Raisins.

4-5  cashews broken in to small pieces.

PREPARATION:

  • Measure out the poha and make sure it has no impurities. These days packaged Poha comes quite clean and without much impurities.
  • Dry roast the poha for a few minutes on medium low flame until the poha turns a dull golden colour. Allow to cool.
  • Add sugar, cardamom seeds, cashew, and pistachios and grind to a powder. Transfer to a bowl.
  • Powder the roasted poha finely  and add to the bowl.
  • Add the tuitty fruity and the raisins to the ground powder.
  • The powder would smell heavenly because of the addition of cardamom seeds.
  • Add melted ghee to the ground powder and shape in to balls.
  • Add a few drops of ghee to your hand to help shape the balls.
  • Do not add too many raisins and cashews as this might make shaping the laddoos difficult.
  • Easy Aval Laddoos can be made in a flash and they are very delicious.

collage

Sweets

Fruit Kesari (Semolina Halwa with fruits and nuts)


IMG_4683

Think of the word “Sweets” and my mind flashes to the variety of Indian sweets that have been adapted and modified and borne out of the so many different cuisines and regions in India…Since Sugarcane has been growing in India for thousands of years, the art of refining sugar was invented there. From its simplest most unrefined form, to the pure refined crystallised forms available in branded packets, we have come a long long way. No other country has the multitude of sweets like the way India does. Milk based sweets like Gulab Jamun, Rosgullas, to the ones made with all purpose flour, made with khoya, with urad flour, condensed milk, besan, milk powder, coconut, the list is simply endless.

My personal favourite has been the most easiest of them all – Rava Kesari. My all time favourite has been the Pineapple Kesari served at weddings and at Sangeetha Restaurants. This one is a variant of the rava kesari and is also served at south indian tamil weddings. Fruit Kesari has a distinctive flavour as it does not have edible camphor or the cardamom powder. The aroma of the fruits in it, itself endears to the flavour of this sweet. This is a version by Revathy Shanmugham, which I had seen in a TV show long ago and noted it handwritten in my little recipe diary. This month for the Shh Cooking Challenge, my secret ingredients given by Priya Suresh, was a fruit and a nut. My secret ingredients were Green Grapes and cashew nuts. Try it and you will love its simple yet robust flavours.

INGREDIENTS:

1 Cup Rava Fine.

2 Cups Sugar.

2 1/2 Cups Water.

1/3 Cup Finely chopped pineapple.

1/3 Cup Finely chopped apples.

1/3 Cup Finely Chopped Grapes (Green).

3 Tbsp  Oil.

2-3 Tbsp Ghee.

A pinch of salt.

1 Tsp Pineapple Essence.

8-10 Cashew Pieces.

10 Raisins/ Sultanas.

PREPARATION:

  • Chop the pineapple, apple and green grapes in to really small pieces and place them in three cups. Add a tbsp of sugar on to each of the cups and mix it in. This will coat the fruits with sweet and also remove the undesirable tartness in certain fruits. Keep it that way for about 30 minutes.
  • Take a wide mouth heavy kadai and add the oil and a tbsp of ghee. Fry the raisins and cashews until the raisins get plump and the cashews fry to a golden colour. Drain out the excess oil and remove the raisins and cashews.
  • In the same kadai, add the 1 cup of rava and roast on a medium low flame for a couple minutes until the raw smell is gone. Remove from kadai.
  • Add the 2 1/2 cups water to the kadai and allow to boil.
  • When it comes to a rolling boil, slowly tip in the roasta rava and stir it with a whisk/ladle on a medium low flame until the rava gets all mixed in.
  • The rava absorbs the water and rapidly cooks to resemble upma. At this point, add the measured 2 cups of sugar.
  • As the sugar melts, the rava gets watery and slightly lumpy. Keep stirring and dissolving the little lumps until the mixture gets smooth.
  • Add the chopped fruits – pineapple, apple, and green grapes to the mix, pineapple essence, any food colouring if needed and a small pinch of salt.
  • Add a spoon of ghee now and then and keep stirring until the kesari reaches the desired consistency.
  • Garnish with fried cashew nuts and raisins and serve Hot!

IMG_4682


Naivedhyams/ Festival Offerings. · Sweets

Quick & Easy Nei Appam – No Grinding, No Fuss.

IMG_4396

“Cooking is like Love; It should be entered in to with abandon, or not at all” 

Cooking has always been a wonderful way for me to express my ramblings, except otherwise when I do it on paper! Many days when I feel upset or a little down, cooking has always been therapy. It`s also the thought that there are people I love, who enjoy eating what I cook! Festivals always always make me extremely chirpy and happy as I love succumbing in to the rituals of a tradition hundreds of years old, including  my kids in to explaining the reasons behind such time tested traditions, dressing up in traditional attires and jewellery, and of course the food…The Food!!! Every religious celebration has very different offerings, with its own significances.  Chakkara Pongal and Venn Pongal for Pongal, Nombu Adai for Karadaiyar Nombu, Kozhukattais for Lord Ganesha, Cheedai and Murukku for Lord Krishna on the celebration of his birthday, different Sundal Varieties for Navarathri and so on and so forth. Nei Appam is one such traditional preparation that we make for Karthigai Deepam, Deepavali, Avani Avittam, Aadi Perukku etc. This is a quick fix version when you dont have the time to soak raw rice and grind. I still prefer the traditional method, but this was something that my MIL taught me to do whenever I have not planned it in advance.

INGREDIENTS:

1 Cup Rice Flour.

1 Cup Wheat Flour.

11/4 Cup Grated Jaggery/ 11/2 Brown Sugar.

1/4 Cup Finely chopped coconut slivers. (Optional)

1 1/2 Tsp Powdered Cardamom.

2-3 Pinches Baking Soda. ( 1 Ripe Banana Mashed)

1 1/4 – 11/2 Cups Milk.

PREPARATION:

  • Quickly measure out the dry ingredients  – Rice Flour, Wheat Flour, Jaggery/ Brown Sugar, Cardamom, Baking Soda and pop them all in to a open mouthed bowl.
  • Whisk it and mix all the ingredients with a spoon.
  • If you want to use a mashed banana instead of the baking soda, add the mashed pulp to the bowl.
  • Now warm up the milk and slowly pour in to the bowl.
  • Using a whisk, mox it all in little by little. Start by pouring 1 cup and add more as you need little by little.
  • The consistency of the batter should resemble a thick idli batter. Not too runny.
  • Allow it to sit on your counter for about ten to twenty minutes.
  • Take the tradional Appam Pan with the hemispherical indeentations or use the Ebelskiver pan available in the specialty kitchen stores like Williams Sonoma, Sur La Table and even Amazon.
  • Fill up the depressions with oil/ ghee and set on the stove on medium heat.
  • Once then oil/ghee is hot enough, pour out the batter with a ladle slowly to fill about 75% of the depression.
  • This should take about 2-3 minutes to cook on one side. Using a knife, or a skewer, tip it over to get the other side cooked.
  • When the oil stops bubbling, carefully drain the appams on to a clean dry container lined with a napkin to drain out the excess oil.
  • Continue until all the batter is complete.
  • Easy Nei Appam is ready with just about ten mins of prep work!