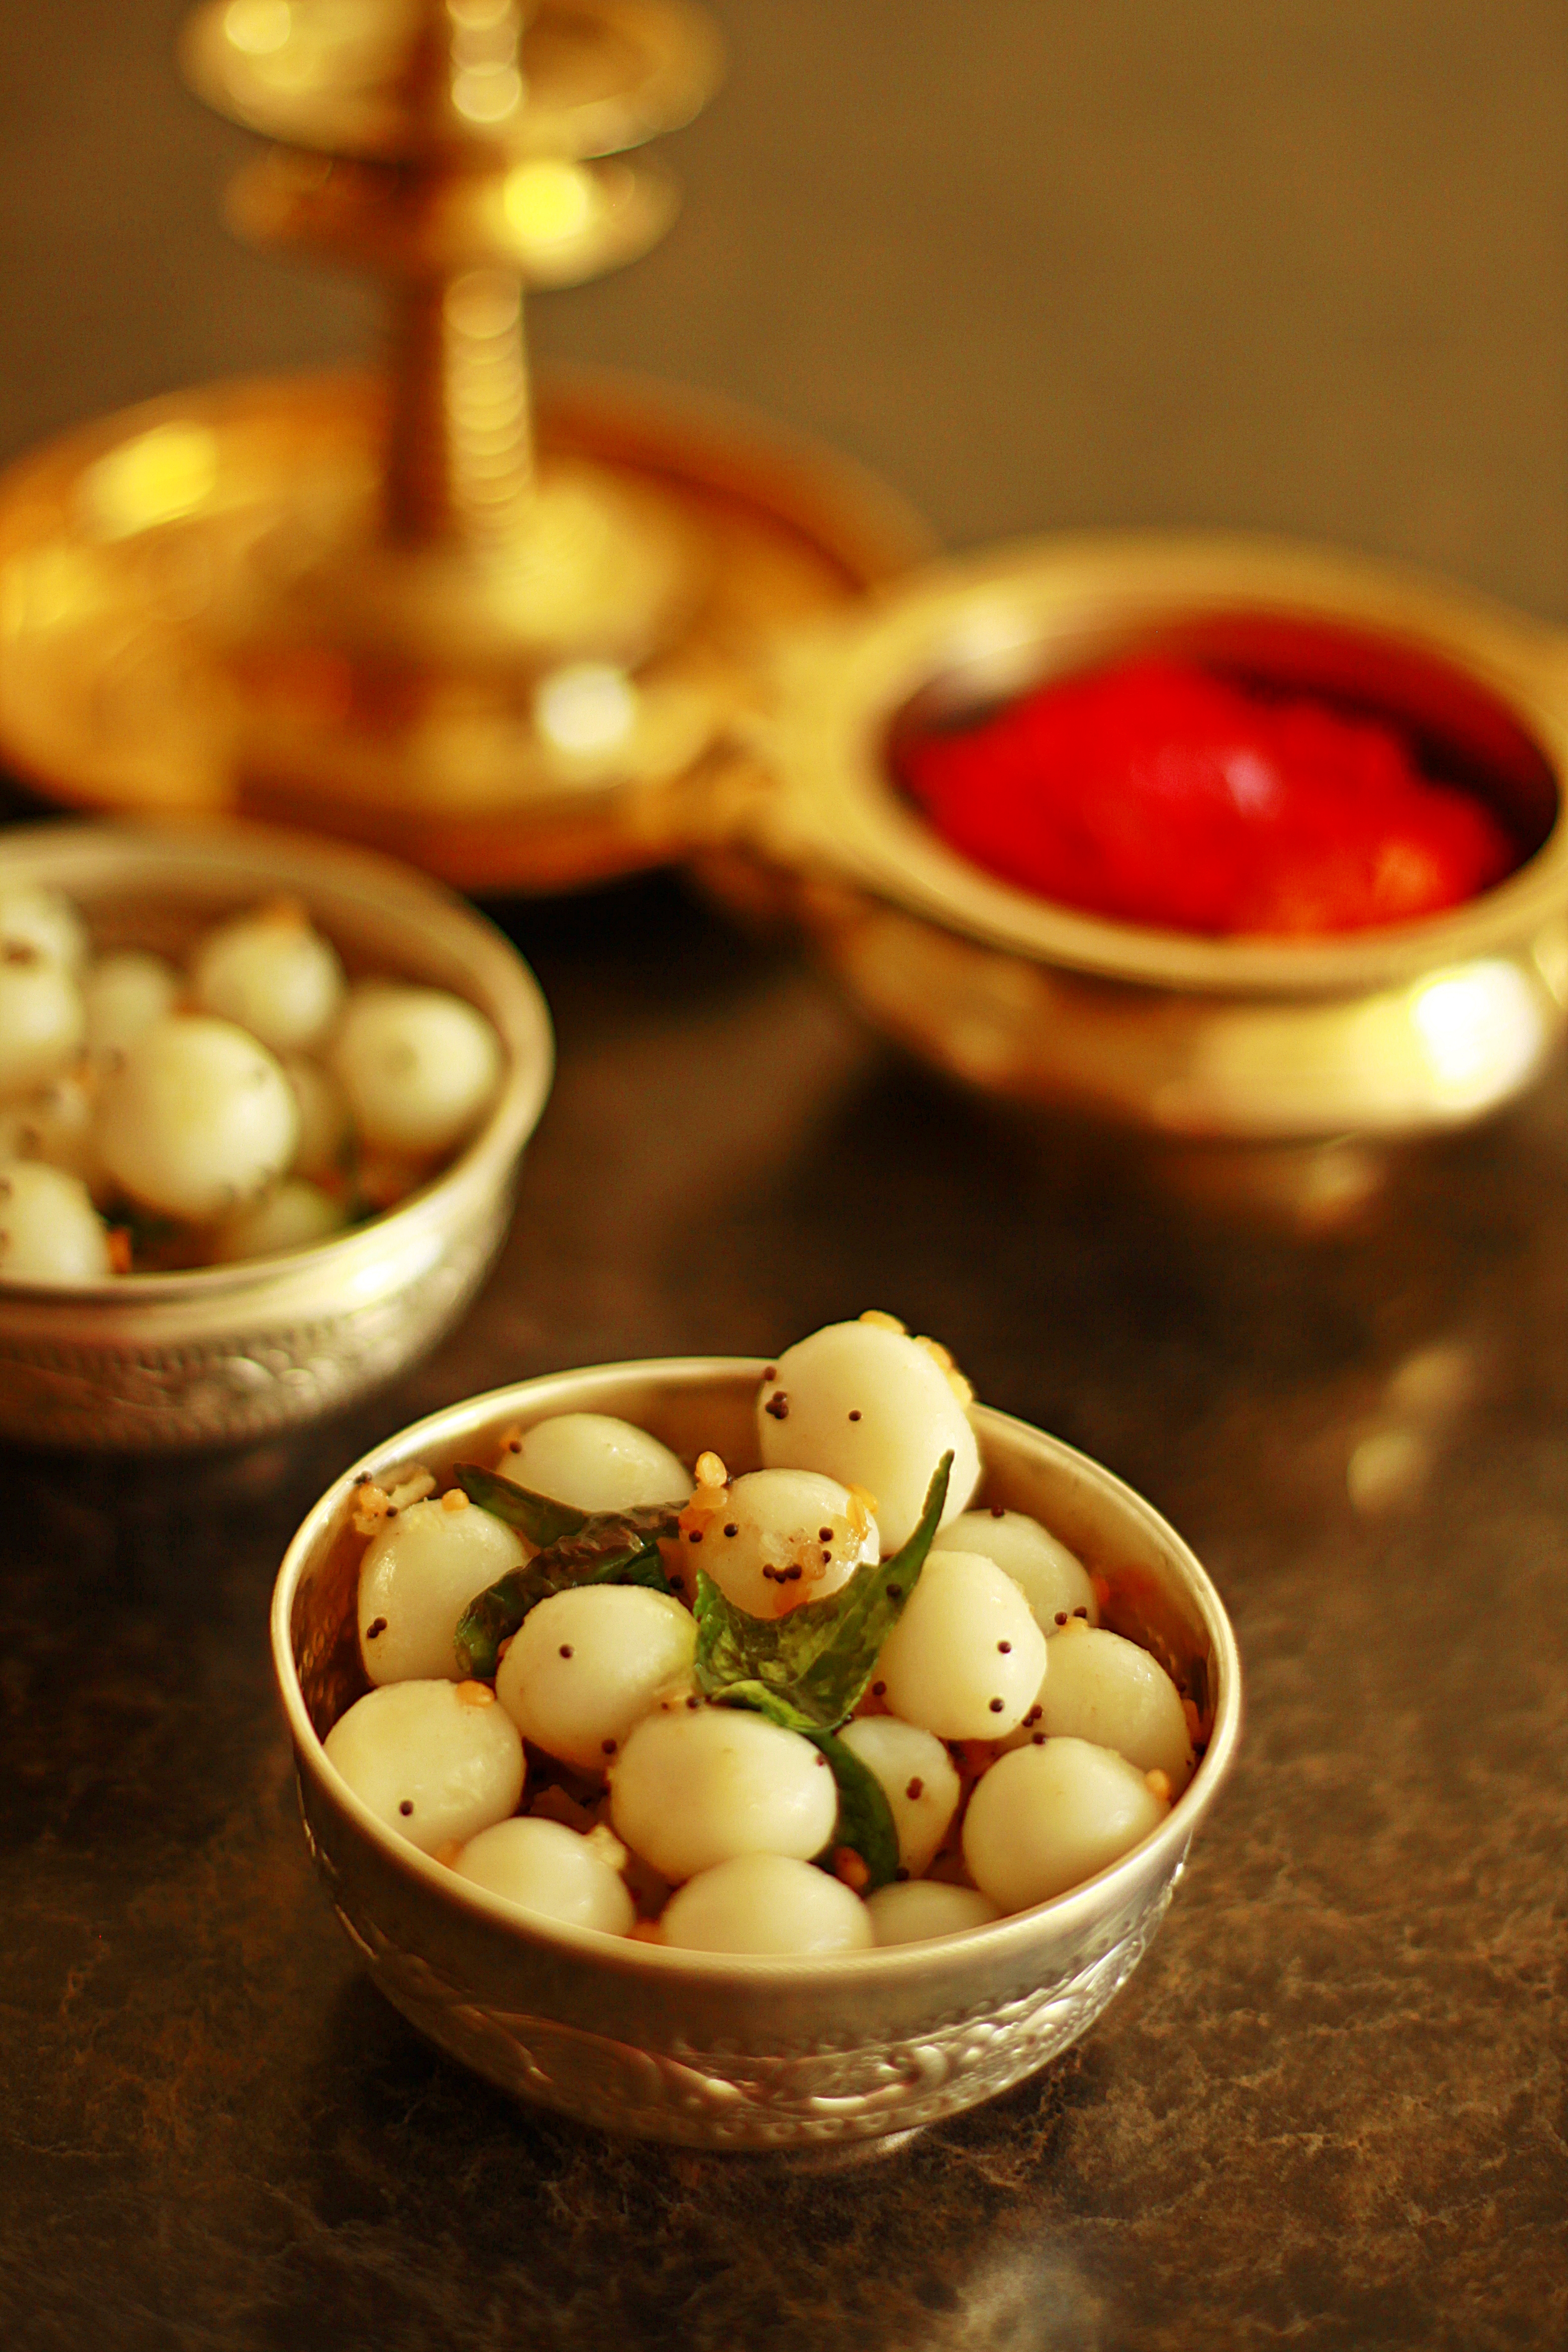
Today being the second day of Navarathri and a weekend, I thought Moong Dal Sundal would be a good choice. Moong Dal is a good source of high levels of protien and contributes only a very low percent of fat calories to the diet. Moong Dal Sundal would be an excellent choice as an evening snack for kids as well as a mid day snack for pregnant women and people on diets. It cooks very easily unlike the other varieties of protien/lentils.
INGREDIENTS:
2 cups of Moong Dal.
Water to cook the dal.
Salt
Hing.
Pinch of red chilli powder.
1/3 cup of fresh grated coconut.
5-6 green chillies or according to taste.
Seasoning: Mustard, Curry Leaves.
Oil.
PREPARATION:
Moong Dal cooks very easily so there is no need to soak ahead.
Take a vessel and put in the moong dal. Then add water to just cover the moong, salt and a pinch of red chilli powder.
Allow it to cook on medium flame for about 6-7 minutes. You will see that the moong with absorb the water and slightly grow in size.
It is important that you do not overcook the moong as it tends to get mushy.
Drain out the water with the help of a collander and set aside to cool down for 10 minutes or so. If needed, spread it out on a plate so it dries out the water a little.
Meanwhile pulse the coconut and green chillies in a mixer to a rough mix.
Take a kadai, add 2 spoons of gingely/coconut oil and allow to heat.
Season with mustard, hing, curry leaves and then add the cooked moong dal.
Immediately add the pulsed coconut-chilli mix and give it a slow mix.
Use your ladle to carefully mix in the ingredients and flavouring. Too much handling could again break the moong and make it mushy.
Garnish with chopped cilantro.
Offer Neivedhyam to Goddess Devi and partake of the prasadam.
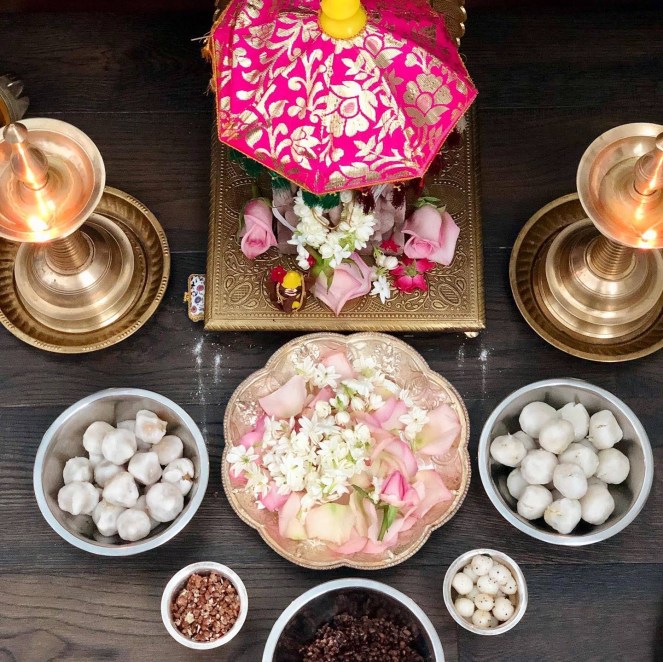
Today being the very first day of Navarathri and also the first saturday of the tamil month of “Purattasi”, it was an auspicious day completely. Today`s Neivedhyam was:
Every year we loved and enjoyedVinayaka Chathurthias it was always the first of the many hindu festivals. It heralded the onset of the other religious festivals likeSri Krishna Jayanthi, Navarathri, Saraswathi Pooja, Vijayadasami, Deepavali, Karthikkai Deepam, Thiruvadharai etc. Every festival was important in it`s own right and had its own religious significance. When we were little kids, collectively the festival season excited us for many small reasons – the family gets together and everyone celebrates, new clothes are bought for one and all and of course the great eats….the “Bhakshanams”, the multitude of sweets and savories that the women of the family get together and plan to make for the festivals. Sometimes, friends would also join in and synergise efforts and share the results.
Some of the more important festivals are Navarathri and Deepavali. These two festivals are both joyous in their celebration of good over evil and in its bringing together people to unify as one, in front of the Lord. Boondhi Ladoo has always been a favourite of mine as I used to watch Madurai amma make it every Deepavali. The most important utensil required for this is the Boondhi Making Ladle- or Boondhi Jaranior Boondhi Karandi , and madurai amma had hers made in heavy iron. I love all her utensils – boondhi karandi, appa kaaral, kadai , all of them heavy and solid and gleaming from the loving washes over the years with soaked tamarind and lemon.
I saw my Boondhi Karandi at Patel`s on Devon Avenue in Chicago, and I had to make it mine. I was waiting to try it out and see if the Boondhis were coming out ok and it was pretty good. A great buy for $7.99 I would say!!!
INGREDIENTS:
2 cup Besan.
1- 11/2 cup water for the Besan.
2 cup Sugar.
3/4 cup water for the syrup.
Chopped Cashews.
Powdered Cardamom.
Pinch of Edible Camphor (Pacha Kalpooram)
A little bit of milk for making Ladoo Balls.
A pinch of saffron soaked in warm milk.
4 or 5 Cloves.
1 Tbsp Ghee
PREPARATION:
For the first time ladoo makers I have tried to provide a lot of little tips, where I found I used to make mistakes.
The first step in the preparation of Boondhi for the ladoos is making the besan batter. It`s important to “try” to make boondhis or drops which are spherical without a “tail”. The tail would come if the water content in the besan is a little more then necessary.
The second point to be noted is that the boondhis should not be fried to a point where they are too crisp. This would also not render the easy making of ladoo balls.
Take a bowl and add the seived besan making sure that there are no clots.
Add about 1-1 1/2 cup water and using a whisk, stir it all in briskly. The whisk also helps in the uniform mixing without clots. If needed you might have to add 1-2 tbsp of water more. This is how it should look like. The consistency should be smooth but not too runny. it should be a pouring consistency.
Gently take a spoon of the besan batter and pour on to the perforated Boondhi Ladle, holding it over the hot oil. The little drops of boondhi fall on to the oil by itself through the slotted ladle.
Boondhi in hot oil.
When the boondhi hits the oil, it will immediately hiss and get fried. As soon as this sound stops, gently ease out all the boondhis from the oil, drain and set aside.
Repeat and complete until all the besan batter is used up.
the same time keep a heavy bottomed vessel on the stove. Add the 2 cups of sugar and the 3/4 cup water. Give it a quick stir and keep it on medium on the stove.
Use a spatula and keep stirring and all the sugar is dissolved and the mix starts boiling.
Stir the sugar syrup now and then until it reaches “One Stick” consistency. This means when you take a little of the syrup in your index finger and lightly tap it on the thumb, it should pull to a single string.
This would vary depending on the size and thickness of the vessel you use for the syrup, LPG/Electric stove, and the kind of appliance, different kinds of sugar etc. I used C&H White Sugar from the store.
Switch off the heat. Add 1 tbsp of ghee, cashews, raisins, edible camphor, cloves and food color if required.
Now add the fried boondhi and mix all these well in to the sugar mixture.
Allow to rest for 30 mins.
Take a large ladle of this mixture and gently pulse grind this in a mixie jar and add this back to the boondhi mixture. This helps with the binding.
Now spoon a ladle on to your hands and gently shape in to a ball. I use a little milk to wet my hands before I mould them in to firm ladoos.
This quantity of besan yielded around 25 medium sized ladoos.
Soft and succulent Boondhi Ladoos.
HINTS:
Try out the boondhi ladle with the batter to see how the batter falls. You can keep the boondhi ladle on the mixed besan batter itself to see results. Then adjust the consistency of the batter.
Do not allow the boondhis to fry for too long as this would make them too crisp. I did this once and I had to be satisfied to eat plain sugared boondhis as I could not bring them to have any cohesiveness to make balls!!
The sugar syrup has to be a syrup consistency, which is slightly thicker than water. Making it too thick would mean , difficult times ahead. Simply add a little more warm water and thin out the consistency as required.
Do not add too much of cloves or edible camphor as this would spoil the taste and aroma of the ladoos.
Ladoo is not a difficult sweet to make, if you follow these simple hints. Try them out at least once before the festival, to note down the timings and results in your kitchens.
Sending these soft and sweet ladoos to WYF – Festive Treats Event happening at SimpleIndianFood.
Uppu Kozhukattai is the prasadam for Vinayaka Chathurthi along with the Vella Kozhakattai and Ammini Kozhakattai. I love the Uppu Kozhakattai as its almost like a paruppu usili filled in the rice balls and then steamed in the pressure cooker. The Uppu Kozhukattais, I always felt were comparitively more easier to make as one makes the balls ahead and then stretch the outer dough over the balls to cover it.
As always the first part is the Outer Dough which is the base of the whole preparation. Keep this prepared Outer Kozhukattai Dough covered tight to preserve the moisture and warmth as this is imperative for easily working on this dough.
Soak the Bengal Gram and Urad Dhal for about 3 hours just as you would for Paruppu Usili.
I have used the proportion of 1/4 cup of bengal gram to 1/2 cup of urad dhal. If you want more numbers, you can extrapolate it to double the quantity.
Grind the bengal gram and urad dhal in the mixer with salt, green chillies and curry leaves with as little water as possible. The water added is important as this affects the final consistency of the urad dhal crumble.
It should not be ground too smooth but a little short of that, a little coarse. Add hing and a spoon of oil and mix it in well.
Place a seasoning kadai on the stove, add oil and mustard, When the mustard splutters, add it to the ground paste. Mix and in a few minutes add the grated coconut. (This is optional).
Ground Paste in Idli Plates ready for steaming.
Grease 1 or 2 idli plates and fill the firm ground paste in the idli plates. Steam in the pressure cooker for 12 – 15 minutes. Switch off gas and remove the plates and allow to cool.
Transfer the cooked dhal idlis to a plate and pour 1 spoon of coconut/gingely/canola oil on them and slowly crumble them with your oiled fingers.
Try to do this when its still warm.
Now with the help of a oil greased hands again, press the crumbles in to 1 inch balls. Keep covered in a container to retain the moisture.
Salt Poornam made in to balls.
Follow the usual procedure of making little cups with the Outer Dough.
Place a urad ball in to the little modhak cups.
Little cups for filling Poornam
Close like a coconut and make a little tuft resembling a coconut.,
Keep your hands oiled when you are working with the Outer Dough.
Place the prepared modhaks in greased idli plates and steam in the pressure cooker for 12 minutes.
Switch off stove, and after a few minutes transfer to a casserole.
If you are not able to shape the crumble in to balls, do not fret. Simply pop a spoon, and fill in your modhak cups with the crumble and continue as usual to seal them. Making them in to balls makes it more easier to handle as there is no binding agent as such except the urad dhal.
If you have exhausted your Ulundhu balls and left with the Outer Dough, proceed to make in to little balls and make Ammini Kozhakattais.
If you are left with the Urad dhal balls, simply crumble and make Usili with beans or cabbage.
Sending delicious Ulundhu Kozhukattais to Festive Food Event happening at Purva`s Daawat.
The Vella Kozhukattais or the sweet modhakas is an all time favourite of mine since I was a little girl. When I was a little girl, we lived in a big joint family so any festival was celebrated with lots of fun and fanfare. Every year for Vinayaka Chathurthi, Madurai amma would make us the outer dough for us to work on and my sister D and me would make little cups out of the dough, fill it with the “Poornam” and arrange it neatly in little idli plates for steaming. Although we would be longing to eat the neivedhyam, we would have to wait until the entire pooja was over and we would get only 3 or 4.Mum would always promise me that she would make it for us on another day so we could have it to our heart`s content. Of course, that day would never come until the next Vinayaka Chathurthi the next year…
Now, my daughter S loves them so much that I decided to make it whenever possible, as often as I can. For instance every month for Sankatahara Chathurthi to offer it as Neivedhyam to the Lord. Sankatahara Chathurthi is an auspicious day dedicated to Lord Ganesha in a traditional Hindu lunar month. It falls during the waning phase of the moon – fourth day after the full moon. Staunch Ganesha devotees observe a fast on the day.Fasting on Sankatahara Chaturthi begins at sunrise and ends after evening puja or after sighting the moon. Ganesh Temples conduct special pujas on the day.It is widely believed by Ganesha devotees that observing Sankashta Chaturthi will bring material progress, happiness and fulfillment of desires.
3/4 – 1 cup of grated jaggery (Depending on brand, degree of sweetness etc)
1 tsp of powdered cardamom.
1 tbsp of milk.( If needed)
2-3 tbsp of water.
PREPARATION:
Always prepare the poornams or filling ahead as the outer dough has to be made last just before consolidating the Kozhukattais.
In a kadai add the jaggery and very little water about 2 Tbsp and 1 tbsp milk and allow to melt.
When the jaggery is well melted add the fresh grated coconut and mix well.
Also put in the powdered cardamom and stir in well until the mixture leaves the sides.
I prefer to make my poornam a little thicker by keeping it on the stove for a longer time to enable me to make them in to balls.
Cool the poornam filling and it will be easier for you roll them in to little balls.
Keep the Kozhukattai outer dough prepared and ready as per instructions here . Keep it covered under a moist cloth and over that a lid to preserve the moisture and the warmth.
Create an assembly line with the Poornam balls, outer dough, greased idli plates and a small cup having 2-3 spoons of coconut oil.
Keep everything ready before you start as the outer dough should never dry out.
Grease your palms with coconut oil and then take a ball of the outer dough and smoothen it between your palms.
Make a little depression with your thumb and make it in to the shape of a diya with smooth sides.
Fill the depression with the coconut jaggery poornam, and close the edges and seal it with your fingers.
Continue until you finish the poornam filling.
Ready to be steamed
If you have the outer dough left over, you can add a little more salt and make delicious Ammini Kozhukattais.
Arrange all the prepared modhakams for steaming on the greased idli plate.
Steam it in the pressure cooker for 10 – 12 minutes just as you would do with idlis.
Remove from steam, transfer to a casserole or container and enjoy after offering it to Lord Ganesha.
Wishing all my readers a very Happy Vinayaka Chathurthi.
HINT:
If your sweet poornam/filling is not as thick as you would like it to be, dont fret. Allow it to sit on the stove for a couple of minutes more and add 1 spoon or two of wheat flour. This will bind them together.
Another option is to make rough balls and pop them in to the refrigerator for a few minutes. This will automatically firm them up.
Before steaming the prepared Modhakas, keep them covered as if they exposed to the air etc, they get dry and crack up. This might render the poornam to seep out during steaming.
Coconuts are always a delicacy for me and we are pretty lavish in our preparations on festivals and Neivedhyams. When I wanted to prepare a Payasam for Avani Avittam, I had to decide between Paruppu Payasam and then a rice based payasam. One of my mom`s favourites has been the simple Cooker Payasam cooked in a pressure cooker with simply rice and milk. Today I wanted to add another ingredient and make the kheer more richer and tastier. I was also enthused on seeing Viji Jeyakumar`s Rice Coconut Payasam and wanted to try something similar. The ensuing dish was extremely tasty and delicious and my husband actually had a second helping of it!!!
The ingredients are simple and wholesome and available in your pantry at all times. One suggestion is to use natural and fresh ingredients alone, as the taste is distinctive and particularly delectable.
INGREDIENTS:
2 cups of Whole milk.
1/3 cup of light coconut milk.
1/2 cup of fresh grated coconut.
1/3 cup of Raw Rice.
1/2 cup of grated jaggery.
Powdered Cardamom Seeds.
3 spoons of ghee.
Cashews.
Raisins.
Saffron Strands for garnishing.
PREPARATION:
Soak the rice for about 30 minutes and when done pulse in the mixer for a few seconds.
To the mixer, add the grated coconut, elaichi and the coconut milk and grind to a paste. The rice kernels will be coarsely ground and that is perfect texture for the payasam.
Pour this in to a heavy bottomed vessel, add the 2 cups of milk and allow the rice to slowly cook in the rich milk mixture.
Maintain the flame on medium low and keep stirring the vessel with a whisk. It will slowly thicken.
Meanwhile, add the grated jaggery to a vessel and pour just enough water for it to be dissolved.
Keep on the flame and when melted add it to the milk mixture in the heavy vessel.
Stir for a few more minutes until the desired consistency is reached.
In a seasoning ladle, add ghee, and fry cashews and rasins and add to the payasam.
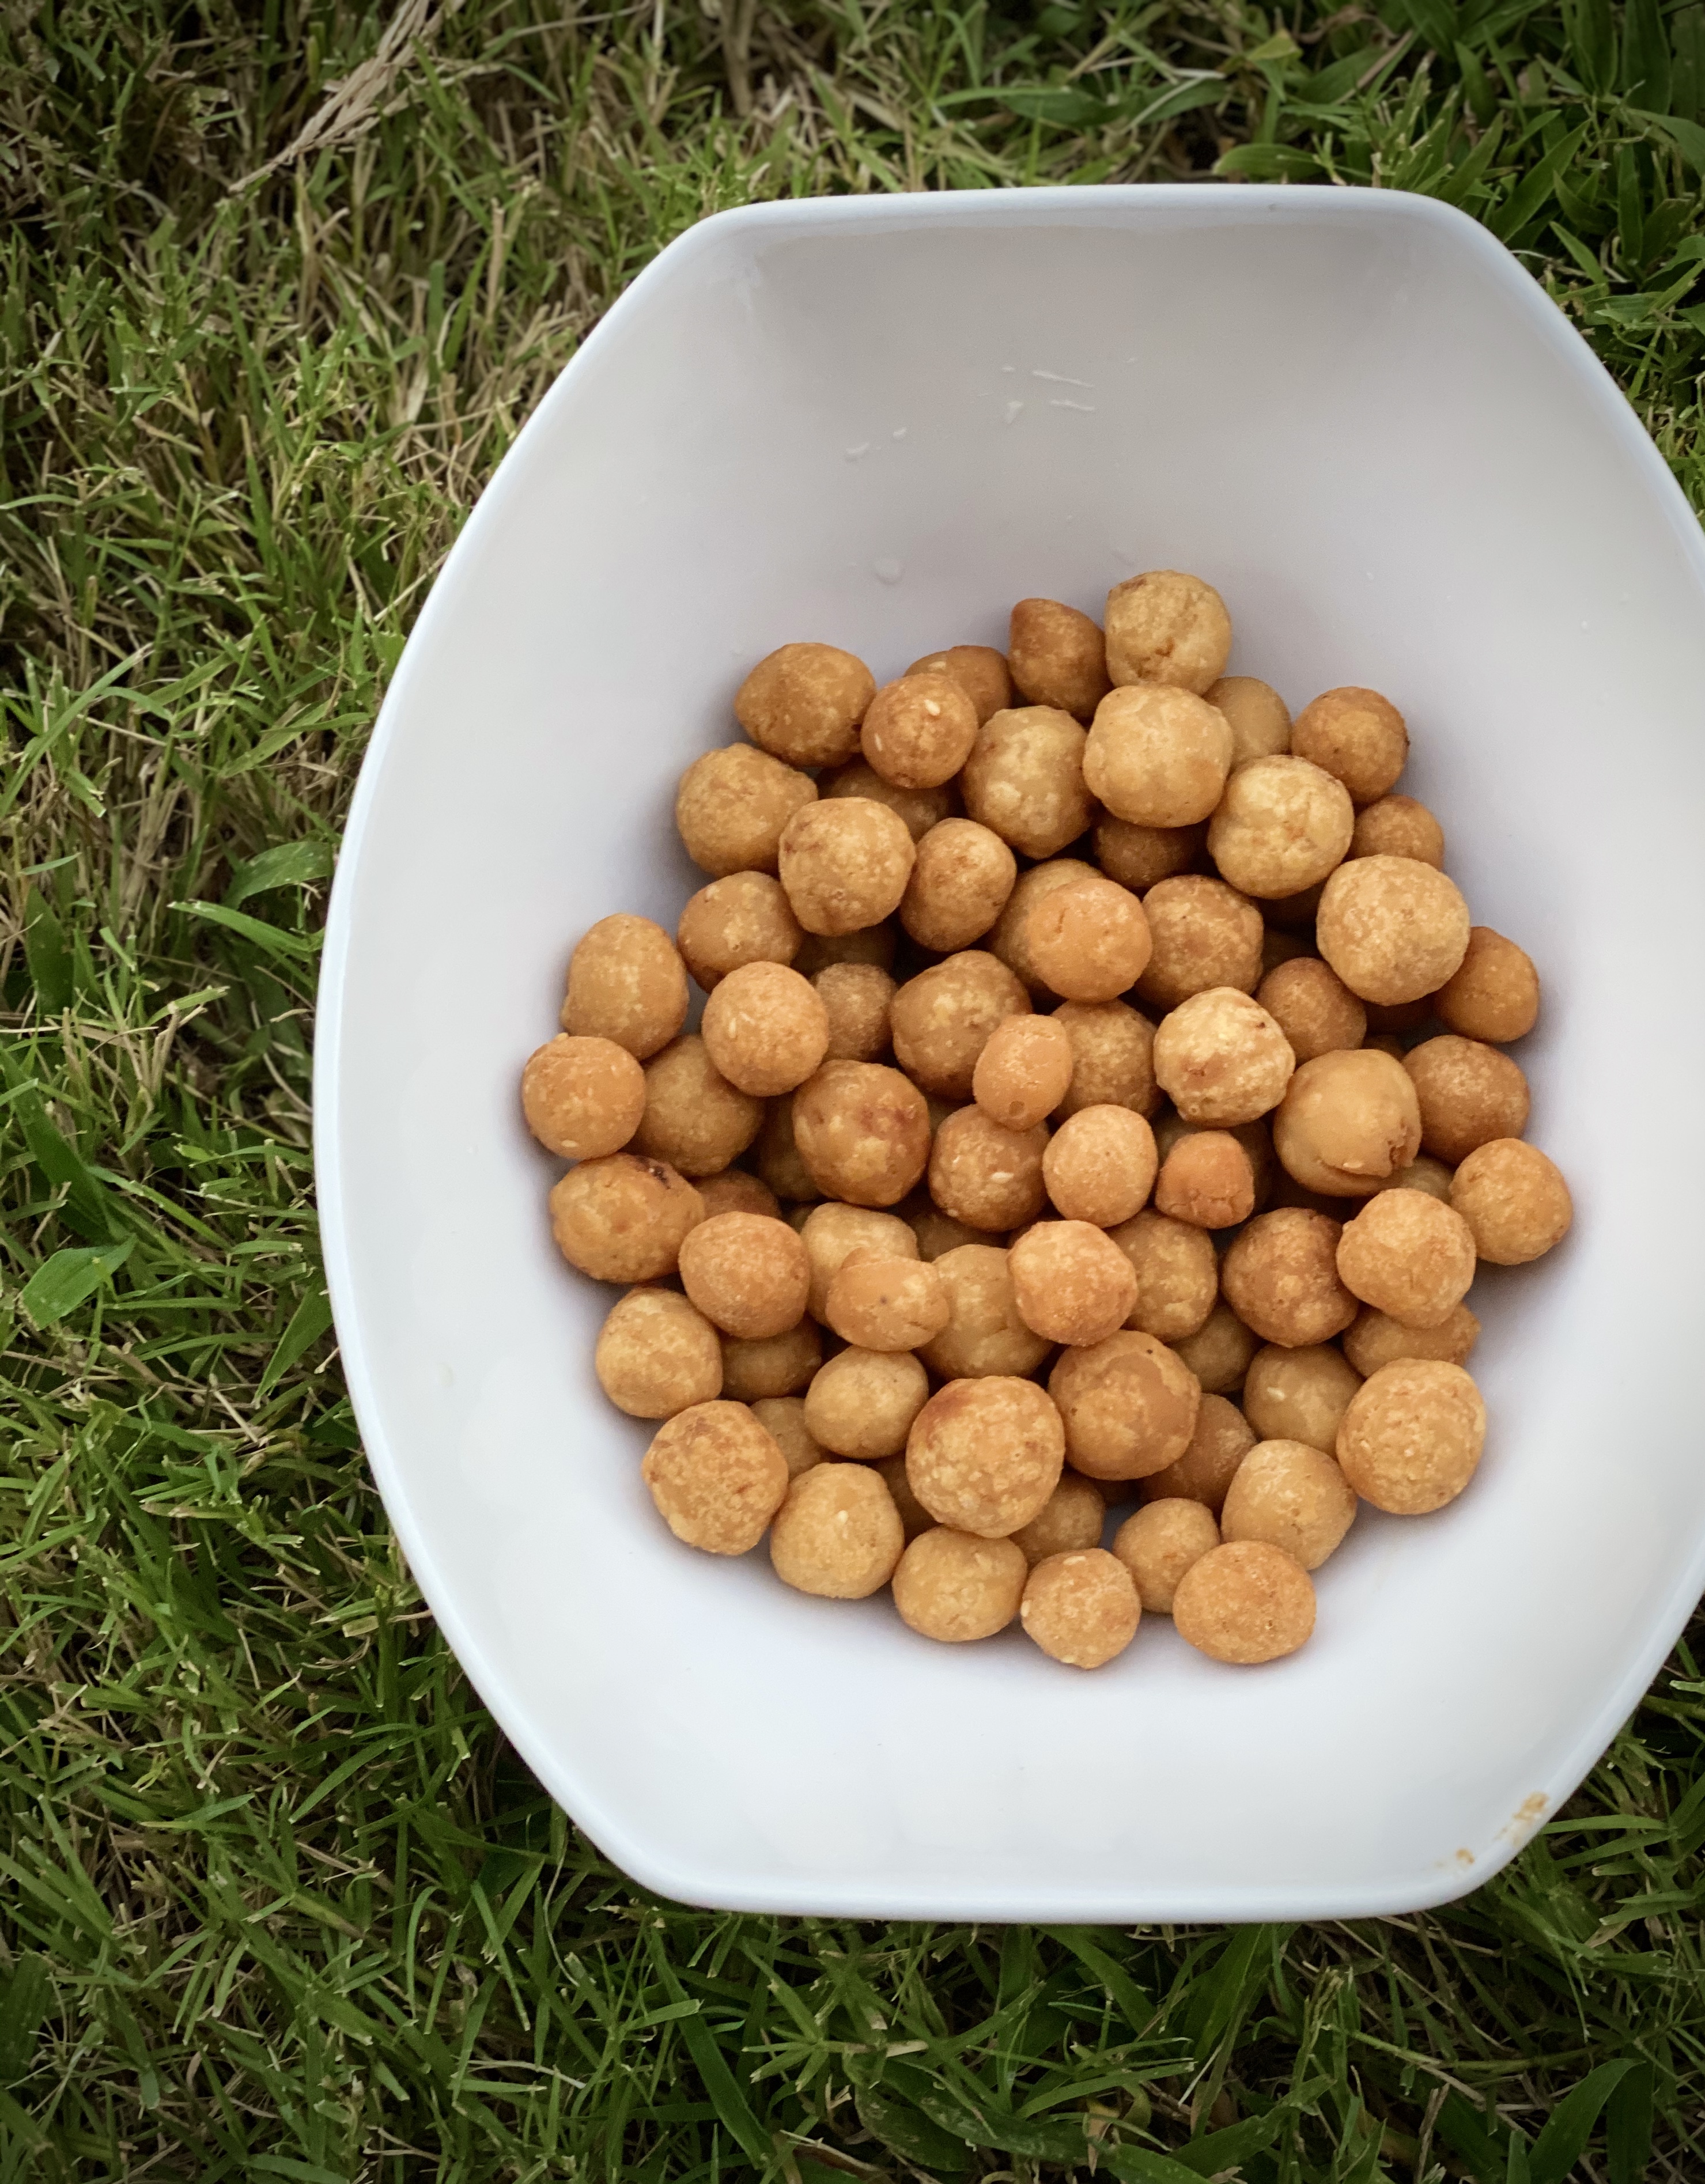
The Sweet Cheedai is a variant of the salted one, only using jaggery. The trick is to maintain the consistency of the dough to be moist and non sticky at the same time to render it pliable.By using this method, I find that the balls come out smooth and do not crack up when they are fried. This is guaranteed to give you perfect results everytime. I have not tried this using “Cane Sugar/Brown Sugar” instead of jaggery. I always grate the jaggery in to little shavings as this gives a more perfect measurement instead of little blocks.
INGREDIENTS:
1 cup Roasted Rice Flour.
1 1/2 Tbsp Urad Flour.
3/4 cup grated Jaggery.(Please adjust as per sweetness)
3/4 cup water.( Proportion of jaggery to water is 1:1)
Elaichi Powder.
Finely chopped coconut pieces.
PREPARATION:
In a vessel mix the butter, rice flour, urad flour elaichi and coconut pieces.
In a kadai, add the water and the jaggery, slightly mix with a ladle and place on the stove.
Add a spoon of ghee to the jaggery water mixture.
As soon as all the jaggery melts, switch off the flame and remove from the stove.
Add the melted jaggery to the flour mix and knead them gently together little by little.
Do not add all the water in one go, add little by little and knead until you get a smooth non sticky soft dough ball.
Vella Seedai made in a homogenous ball.
Now roll smaller 1 inch balls and transfer to a plate.
Keep the flame on medium low just as you would do for gulab jamuns, and fry the balls until they are a deep brown on all sides.
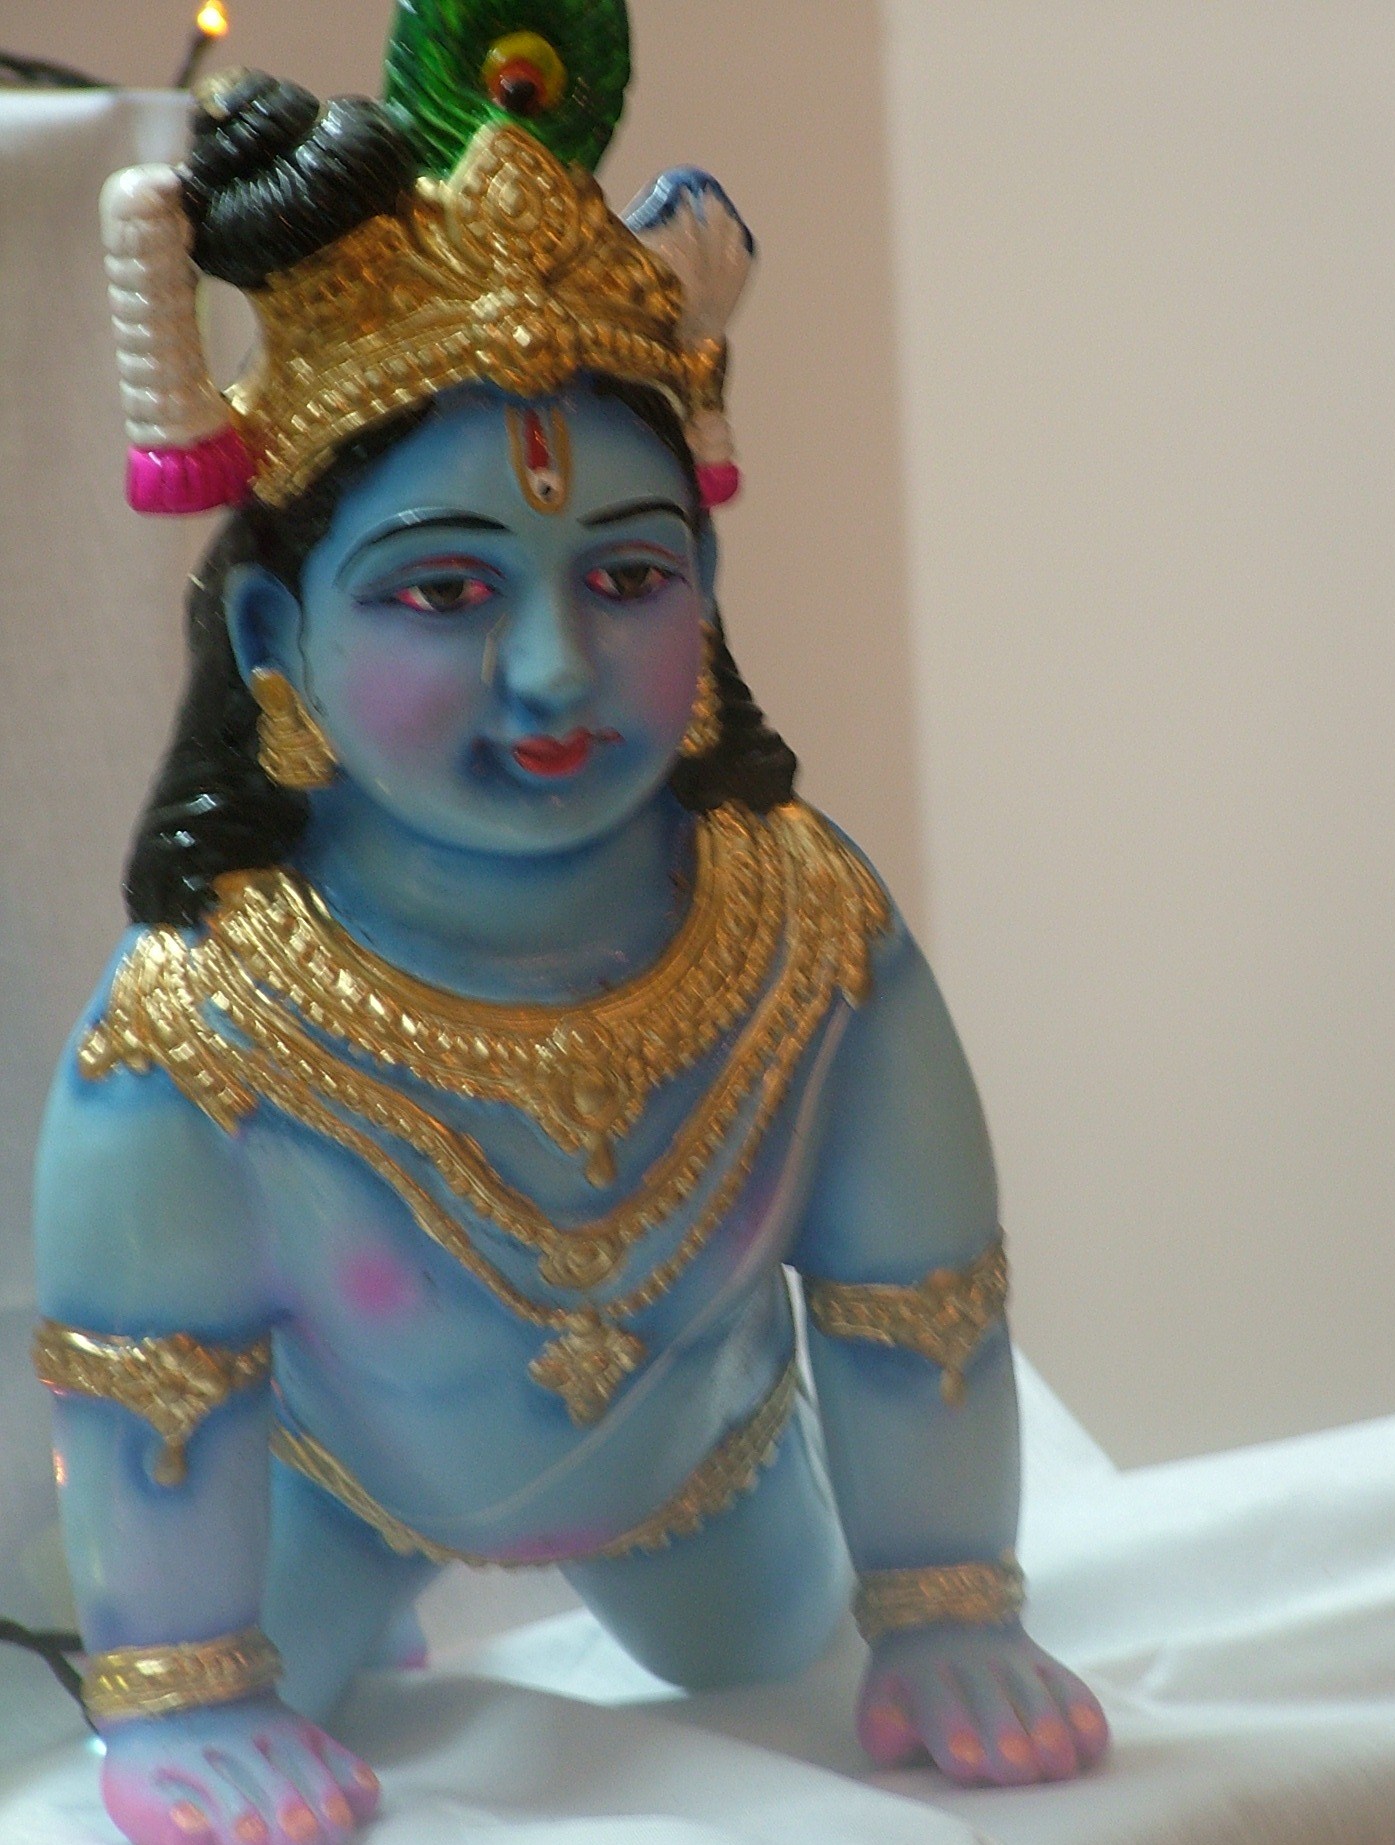
Offer to Lord Sri Krishna as neivedhyam and then partake of your offering.
Preparation of Uppu Cheedai, one of the Neivedhyams offered to Lord Krishna has been a real learning experience for me. The thing about Uppu Cheedai is that there was never uniformity or consistency in my preparation. This was because there would no uniformity in the rice that we used, in the way it is ground in the mill, or in the ingredients. Many times, the jeera in the batter has caused it to splutter in the oil and hence result in small accidents in the kitchen. For a couple of years, I had given up on this specialty completely. Curiosity got the better of me as I wanted to know how to turn around the problem. This is my shortcut and I hope this works for you too.
RICE FLOUR:
The base rice flour can be made in two ways.
Option 1: Soak 1 cup of raw rice for 1/2 hour and allow to spread and dry on a soft towel until the water is all drained completely. Then grind the rice in the mixer to a fine powder.
Option 2 : is to use READY MADE STORE BOUGHT rice flour. ( I use DURBAR/ SWAD/ Nirapara Brand).
Now take a dry kadai and roast the rice flour on medium low heat stirring ocassionally.
The white rice flour slowly changes colour to a yellowish light brown and also emits an aroma.
As soon as you are able to take the roasted rice flour and draw a line like a “kolam” that’s the indication that you have gone as far as you should.
Immediately transfer the contents to a dry container as keeping it in the same kadai might burn the rice flour.
Do not close the rice flour until it cools down to room temperature.
The method of roasting is the same whether the rice flour is made from scratch or it is store bought. Both render excellent results.
Sieve and keep aside.
URAD FLOUR:
Dry roast 2 Tbsp of whole urad dhal/ Urad Dhal flour in the kadai on medium flame until the urad dhal slowly emits an aroma and it turns to a dull yellowish brown colour.
Set aside to cool on a plate.
Grind little by little in a mixer to a fine powder.
Sieve and keep aside.
Grated Coconut:
Dry roast 2 Tbsp of grated coconut on a low flame until its a little dry and moisture is gone.
Set aside.
PROPORTION OF RICE FLOUR TO URAD FLOUR : 1 cup of rice flour : 2 tbsp of Urad Flour.
INGREDIENTS:
1 cup Roasted Rice flour as per procedure above.
2 Tbsp of Roasted Urad Flour prepared as per procedure above.
1 Tsp finely ground and sieved Jeera Powder. (Optional).
2 Tbsp Grated and roasted coconut.
1 Tbsp butter at room temperature.
1 Tsp salt.
Hing.
Almost 3/4 cup of water.
PREPARATION:
In a dry vessel add butter, ground jeera, and hing and mix well with your fingers.
Add the 1 cup of rice flour, the urad flour , salt and grated coconut and mix all the dry ingredients well.
Add the water slowly and mix it in. If the batter is already mixed in to a firm consistency, do not add all the water. Use your discretion in this regard.
The dough should be firm and non sticky but moist and creamy.
Roll out rough balls and keep on a plate. Do not press hard in to balls.
The secret is to roll them in to really small balls so they crisp quickly when fried.
I do not recommend sitting under the fan and rolling out balls as I have felt that this robs the balls of moisture and causes cracks and hence splutters in the oil.
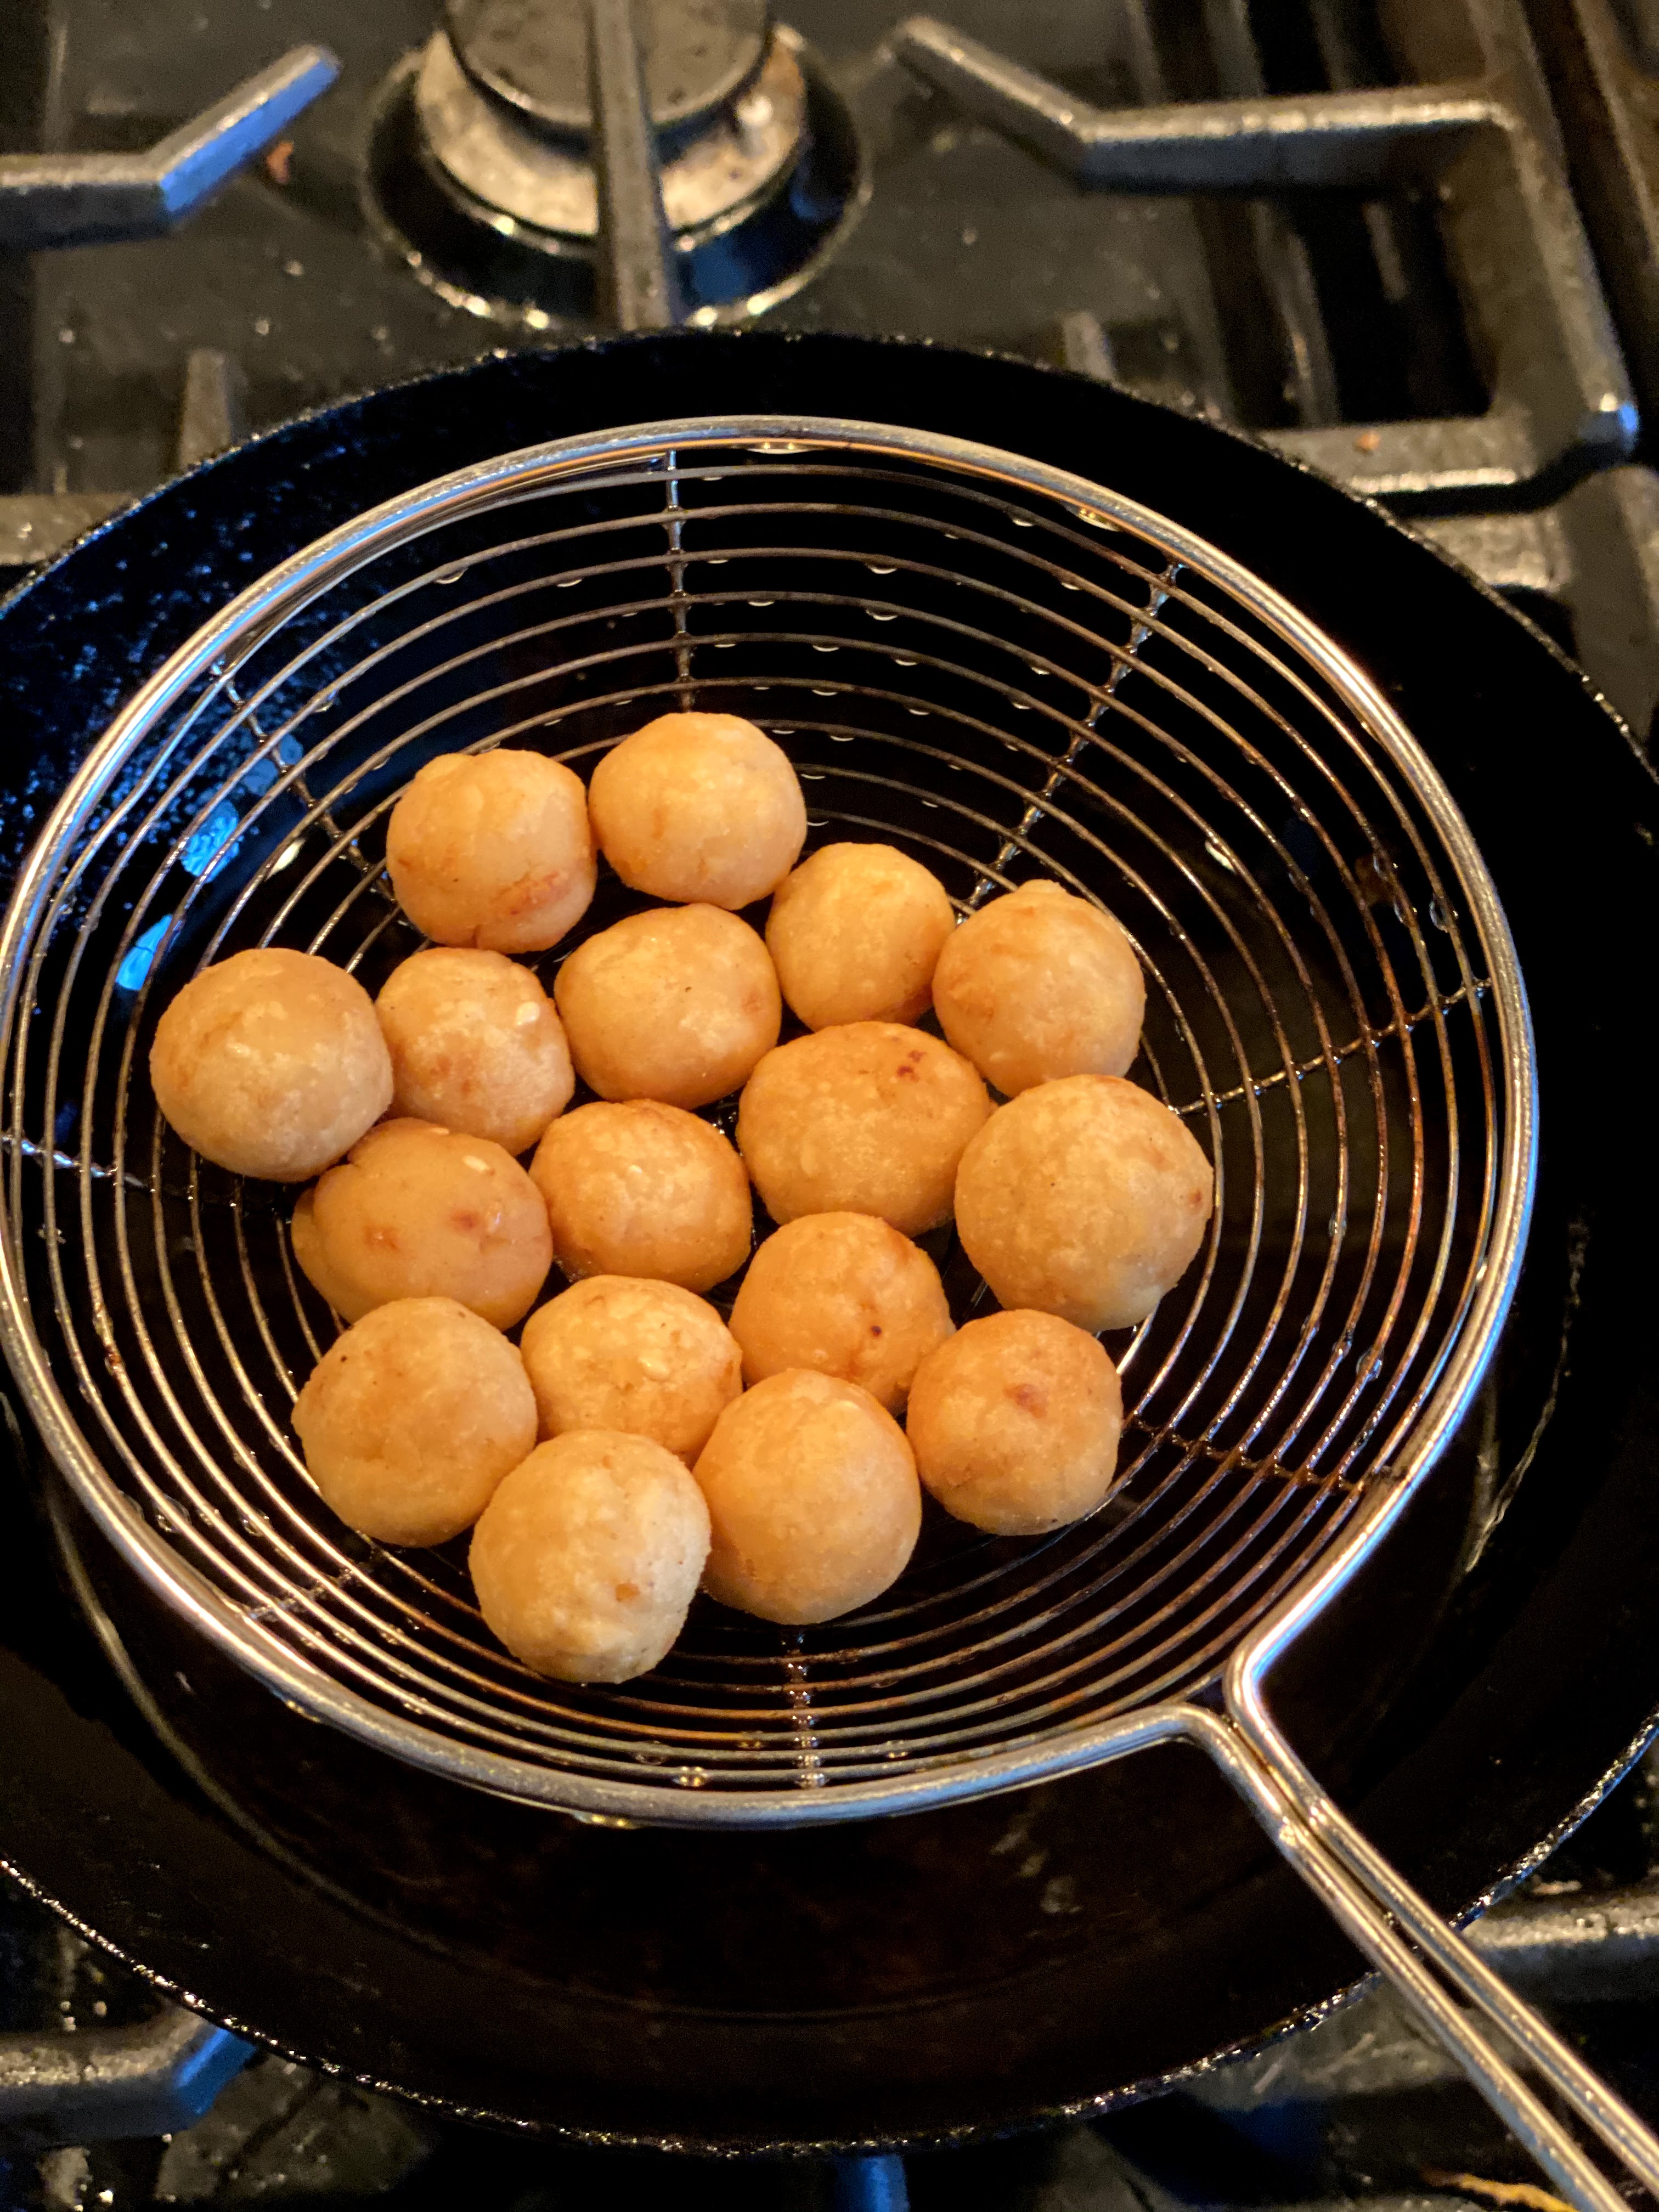
Heat sufficient oil in a kadai and when hot, add 7-8 balls of the cheedai.
Allow to fry well on medium low heat until crisp and well done and draw out the balls on a paper towel.
After a couple of minutes, store in an air tight container.
Enjoy crisp and crunchy Uppu Cheedaiafter offering to the Lord.
HINTS:
Fry the cheedai balls on medium low heat like you would do with Gulab Jamuns as they need to get completely fried on the insides. Keeping the flame high would render them overcooked on the outside yet not cooked enough on the inside.
Right after frying, allow them to cool before closing the container. If the balls are still warm, closing them would make them “sweat” and make them chewy.
Festivals have been an integral part of our lives and they usher in so much of redundant goodness and positive vibrations. Every festival has its own significance and I try to capture as much as I can with what I have lived with, in my childhood. It`s more an effort to showcase to my daughter all the traditions that I had grown up with, although in many cases it can never be the same. It`s always better with a grandmother in the household, leading the way for all of us to learn. I do miss the fact that my daughter is not growing up in a joint family, with elders to guide and grow with….
Nei Appam is a staple “neivedhyam” for karthikai deepam, avani avittam, Krishna Jayanthi etc. I remember the lovely heavy bronze Appakaral that Madurai amma had with its huge curvy depressions. I have an Appa Karal thats made of non stick and very shallow depressions. I do miss the heaviness and the beauty of the bronze one I am used to.
INGREDIENTS:
1/2 cup of Rice soaked for 3-4 hours.
A little less than 1/2 cup of Jaggery. (I don`t prefer the dripping with sweetness taste)
1/2 a ripe banana.
1 Tsp Wheat flour.
A pinch of baking soda.
1 tsp cardamom seeds powdered.
1/4 cup of finely chopped coconut pieces.
PREPARATION:
Clean the soaked rice and put in to a mixer jar. Pulse it to grind to a smooth paste adding little water .
Crush the ripe banana with a fork. Grate the jaggery with a peeler or knife. Set aside.
Now add the ripe banana and the grated jaggery and pulse it once again to mix it well. The jaggery pours out more water in to the mixture.
It is always better to watch the water added as we dont want the batter too runny.
Pour out the batter in to a vessel and add the chopped coconut pieces. Stir well.
In the Appa Karal add a few spoons of ghee and allow to heat.
Pour out the batter in to the depressions and allow to cook well on one side.
Now flip it over with a knife or a skewer and allow the other side to cook in the ghee.
When done, it would look a little crusty on the outside.
Remove and allow the ghee to drain on a tissue.
Keep closed.
The Nei Appam should be a littl crusty on the outside but soft and spongy on the inside, with the aromas of the cardamom, ripe banana and fried coconut pieces.
Offer to the Lord and ENJOY!
HINT:
Retried the recipe today and I added 1 spoon of wheat flour and a pinch of baking soda to the ground batter.The results was an astonishingly crunchy crust with a very soft spongy inner layer!!!
Ammini Kozhukattais – I have no clue about the origin of that name and how we came about calling that delicacy that. I know that whenever we set out to make Uppu Kozhukattais and Vella Kozhukattais, we would normally have the outer dough leftover and so amma would always make these mini delicacies!!! In my heart, I am guessing she would purposely have more of the outer dough so we could make this !!! We have this scooped up in a little container, and eat them just like that. Many times I also love to have it as a side for curd rice along with pickle. The preparation is hardly more than 2-3 steps so here goes.
The outer dough of Kozhukattais have negligible salt. So take the dough and add sufficient powder salt and mix it in by kneading well. If you feel the dough is a little dry, add a few drops of coconut oil to your hands.
Make a smooth ball.
Greasing your hands, shape it in to smaller balls, say, the size of naphthalene balls and keep covered in a bowl.
Balls rolled ready for steaming.
Complete the dough by making small balls and arrange on greased idli plates.
Steam them in the pressure cooker without weight for 10 minutes on high. As they have already been cooked once, it will cook in steam pretty fast.
Once the cooker is switched off, wait for a few minutes and collect all the balls on the serving bowl.
In a seasoning kadai, add 2 spoons of oil. When hot, add broken urad dhal, mustard, green chillies, hing and curry leaves.
Drop over the kozhukattais and mix well.
Delicious Mini/Ammini Kozhakattais are ready to be served.
Serving Suggestions & Hints:
It`s a great dish to make along with your kids, as they love to roll the dough in to small balls.
Since it does not need a filling, there is no hard and fast rule on the shape.
Easy to make with rice flour and hence a very healthy fast preparation.
Cooked twice so its healthy for the toddlers as well as for older people.
These kozhukattais are best eaten plain all by themselves.
Another option is to soak it in steaming hot rasam and serve them as Rasam Balls or with Molagapodi and Gingely Oil.
YUM anyway!!!
Sending cups of steaming hot Kozhakattais to Shruthi`s Steamed Treats Event at her blogsite.