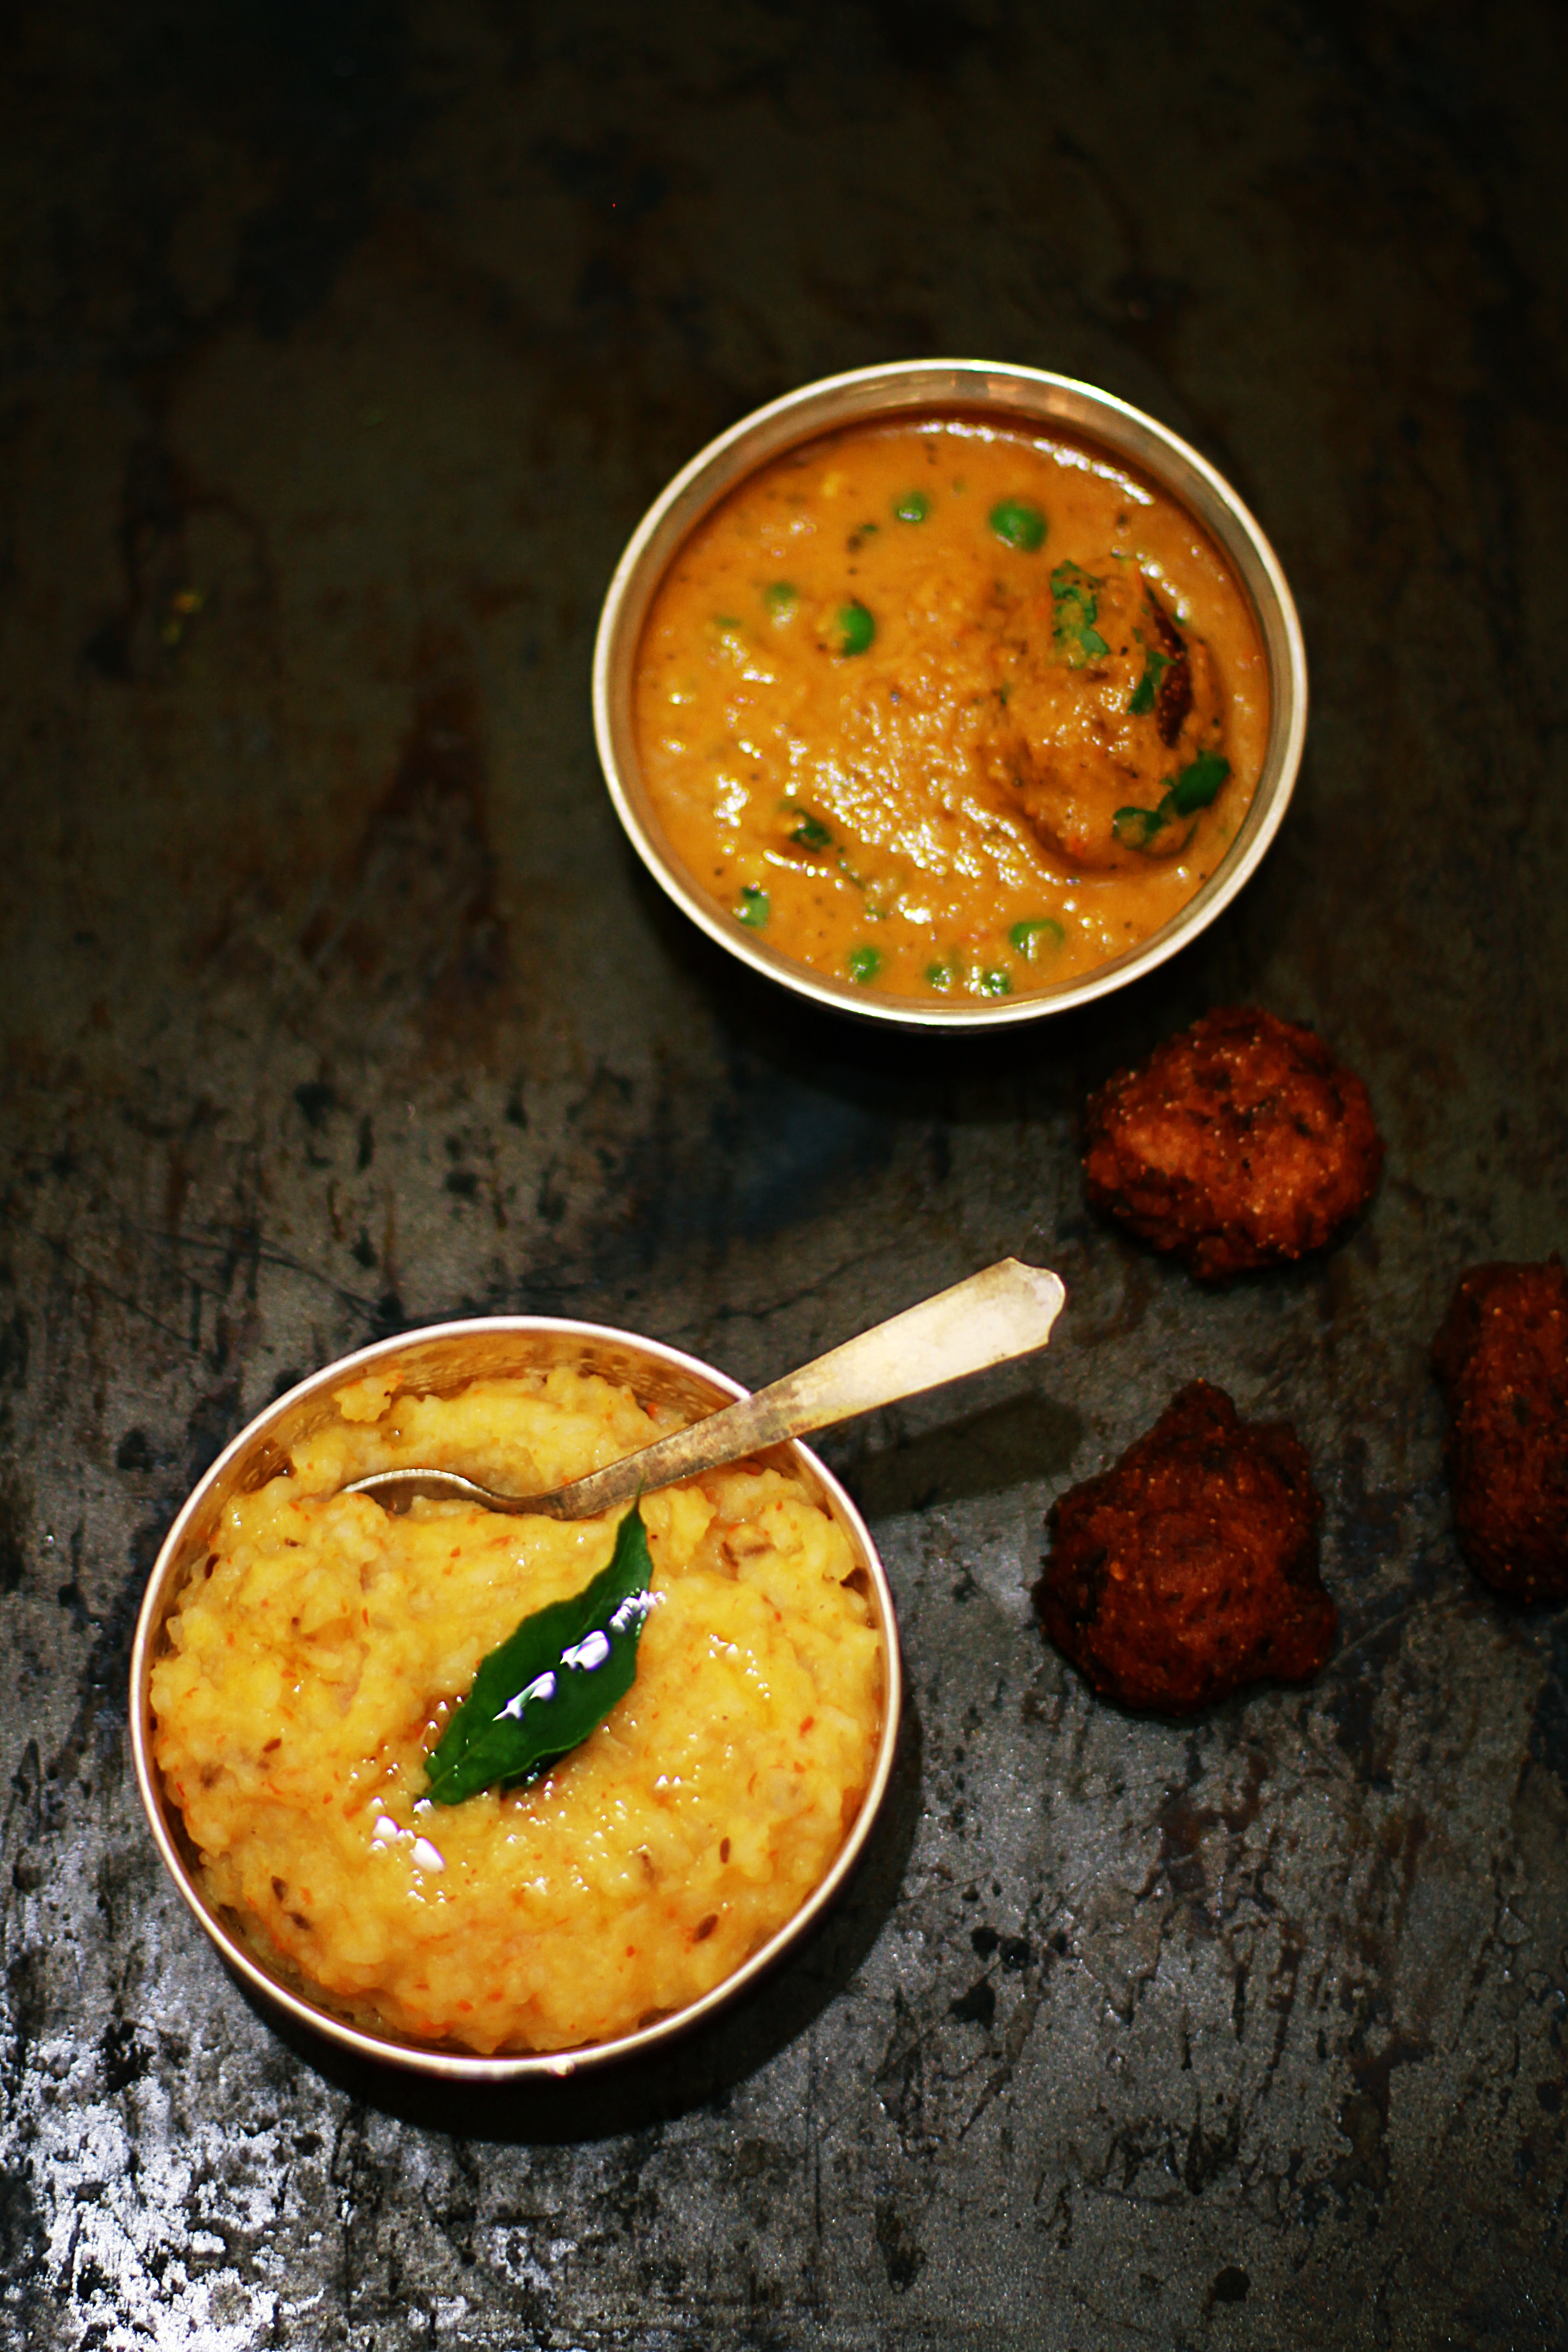
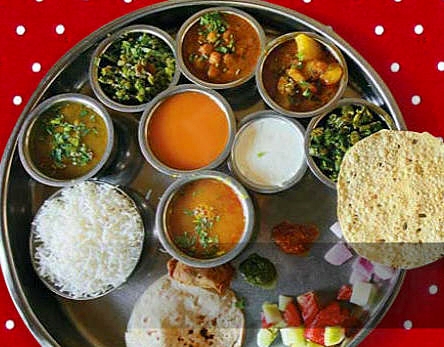
You just cant go wrong with relatively simple comfort food. The most comforting foods are the most hearties and the most easiest. The very first time we went to the Rangoli Restaurant at T.Nagar was something I could never forget. I got to sample comforting, wholesome gujrathi and rajasthani rustic cuisine here and I was completely smitten. I remember starting the course with the huge thali plate with a multitude of minuscule steel cups. They had around 2 dry vegetables, 2 gravies and one daal, curd, pickle, shrikhand, dessert and sample starters. They also serve unlimited hot and super soft rotis with refills of the accompaniments too. Then they served hot khichdi with a dollop of desi ghee. It was almost redolent with the aroma of freshly melted ghee on a bed of hot mushy khichdi which almost reminded me of the “paruppu sadam” we eat as kids. Now I was hooked! It was the simplest of all the dishes that were served but I could never really recreate it at home for quite some time. I guess it was the basmati rice thats cooked to a mushy consistency and I figured it out completely by accident. It`s really my goto dish on days that are crazy, rainy and otherwise dull.
Pic Courtesy:Google.
INGREDIENTS:
1 Cup Basmati Rice.
1/4 Cup heaped Moong Dal.
Handful of Toor Dhal.
5-6 Cups Water.
1 Tsp Ghee to add to rice.
Salt to taste.
Seasoning:
2 Tbsp Ghee.
2 Tsp Jeera.
1 Cinnamon Stick.
10 Curry Leaves torn.
PREPARATION:
Wash the rice and dal until its clean and add the 6 cups water.
Transfer to a pressure cooker vessel and add a Tsp of ghee.
Pressure cook as you would for regular rice/dal. I normally wait for one whistle and then bring down the flame to sim and THEN cook for ten minutes. Switch off.
When ready to release pressure, open the lid and with a masher, mash the rice well until mushy.
Season with the ingredients specified and pour over the khichdi.
I really dont know whats with me and mangoes. I find gazillion ways and including mangoes in my dishes now and then. I remember, as a child in our earlier home in Chennai. my dad had planted a mango sapling when I was a baby!. By the time I was in high school, the mango tree used to give lovely green mangoes in the summer. They were not the greatest variety or the best tasting, but there is a certain pride in going in to your own backyard and plucking mangoes from a tree laden with them. There is an aroma to this freshness – the mango perfect and tight, with the milk oozing from the stalk, at the point where it has been severed from the tree. Amma used to make Avakkai pickle, Maavadus from the little ones and of course the regular Mangaa Curry. Summers in Chennai….beyond the heat, had so many memories for me…
One such recurring memory is the regular shopping visits to Nalli, Kumaran Silks etc in T.Nagar. All these store, entice you with their innumerable lovely breathtakingly woven silk sarees, but the mango vendors outside these stores, enticed me to go shopping!!! Amma would give me a firm look as if to say, “Come on, we`ve come all this way to finish Diwali shopping in such short time, and all you can think about is mangoes???” The shopping would be over and we would rejoice and run to the vendors. They would cut the mangoes in to lovely slim long slices right in front of your eyes and then cut out little patters on top to resemble a little crown made of sticks…..the mangoes would be so tender, they would bend in his arms. He would then roughly pull out a newspaper, dash a little of his secret-ingredient spice powder, and then swathe the mangoes over the powder and hand over the paper to us. Ditto treatment for the pineapple slices. There cannot be a word to describe the taste of those mangoes, wrapped in spice powder,shared with cousins, standing spell bound, in a crowded shopping area……
My effort to recreate the T.Nagar magic was pretty limited, although it does take me on those trips some times. The ingredients are simple and clear – loads of mangoes…
INGREDIENTS:
2 Mangoes cut in to thin slices.
1 spoon salt
1 spoon red chilli powder
A dash of hing
PREPARATION:
Combine the powders and set aside. Please alter the red chilli powder levels, if you think its soo spicy.
Arrange the sliced mangoes on a plate.
Sprinkle as desired and serve fresh.
Spiced Mango Slices are an anytime snack over at my place. Picnics are always a fun place to make them since they are so easy to assemble. They serve as a very simple yet novel starter snack, favourite among the kids and the adults alike…. Its our favourite movie time snack!!!
Healthy meals have been an imperative rule in every household and ours is no exception.My daughter recently learnt from school that one has to eat at least 5 different vegetables in our daily diet and we have started a fun way to incorporate this rule almost every single day. When I was a small girl, we used to have two vegetables everyday. One of which would definitely be greens/ spinach etc. In India, there are so many different varieties of greens that are available, each unique in their taste and texture. Of course, our favourite preparation would almost always be Keerai Molagootal. Other varations would be Keerai masiyal, Keerai Sundal etc.
This time around I wanted to make spinach rice after seeing it in Viji`s blog some time back I so wanted to use my spinach in a one pot meal. It`s always easy to pick out ingredients from a party and throw them in to a rice pilaf preparation. This was one such preparation and the result was almost restaurant style rice pulav with a warm comforting aroma.
INGREDIENTS:
2 cups Basmati Rice.
1/2 cup Light Coconut Milk.
2 1/2 cups Water.
1 Bay leaf.
1 stick of Cinnamon.
Pinch of Ground Cardamom Powder.
1 tsp Fennel/ Somph.
Handful of chopped cashew pieces.
1 Bunch of fresh Spinach including the tender stalk.
Wash the basmati rice and place in the electric rice cooker. Add 1/2 cup coconut milk, 2 1/2 cups water, a blob of butter, the saffron soaking in milk, salt and allow to cook.
When done, fluff the rice with a fork to seperate the grains and allow to cool.
The butter added coats the grains with a layer of fat, so this keeps the grains without sticking to each other.
In the mixer add ginger, a few pieces of green chillies, grated coconut and the spinach leaves. Pulse to a coarse paste adding a few drops of water if needed.
In a kadai add 2 spoons of ghee. First fry the chopped cashew pieces and remove and keep aside.
In the same kadai, now add cinnamon, bay leaf, cardamom powder and allow to roast for a couple of seconds.
Slowly add the chopped green chillies and onions and saute well until the onions turn a light pinkish brown.
Next add the pulsed spinach paste and bring the flame to medium low. Stir in the peas and corn kernels and allow the mixture to cook on the medium flame as this enhances the flavours.
After 8-10 minutes, all the water evaporates from the spinach paste and you see it coming together as one.
At this point, add the cooked basmati rice and stir carefully so as not to break the rice grains.
Add a spoon of ghee if needed and serve with a garnish of saffron and grated coconut.
Aromatic saffron flavoured spinach pulav is a wholesome delicious meal ready in a matter of minutes. Serve with your favourite cucumber raita.
Crispy Black Gram Dhal Vadas were always my favourite from when I was a little girl. Madurai amma used to make them at home for all important festivals and I used to love to bite in to their crispy exterior and spongy insides!!! I have two maternal uncles living in the north and whenever they would visit us in Chennai, they would go to Balajee Bhavan or Geetha Cafe in Pondy Bazzar in T.Nagar and order for Pongal and Vada for breakfast!!! Steaming hot Venn Pongal, shaped in to a ball, coupled with two crispy vadas on the sides, loftily served with piping hot sambar and thick coconut chutney on the side….YUM….I would give anything to be there right now!!!
When I wanted to make it, at home for Avani Avittamone year, I used my Premier Mixer and tried my hand at the batter. I had to say, I did soak the urad dhal for just 3 hours, and it did come out fried, but it was never crispy and in the shape I wanted it to be. I wanted golden vadas, which were crisp and yet spongy, and not dripping with oil in which it was fried. I tried various methods, adding rice flour, adding rava, fermenting the batter for a bit, adding very less water, using ziploc bags to get the desired shape….and then I hit upon the home truth – GRINDING THE BATTER IN A WET GRINDER!!! Yes, thats really it. And the last few times, I have been enjoying wonderful, crisp, terrific, delicious vadas, way better than the ones in the hotels, as we make at home with the freshest of oils and the best of efforts and devotion. This does not in any way mean that people with mixers cant try this out. The secret is to increase the fluffiness of the urad dhal without adding much water. This end result is best achieved with stone grinder, rather than with a electric mixer, loaded with urad dhal, and little water.
INGREDIENTS:
1 cup whole Urad Dhal soaked for 3-4 hours.
8-9 Green Chillies.
Less than 1/4 cup of Water.
1 spoon Salt.
Hing.
Torn Curry Leaves.
Oil to fry.
Wet Grinder.(Optional)
Ice Cream Scoop (Optional)
PREPARATION:
Take the wet grinder/mixer, wash it and keep it ready for use. Clean the soaked Urad Dhal and remove all the water it was soaked in.
Switch on the grinder, add the green chillies and 1/8 cp of water and then slowly add the soaked and cleaned urad dhal.
Add all the urad and let the grinder run for at least 40 minutes.
In the middle, if you feel that it requires some water, go ahead and sprinkle a few drops. Add salt.
The secret is to allow it to run for the 40 minutes with as much less as water as needed.
By now the urad is very softly ground. Remove and store in a container. Add hing, freshly torn curry leaves and mix well. The consistency should look like this.
Vadai Batter - Thick and fluffy.
Keep sufficient oil in a kadai and allow it to heat. Do not overheat lest the oil should smoke. Keep the flame on medium to medium high.
If you have an ice cream scoop, put that in a small cup filled with water.
Wet your left hand, scoop out some batter in the ice cream scoop with your right and pop it in your left hand.
Wet your right hand and slightly flatten the batter, make a hole in the middle, and drop it slowly in to the oil.
This is easily achieved ONLY if your batter has minimal water AND your hands are sufficiently wet. The scoop is also made wet, as this aids in easily slipping out the batter on to your hands.
Vadais frying in Oil.
The scoop is only used to get uniformly shaped vadas. Feel free to scoop with your bare right hand and drop it on your left, if you are comfortable with this.
The vadas, when they hit the oil, will hiss and start cooking on one side. When its done, turn over to the other.
When fried to a golden colour, remove from oil and allow to drain on kitchen tissue lining a colander/bowl.
Repeat and continue until the batter is completed.
Crispy fried Ulundhu /Urad Dhal Vadas are ready to taste!!!
Ulundhu Vadai
HINTS:
The only difference with using the mixer, is that the batter never comes out as fluffy and thick as the ones that go through the grinder. Here you would need to use a spoon of rice flour to thicken it out.
Ulundhu Vadais/Urad Dhal Vadas can be soaked in Rasam and served as Rasa Vadas.
Served with hot sambar and garnished with cilantro, it becomes Sambar Vadas.
Soaked in thick curd/dahi, garnished with a little bit of sweet tamarind chutney, chat masala and boondhi, it becomes yummy Dahi Vadas.
On this Ashtami of Navarathri I wanted to make an all time favourite – Black Channa Sundal garnished with sliced coconut pieces. Black Channa is very common among our homes as a classic Neivedhyam for Navarathri. It is in fact made on Saraswathy Pooja day as the “traditional” offering to Sarswathy, in my home. Just like any other legume, the black channa variety is high in cholestrol lowering fibre and has a lot of protien content which is very useful for people on diets and for a healthy snack.
INGREDIENTS:
1 cup Black Channa.
Water to cook
Salt
Oil
Mustard
Curry Leaves
4 Red Chillies Dry.
1/4 cup of finely slit coconut pieces.
PREPARATION:
Soak the black channa for at least 6 hours prior to cooking.
Put in a wide mouthed container, add salt, turmeric and add just enough water to cover the channa.
Put in the pressure cooker and when the steam comes, put on the whistle.
Wait for one whistle and then reduce the flame to “SIM” and keep for ten minutes and then switch off.
Drain in a collander, but save the water to mix chappathi, make rasam, sambar etc.
Take a kadai, add 2 spoons of coconut oil. When the oil is hot add mustard, curry leaves, hing, dry red chillies and then the cooked channa.
Mix well and wait until the seasoning ingredients are mixed well in to the legumes.
Garnish with finely sliced coconuts and serve HOT after offering as Neivedhyam.
Every morning when its time to decide the day`s menu, I promise you I really get stumped. It`s the same story everyday….I decide on Vazhakkai Podimasand then to my dismay realise that I am out of Dhania for the spice powder. Then I think why not Pavakkai Pitlae, but the pavakkai is in a very pitiful state. Dunked in to the trash can. Then again…Adai? no way I got to soak for at least 3-4 hours….Back again to the open fridge….Capsicum Pulav? Well….capsicum yes, but not enough curd or sour cream for a good serving of raita…and me cannot have pulav without raitha…Blah….how much more can one dwell on a simple culinary decision?
Today the only thing I had loads of was fresh ginger preserved in a paper towel Ginger!!! Aha…suddenly dawned on me Bharathi`s Inji Kuzhambu…The only thing that bothered me was I had to throw in some thing in the gravy. I never prefer plain sambars with no vathals or vadagams or veggies!!! I could not pair even a single veggie in the fridge with this one, so I decided to modify it to a Sutta Appalam Inji Kuzhambu redolent with its flavours and aromas. So here we go…
INGREDIENTS:
2 Appalams fire roasted and broken in to big pieces.
2 Tbsp roughly chopped Ginger.
1 Tbsp finely chopped Ginger.
Salt
Hing
Turmeric Powder.
1 1/2 cups of tamarind water extract.
Curry Leaves.
Roast in Oil Individually:
2 1/2 tsp Dhania.
1/2 Tsp Methi Seeds.
2 Tsp Toor Dhal.
7-8 Red Chillies. (Kindly alter the red chillies according to personal taste).
The 2 Tbsp of roughly chopped Ginger pieces.
Tempering:
Mustard, Curry leaves, Gingely Oil.
PREPARATION:
As already mentioned take any appalam of your choice and slowly roast it over direct fire. If you have leftover Vadams or Vethals you can use those too. Fire roasted appalams are a personal favourite of mine. Break in to slighly bigger pieces and set aside.
Roast in gingely oil all the specified ingredients and pop them in to a mixer. Grind to a smooth paste with water. Keep aside.
In a kadai, add 2 spoons of gingely oil and when hot add mustard, curry leaves, ginger and saute for a few seconds.
Add immediately the tamarind water, ground paste, salt, hing and turmeric powder.
Now add the broken pieces of appalam also to the gravy.
Let them all simmer on a medium low flame for about 25 minutes or so.
You will see that the oil seperates fromt the gravy and all the raw smell is gone.
Switch off the stove and garnish with chopped corriander.
In my opinion, any of the varieties of tamarind based gravies, always taste better after a day or two later. By afternoon, the kuzhambu was smelling so awesome with the flavours and spices soaking up really well.
There are so many different varieties of red chillies and ginger, so re-adjust the quantity of both depending on personal preference. The end result does not reek of the ginger flavour. It`s just a mild after-thought flavour.
Eggplants have always been my husband`s favourite vegetable. He loves it in any form. I know a lot of people who are allergic to eggplants because of the seeds in it.In addition to featuring a host of vitamins and minerals, eggplant also contains important phytonutrients, many which have antioxidant activity. Phytonutrients contained in eggplant include phenolic compounds, such caffeic and chlorogenic acid, and flavonoids, such as nasunin. Nasunin is believed to protect cell membranes from damage. Its also rich in dietary fibre and known to also promote cardio vascular health.
How to Select and Store: (Courtesy – Whole Foods)
Choose eggplants that are firm and heavy for their size. Their skin should be smooth and shiny, and their color, whether it be purple, white or green, should be vivid. They should be free of discoloration, scars, and bruises, which usually indicate that the flesh beneath has become damaged and possibly decayed.The stem and cap, on either end of the eggplant, should be bright green in color. As you would with other fruits and vegetables, avoid purchasing eggplant that has been waxed.
Place uncut and unwashed eggplant in a plastic bag and store in the refrigerator crisper where it will keep for a few days. If it is too large for the crisper, do not try to force it in; this will damage the skin and cause the eggplant to spoil and decay. Instead, place it on a shelf within the refrigerator.If you purchase eggplant that is wrapped in plastic film, remove it as soon as possible since it will inhibit the eggplant from breathing and degrade its freshness.
I always prefer cooking with the Japanese Eggplant as its very soft, has minimal seeds and cooks extremely fast. I use the Indian Eggplant only when I would reequire to make stuffed brinjals etc.
This time around my husband wanted Yennai Kathirikkai Kara Kuzhambu and so I was inspired completely by Viji`s method and have made a few changes to her version to incorporate a few of my inputs. There is no grinding of masalas or spices and once you put it on the stove to simmer, you can forget about it. The resulting gravy was tangy, spicy and completely out of the world taste. Since it combines the stuffing of the brinjals with spice powders and then simmering it in the tamarind gravy, the combination of best practises was heavenly.
INGREDIENTS:
5 Baby Brinjals.
1 large organic sour tomato or 2 medium sized tomatoes.
Curry Powder to stuff the brinjals.( I once used store bought Puliyodharai Powder/Vangibath Powder etc)
2 tsp Sambar Powder.
1/2 tsp Red Chilli Powder.
Tamarind Juice extracted from a gooseberry sized tamarind.
Wash and clean the brinjals and dry them with a paper towel. Slit them three times across with a knife keeping the calyx intact. Take a few drops of coconut oil and slide it in to the slit brinjals.
Brinjals slit and filled with drops of oil and salt.
Now sprinkle some salt from a salt shaker and place it in the microwave for 3 min on HIGH.
The brinjals come out a little cooked with the salt sticking to their sides. Keep aside for a few minutes to cool.
Brinjals with salt, curry powder filling.
Meanwhile slit the side of a tomato with a cross and pop it in boiling water for 5-6 minutes.
Remove from water and when slightly cool, puree it in the mixer. Keep aside.
Combine the tomato puree and the tamarind water.
Now slowly fill in the vangibath powder/curry powder/puliyodharai powder into the moist brinjals and set aside. Since there is some oil inside, the powder would stick to the sides.
Take a kadai, add 2-3 spoons of gingely oil and when hot, add mustard, urad dhal, curry leaves, hing and slowly the stuffed brinjals.
The stuffed brinjals will slowly get shallow fried in the oil in the kadai. Turn them around every few minutes to make sure that they are cooked on all sides.
Now add the tamarind tomato water and bring the flame to medium low.
Add salt, hing, turmeric, sambar powder, red chilli powder and some torn curry leaves.
Keep the flame on medium low and allow to simmer for some time until the raw smell is gone.
When the oil starts to separate, switch off the stove and garnish with chopped cilantro leaves.
Every evening from school meant having tiffin prepared by dear Madurai amma. It would not be a lot in quantity, just a little bit to satisfy that crazy hunger pangs when you come home from school after a tiring day and a crowded journey jostled in public transport. It would not even be warm, let alone hot, but lovingly served. When you are a student, somehow you crave for exotic eatables like Gobi Manchurian, fried rice. pulav, channa batura and the like. In contrast, madurai amma would make Upma, Pidi Kozhakattai, Poha, Dosa etc. After some years, in my hostel for my Masters, I would recount those lovely home made preparations waiting for you when you come home after a tiring day. Life after masters was completely different. I started eating all fruits and vegetables and an thing that amma or Madurai amma would prepare and serve on my plate. I had realised the importance of what I had taken for granted!!!
One such tiffin entree that Madurai amma was an expert at, was Arisi Upma. Many times, it would be the dinner for every one on Amma Vasya, festivals, Pradosham etc.This evening, I had made Arisi Upma for dinner and was recounting those lovely days of my childhood…..
It is a quick preparation, that does not need any prep work done ahead of time.
INGREDIENTS:
1 cup of Raw Rice ground coarsely in the mixer.
1/4 cup of Toor Dhal.
1 spoon of Urad Dhal.
1 1/2 spoons pf Black Pepper.
1 spoon of Jeera.
1/4 cup of fresh coconut.
2-2 1/4 cups of water.(Depending on induvidual preference of Upma consistency)
Salt.
Coconut Oil.
Hing.
A handful of broken cashews.
SEASONING:
Mustard, Jeera, Red Chillies, Urad Dhal, Channa Dal, Cashew, Hing and Curry Leaves.
PREPARATION:
As already mentioned coarsely grind the rice in the mixer and set aside.
In the mixer jar add – toor dhal, pepper. 1 red chilli and give it a quick pulse. Then add the fresh coconut and 5-6 cashew pieces.
Pulse it for a few more seconds and set aside. You will have a coarse mix.
Set the kadai on the stove and add 2-3 spoons of coconut oil. (You could also use ghee/canola.)
Add urad dhal, channa dal, mustard, cashew, jeera, 2-3 red chillies coarsely broken, hing and curry leaves.
After a few seconds add the coarse ground rice and then the coarsely ground dal coconut mix.
Allow to saute in the oil for a minute or two.
Now add the water and mix well. Switch off the heat and transfer to a vessel along with the water.
To be kept in the cooker.
Pressure cook it just as you would do with rice.
Generally I allow 3 whistles after the weight. Give a couple minutes for the steam to work off and then open the cooker.
Avani Avittam, as I remember, was a day when the men of the family went to the temples, in the morning for performing the Upakarma, in the temples. Upakarma(/upaakarma/) means beginning or “Arambham“, i.e. to begin the study of the Veda (Veda Adhyayanam). For example, Yajur Upakarma means to begin the study of the Yajur Veda. Those belonging to the Yajur Veda observe the Upakarma in the month of Sravana (August-September), on the day of the full moon (paurnami). Why begin study of the Vedas on this particular day? This auspicious day also happens to be the day when Lord Narayana assumed the avatar of Lord Hayagriva. Lord Hayagriva as we all know restored the Vedas to Brahma and also is the God of Knowledge. (Courtesy – Ramanujam.org)
The next question is: why do this every year? In the not too distant a past, Veda Adhyayanam was performed only during the period Avani to Tai (from mid-August to mid-January). Therefore, one is supposed to perform an “utsarjanam” in the month of Tai, i.e., a giving up of the learning of Vedas from Tai to Avani. Just like a Upakarma function there was a Utsarjana function in Tai. The period between January to August was then devoted to learning other branches of our shastras. Thus the cycle of Upakarma and Utsarjana with regard to Vedic studies was established. However, this method took 12 or more years to learn just one veda. Slowly this became impractical and Vedic studies continued throughout the year.
The main purpose of the Upakarma function is to offer prayers and express our gratitude to those rishis who gave us the Vedas — the rishis through whom the Vedic mantras were revealed. These rishis are known as “kaanda rishis”.In the Upakarma Homam as well as in the tarpanam, the offerings are made to the kaanda rishis. In fact this tarpanam is so important that it is included as part of our daily worship.
On the Avani Avittam day(the full moon day bearing the nakshatra “Avittam” in the tamil month of Avani) Brahmins after a holy dip ,change the sacred thread and wear a new holy thread. This ritual is known as Upakarma, which means beginning. The sacred thread is referred as ‘Poonool,’ ‘Yajnopavita’ or ‘Janeyu.’
Today`s lunch menu was a little spread, consisting of:
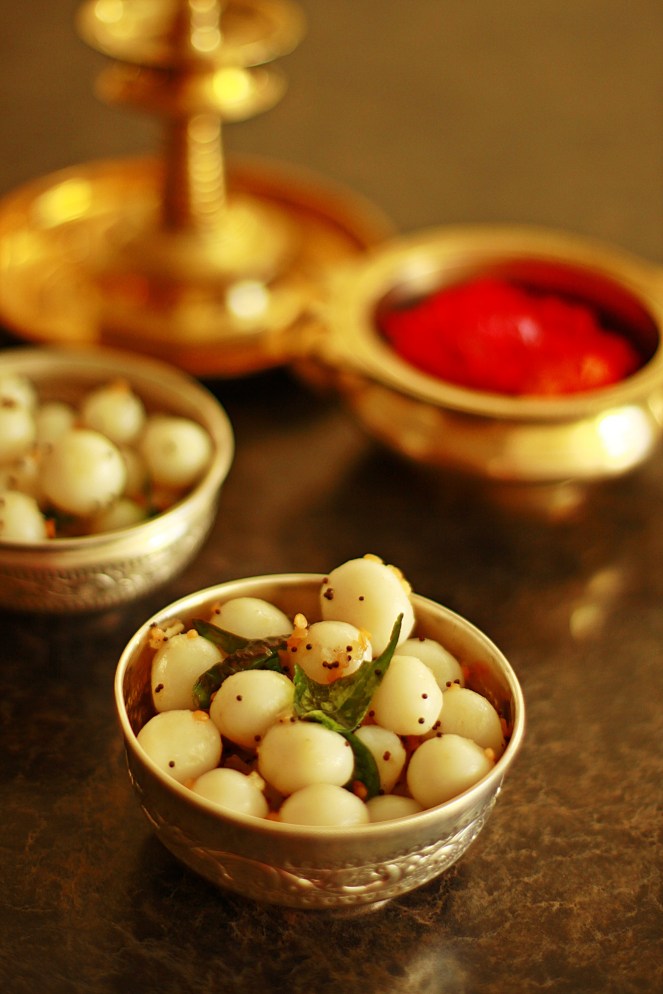
Ammini Kozhukattais – I have no clue about the origin of that name and how we came about calling that delicacy that. I know that whenever we set out to make Uppu Kozhukattais and Vella Kozhukattais, we would normally have the outer dough leftover and so amma would always make these mini delicacies!!! In my heart, I am guessing she would purposely have more of the outer dough so we could make this !!! We have this scooped up in a little container, and eat them just like that. Many times I also love to have it as a side for curd rice along with pickle. The preparation is hardly more than 2-3 steps so here goes.
The outer dough of Kozhukattais have negligible salt. So take the dough and add sufficient powder salt and mix it in by kneading well. If you feel the dough is a little dry, add a few drops of coconut oil to your hands.
Make a smooth ball.
Greasing your hands, shape it in to smaller balls, say, the size of naphthalene balls and keep covered in a bowl.
Balls rolled ready for steaming.
Complete the dough by making small balls and arrange on greased idli plates.
Steam them in the pressure cooker without weight for 10 minutes on high. As they have already been cooked once, it will cook in steam pretty fast.
Once the cooker is switched off, wait for a few minutes and collect all the balls on the serving bowl.
In a seasoning kadai, add 2 spoons of oil. When hot, add broken urad dhal, mustard, green chillies, hing and curry leaves.
Drop over the kozhukattais and mix well.
Delicious Mini/Ammini Kozhakattais are ready to be served.
Serving Suggestions & Hints:
It`s a great dish to make along with your kids, as they love to roll the dough in to small balls.
Since it does not need a filling, there is no hard and fast rule on the shape.
Easy to make with rice flour and hence a very healthy fast preparation.
Cooked twice so its healthy for the toddlers as well as for older people.
These kozhukattais are best eaten plain all by themselves.
Another option is to soak it in steaming hot rasam and serve them as Rasam Balls or with Molagapodi and Gingely Oil.
YUM anyway!!!
Sending cups of steaming hot Kozhakattais to Shruthi`s Steamed Treats Event at her blogsite.