Cakes / Pastries / Cookies/ Bread/Muffins.

Eggless Princess Cookies with Rose bits and Jam hearts!

IMG_1218

These Eggless Princess Cookies with Hearts of Strawberry Jam are really easy and an awesome addition to a valentine party at your kids school or a birthday party! These are easily flexible and can be turned around to create any cookie. WIth a dash of dried cranberries it gets a tart taste and looks so pretty. Add bits of orange zest and essence and some orange vegetable food colour to make a cookie for Halloween! Add bits of chocolate chips, peppermint barks, heath toffee bits and pllay around with it. Today I added rose essence and bits of rose petals for a refreshing change from the regular Eggless Choco Chip that I normally make for the kids. With some leftover dough I baked hearts and dunked half of each cookie in to melted chocolate. One dough – two cookies…Smart arent I??

INGREDIENTS:

2 1/4 Cup All Purpose Flour.

2 Sticks of Butter at room temperature.

1/2 Cup Powdered Sugar.

1/3 Cup Light Brown Sugar or White Sugar.

1/2 Tsp Baking Powder.

1 Tsp Vanilla Essence.

2 Tsp of Strawberry Jam.

1/4 Tsp Rose Essence. (Optional).

A pinch of salt.

Rose petals fresh/ dried crushed to little bits. (Optional)

PREPARATION:

  • Cream the sugar and the butter on medium speed on a stand mixer using the whip attachment. Once its incorporated add vanilla essence , rose essence and rose bits. You can add a few drops of Vegetable based food coloring. 
  • In a dry container add the flour, baking powder and salt and give it a quick mix with your spoon.
  • Slowly add the flour in to the mixing bowl and beat it in on low speed. Continue and finish all the flour. Loved the little specks of red in the dough!!
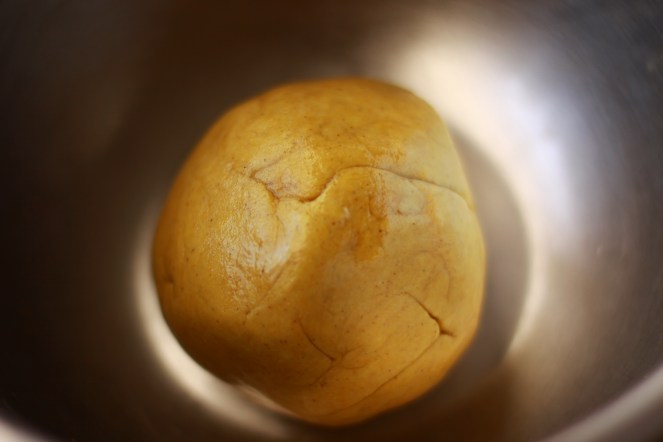
  • Remove from the mixing bowl and using your fingers, knead lightly to form a smooth flat disc. Wrap with cling film and refrigerate for about 30 mins.

IMG_1195

  • Now there are loads of arguments on chilling cookie dough and whether it really adds to the flavour, texture and buttery taste. But I rarely plan ahead for a cookie.
  • When I decide to make a batch of cookies, I just go ahead and make it.  I did have some errands to run before rolling out the dough , so I thought hey why not?
  • Remove the dough from the refrigerator and If you find that its too hard, allow it to rest for a couple minutes until you get your stuff ready.
  • Spread the dough between two sheets of parchment paper and using a rolling pin, roll it in to 1 – 1 1/2 inch thickness.

collage

  • Using a heart shaped cookie cutter, cut out perfect heart cookies and place them 1 inch apart on a lined cookie pan.
  • Take out remaining dough, shape them in to a ball, flatten them out again and re cut more heart shaped cookies. Continue until you exhaust most of the cookie dough. Feel free to sample the remaining dough!!
  • Using the back of a wooden spatula make a small little indentation in the centre of the heart cookie and fill with a small scoop of strawberry jam.
  • Preheat the oven to 325 F and place the cookies in the top rack.
  • Bake for 18 – 20 minutes until the cookies are cooked . Whats that? How to check if they are done?
  • Well, it varies with each type of cookies, but for this one, when you see that the cookie is firm and the ends and the bottom has a beautiful golden colour, its good to go!

CHOCOLATE BETTER HALF COOKIES!!

IMG_1240

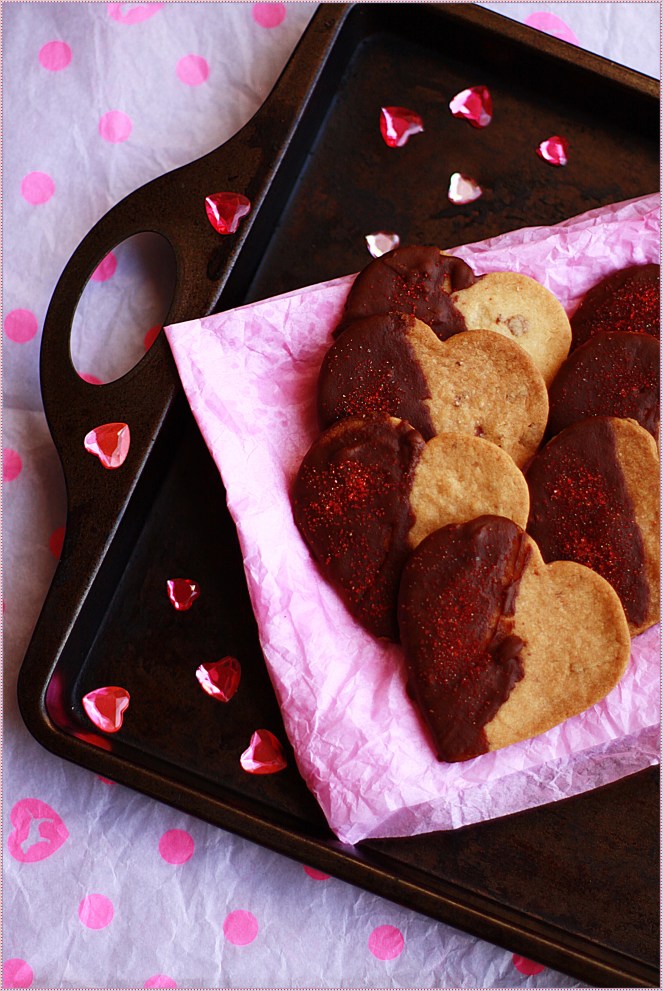
  • I had some of the cookies which I did not fill with Strawberry Jam Heart, so I simply dunked half of the baked cookie into  a bowl of melted chocolate and sprinkled them with red coloured sugar sprinkles….Chocolate Better Half Cookies were soft, crumbly, decadent and extremely delicious!!!
Thai/ Vietnamese Cuisine

Fresh Spring Roll with Marinated Tofu & Veggies served with Peanut Dipping Sauce.

IMG_1147

Fried Spring Rolls and Vegetable Cutlets were an all time favourite appetiser for all of us growing up. Every time we would go to a restaurant, it would be most definitely Vegetable Cutlets with a side of tomato ketchup. As more and more indo chinese restaurants opened up, Fried Spring Rolls would be the instant choice. More recently it has been steaming hot Vegetable Dumplings with a side of sweet spicy tomato dip. I have never actually tried a Fresh Spring Roll until recently and I must say there is no looking back. My husband`s profession takes him to various cities all over the United States where he gets to sample diverse cuisines and try out different dishes. On one such trip he brought back these from a tiny Vietnamese restaurant called Pho Dang, in Winooski Vermont. The spring rolls had rice sticks (vermicelli) cooked to perfection, on a bed of crisp lettuce, and long marinated and grilled tofu, mango all rolled in to one awesome roll. The dip was a peanut soy based served with a garnish of finely chopped peanuts. YUM! I have been playing it on my mind for quite some time now and after seeing many blog posts, and of course based on my own interpretation of the dish, sampled from the restaurants, I decided to make it at home for dinner and I must say it was very wholesome and delicious.

Ingredients for Tofu Marinade:

1 Pack Extra Firm Organic Tofu.

1/4 Cup Dark Soy Sauce.

1 Tsp Sugar.

1/2 Tsp Sriracha or Red Chilli Powder.

1/2 Tsp Garlic Powder.

1/4 Tsp Salt.

Ingredients for Peanut Hoisin Dipping Sauce:

2 Tbsp Oil.

1 Tsp Minced Garlic.

1/3 – 1/2 Cup Water.

1 – 11/2  Tbsp Heaped Sugar.

4 Tbsp Hoisin Sauce.

4 Tbsp Creamy Peanut Butter.

2 Tsp Sriracha or Chilli Garlic Sauce.

Crushed Peanuts to garnish.

INGREDIENTS FOR FRESH SPRING ROLL:

10 Rice Paper Sheets.

1 Package of Rice Vermicelli.

10 large lettuce leaves.

Fresh Mango sliced in to thin long strips.

Fresh Cucumber peeled and sliced long.

Long Marinated Tofu slices. (Extra Firm Tofu)

20 – 25 Mint Leaves.

20 Stems of Cilantro.

PREPARATION:

  • First remove the tofu from the cover and drain all the water. Pat dry and allow to rest on a piece of tissue paper.
  • When completely dry, cut in to long, 1  inch wide strips.
  • Whisk all the ingredients for the marinade until they all come together and transfer to a shallow dish.
  • Place the tofu in the marinade and allow to sit for about 40 mins to 1 hour.

IMG_1124 IMG_1136

  • Use a cast iron skillet or a grill or a tava, grease it a little and pan fry the tofu until its evenly cooked on all sides.
  • Slice the mango in to long pieces.
  • Cook the vermicelli / rice sticks as per instructions. Once done. drain and grease with a little oil. Place on a shallow bowl.
  • Keep your assembly line ready – Rice Paper, Vermicelli, Lettuce Leaves, Grilled Tofu, Sliced Mango, Sliced Cucumber, torn mint leaves and roughly chopped cilantro.
  • Take a large bowl filled with lukewarm water and keep ready.
  • Take a clean dry flat plate. Dip the rice paper in to the water to moisten and place on the plate. It will soften as you assemble the filling.
  • Place the lettuce on the rice paper base, add a little vermicelli over the lettuce, and arrange the mango, tofu, cilantro and mint over the vermicelli.
  • Moisten your hands, and start rolling tightly, tucking in the sides and rolling up until you get a sealed spring roll.
  • Arrange on a clean plate in a way that they don’t stick to each other.
  • Serve with Peanut Hoisin Dipping Sauce.

PEANUT HOISIN DIPPING SAUCE:

  • In a wok add about 2 tsp of oil and when its hot, add the grated/ minced garlic. When the garlic is sauteed well, add the water, sugar, hoisin sauce, creamy peanut butter ( I made my own from here), and Sriracha. Give it a couple quick whisks and remove from the stove.
  • Add a little more water/ soy sauce to adjust the consistency depending on your preference.
  • Garnish with finely chopped peanuts.

IMG_1153

HINTS:

  1. Take care not to serve the fresh spring rolls too close to each other as they may stick to each other and tear.
  2. Any left over marinade sauce can be added to the dipping sauce for additional flavour.
  3. It`s best to be assembled right before serving as it retains its freshness and crunch.
  4. Do not refrigerate as the vermicelli and the rice paper would become chewy.
Rice Varieties.

Hyderabadi Vegetable Dum Biriyani – and not a drop of oil/ghee!!!

070

I have always loved the flavour of Hyderabadi Dum Biriyani which is slow cooked in the dum with the flavours of various layers of rice and marinated vegetables, intermingled with the aroma of cilantro, mint and spices. My neighbour in Bangalore Gayathri always used to make Hyderabadi Vegetable Biriyani and share it with me. On one occasion, when her mom was visiting her, she offered to teach me to make it the elaborate way, with loads of ghee and oil, marinated vegetables etc and the end result was an extremely delicate taste of the biriyani which would explode in to a hundred flavours in the mouth. This is a version made WITHOUT A DROP OF OIL, on requests from many of my readers. Please feel free to add ghee if needed and if you feel that its very dry.

INGREDIENTS:

2 Cups Basmati Rice.

4 Cups Water.

1 Onion diced small.

1 Onion diced in to long slices.

2 Medium Carrots diced.

20 Florets of Cauliflower.

1 Cup French Beans diced.

3/4 Cup Green Peas.

6-8 Green Cardamom Pods.

2 Large Black Cardamom.

15 Cloves.

1 Bay Leaf.

1 1/2 Inch Cinnamon Stick.

1 Tsp Caraway/ Shahi Jeera.

2 Tbsp Fresh Ginger Garlic Paste.

1 Tsp Turmeric Powder.

1 Tbsp Red Chilli Powder.

1 Tbsp Dhania Powder.

1/2 Cup Yoghurt.

1/2 Tsp Rose Water.

1 Cup Tomato Puree.

A few strands of saffron.

1 Tsp Garam Masala.

1/4 Cup Chopped Corriander.

1/4 Cup Chopped Mint.

PREPARATION:

  • Wash the basmati rice a couple times and let it sit for about 30 minutes. Move the rice to a rice cooker and add 3 green cardamom,  one black cardamom, 5 cloves and a 1/2 inch of cinnamon. Cook until 3/4`ths done and set aside. Drain excess water and allow to cool for some time.
  • In a non stick pan add the remaining green cardamoms, black cardamom, clove, cinnamon, caraway seeds and bay leaf. Saute for a couple of minutes and add the onions, carrots, cauliflower, french beans and green peas.
  • Add a little salt and the ginger garlic paste and mix well. Add turmeric powder, red chilli powder and dhania powder.
  • Around the same time, heat a cast iron skillet and spread the long slices of onions on the tava. Keep the flame on medium low and allow to grill/ carmelise.
  • Whisk yoghurt with rose water and saffron. If the consistency is too thick feel free to add a little milk to make it creamy. Set aside.
  • At this time, pour in the tomato puree in to the pan along with 1/2 tsp Garam Masala and mix well.Simmer for about two minutes.
  • Take a large glass bowl or simply use the rice container in the rice cooker.
  • Arrange a layer of rice at the bottom. Over that, arrange half of the cooked vegetables  followed by another layer of rice. Sprinkle half of the remaining 1/2 Tsp garam masala powder, half the coriander leaves, half the mint leaves and half the yogurt mixture. Sprinkle a little of the carmelized onions.
  • Arrange the remaining vegetables followed by the remaining rice.
  • Sprinkle remaining yogurt mixture, mint leaves, corriander leaves and the grilled onions. Cover with a silicon lid and cook in the microwave oven for four to five minutes on HIGH (100%). Else finish up the cooking in the rice cooker for about 7 minutes or so. Please keep checking to make sure that the rice is cooked well enough to be served.
  • Let it stand for five minutes, garnish with more finely chopped cilantro  and then serve.
  • Scoop out vertically down so you can get the rice and the vegetables in one scoop.
  • Hot Hyderabadi Dum Biriyani without a drop of oil is ready to be served with cold Carrot Raita.

081

Naivedhyams/ Festival Offerings. · Sweets

Sweet Poornam Wheat Poli (Wheat flour flatbread stuffed with delicious coconut jaggery filling)

IMG_1093

Poli is a traditional Indian sweet made during many festive occasions. There are basically two varieties of Poornam Poli – one thats stuffed with a coconut jaggery filling and the other with a bengal gram and jaggery filling. Both are extremely delicious and every household have their own way of doing these festive treats.  Traditionally  the outer dough of the Poornam Poli is made with maida and its a slightly laborious process. The maida is mixed with turmeric and a pinch of salt and doused with gingely oil. The traditional poli also requires to be made by flattening the maida on to a greased banana leaf and spreading with the fingers, which are also greased with more gingely oil. Its then “stuffed” with the poornam and spread out again on to the leaf, with more oil. Normally after a session of “poli making” the kitchen are so heavily oiled and get so greasy. It requires a lot of cleaning up after. TOday my version is made more healthier by making the outer dough with Wheat Flour and rolling the stuffing the polis just like you would, a paratha!  If you miss the elasticity of the maida, you can try making them with 50% atta and 50% maida.

INGREDIENTS:

1 Cup Wheat Flour.

A Pinch of Salt.

A pinch of turmeric.

1/2 Cup Warm Water.

2 Tsp Gingely Oil.

1/2 Cup Jaggery.

1/2 Cup Coconut.

1/8 Cup Water.

1/4 Tsp Cardamom Powder.

PREPARATION:

  • Add a pinch of salt, turmeric and the gingely oil and knead the wheat flour with warm water slowly and firmly until you get a soft pliable dough. This is extremely important for the easy spreading of the polis. It should feel soft, and pliable. If you feel its too hard, add a few drops of water and oil and keep kneading until you get the required texture. Spread a layer of oil on the ball and keep covered with a damp cloth.

IMG_1076

  • In a flat heavy bottomed vessel, add the jaggery and water and allow it to melt. When it starts boiling, add the measured grated coconut.
  • Keep stirring until you get a slightly solid consistency – one where you can make a poornam ball. ( This is almost similar to how we make the poornams for the Sweet Kozhukattais.)
  • When its a little cool, make little poornam balls and set aside.
  • Take a large lemon sized ball and make a dent with your thumb. Shape in to a form of a diya and drop a poornam ball inside the depsression. Now close the edges and seal it by twisting the top.

IMG_1086

IMG_1088

  • Dust with a little flour and flatten them  in to round chappathis, like you would do with an aloo paratha.
  • Cook the sweet poornam filled chappathis over a hot tava greasing it with ghee or gingely oil.
  • Sweet Wheat Poli with Coconut Jaggery Poornam is ready for Neivedhyam.
  • It has a lot less oil and fat, and subsitution of wheat flour for all purpose flour makes it all the more healthier.
  • Half the carbs – double the fun!!
  • Sweet Wheat Polis are traditionally made in our household during Pongal.
Sambar / Rasam / Kuzhambu Varieties.

Karivepalai Kuzhambu. ( Curry Leaves roasted , ground and simmered in a tamarind gravy)

Karivepillai Kuzhambu.

This Karivepilai Kuzhambu is a great option on a day when you dont feel like going for simple home cooked satvik food. Many times I take this option on a sunday afternoon for lunch as its filled with pepper and curry leaves, both of which act as a cleanser for the stomach. Teamed with Milagu Jeeraga Rasam and Simple Beans Poriyal, its an awesome sunday lunch option.

INGREDIENTS:

1 1/2 Tsp Urad Dhal

2 Red Chillies.

1 Tsp Black Pepper.

1/2 Cup Curry leaves packed.

2 Cups Tamarind Water.

Asfoetida.

Salt.

To Season:

1 Tsp Bengal Gram.

A few Curry Leaves.

1 Tsp Mustard Seeds.

PREPARATION:

  • Wash the curry leave, pat them dry with a kitchen towel and allow to air dry for a few minutes.
  • Roast the first three ingredients in about a spoon of gingely oil- Red Chillies, Pepper and Urad Dhal on a medium flame until you see them turn light brown and there is a gentle aroma.
  • Add the washed and dried curry leaves and quickly turn down the flame.
  • Pulse the roasted ingredients in the mixer until you get a coarse powder. Set asided.
  • In a kadai, add about 2-3 tbsp of gingely oil and season with bengal gram and curry leaves. Add the tamarind water and the required amount of asfoetida, salt and turmeric powder.
  • Add the pulsed powder and allow to simmer on a medium flame until the raw smell goes and some of the water evaporates and the kuzhambu thickens.
  • When its cooked, dilute about 1/4 cup of water with a spoon of rice flour and mix it well. Add this to the kuzhambu for the thickening of it.
Cakes / Pastries / Cookies/ Bread/Muffins.

Eggless , Fudgy & Low Fat Avocado Chocolate Brownies.

Eggless Low Fat Fudgy Avocado Chocolate Brownies.

“Forget Love, I`d rather fall in chocolate!!!”

Brownies have always been a favourite anytime snack at home.  The little one had never been a great fan of anything sweet, but give her a chocolate brownie, and she loves to have a couple at least. I have tried all kinds of brownies,  The best brownies ever, with a dollop of cream cheese I tried the Scream Cheese Swirl Brownies, and when I had to use up the Ghirardhelli Cocoa Powder, I made the Eggless Ghirardhelli Chocolate Brownie Bites!!! I was on a hunt for a brownie recipe that was eggless and moist yet fudgy. I love my brownies fudgy and moist and chewy on the inside and slightly crusty on the outside. Just Perfect! Pavithra`s version did inspire me a lot here and I came up with this version. Please try them in a small quantity , in your oven with the ingredients that you carry before you try them out for a get together or a party.

INGREDIENTS:

1 Large Avocado or 2 small mashed to a smooth puree.

1 cup All Purpose Flour.

1 1/2 Cup Milk Chocolate Baking Melts.

1/3 Cup Hot Water.

3 Tbsp Butter.

1 Cup Sugar.

1 Tsp Baking Powder.

1/2 Tsp Baking Soda.

1 Tsp Vanilla Extract.

PREPARATION:

  • Mash the avocado to a smooth paste and set aside.
  • Preheat the oven to 350F and prep the brownie pan with grease and parchment paper.
  • Sieve the all purpose flour, baking soda and baking powder and mix them all together.
  • Melt the chocolate chips and butter over low flame in a double boiler.
  • Add the hot water to the avocados and mix them in. Follow up with the melted chocolate, sugar, and vanilla essence.
  • Using a whisk, incorporate them all together and then slowly add in the dry ingredients – all purpose flour, baking soda and baking powder.
  • Take care not to over mix the batter. Pour in to the prepared pan, smooth the surface  and bake for about 25 – 30 minutes.
  • When a toothpick inserted in to the brownie comes out clean, then its time to take it out and allow it to cool for about an hour.
  • This is actually the time when the brownies set and come together.
  • When its well cooled, use a bread knife and cut in to clean squares. If you DO NOT allow them to cool, they dont get sliced in to clean squares. 
  • Serve warm brownies with cold vanilla ice cream and a dollop of chocolate sauce.
Salads/ Recipes for the Calorie Conscious. · Snacks & Tiffin Items

Brown Rice Pidi Kozhukattai (Brown Rice Steamed Dumplings).

IMG_5563

Rice Pidi Kozhukkatais has been an absolute favourite saturday night dinner, all through my childhood.  Those were days when we would never go out all weekend. It would be spent at home with my sisters, catching up on the week`s lessons, cleaning, getting ready for the next week and of course chatting up with each other. We could never ever get enough of talking to one another. There was always something that we had forgotten to share, about an event at school, or that nasty girl who spoke behind our back, or a shocking gossip about a teacher, or the topic we all three always always loved – Music! We could talk about it for hours on end and it would figure all kinds of music forms – Pop, Rock, Carnatic, Classical, Movie Songs, Indipop….there was just so much music all the time around the three of us. I always miss those days of my growing up together with my sisters!!!

These days rice pidi kozhukattais have been a little rare and I have been using other fibre rich or protein rich ingredients as substitutions for rice. I had made a version completely with cracked wheat  and I have another version with Quinoa. Today`s version is with Brown Rice, as its high in fibre ,and minerals like manganese and phosphorus, and low in saturated fat and has a moderate glycemic index.

INGREDIENTS:

1 Cup Brown Rice.

Handful of Cracked Wheat.

A handful Toor dhal.

1 Tsp Urad Dhal.

2 Green Chillies.

2 1/2 Cups of Water.

Seasoning:

Oil.

Mustard

Curry leaves.

2 Red Chillies as per taste.

A few broken cashews.

PREPARATION:

  • Grind the brown rice and the cracked wheat to a coarse gritty texture.
  • Soak the urad dhal, toor dhal and the green chillies in water for about 2-3 hours. The Urad Dhal is mostly a binding agent for bringing the kozhukattais together.
  • Grind the urad dhal, toor dhal and the green chillies using little water, to a smooth paste. I also added a few sprigs of cilantro and some curry leaves.Set aside. Measure out the fluid (apprx 1/2 cup).

IMG_5540

  • To this ground paste add enough water to bring it to 2 1/2 cups measurement. Set aside.
  • Take your favorite kadai and add about 1 Tbsp of coconut oil. When hot, add the ingredients mentioned under “Seasoning” and mix away until they are lightly roasted.
  • Now bring down the flame to a medium low and add the measured water + ground paste which is totally 2 1/2 cups. Mix them all in.
  • Now add sufficient salt and wait until the water just starts to boil.
  • Bring down the heat and slowly add the pulsed brown rice + cracked wheat mixture.
  • Bring down the heat to medium low and with a whisk bring it together until its almost resembling a thick upma.
  • Switch off the flame and allow to cool for a few minutes.
  • When its a little more easy to handle, make little balls by holding them inside your palm and closing your fingers over them so as to fashion them so.
  • Grease idli plates with coconut oil and place the pidi kozhukattais in the depression.

IMG_5552

064

Brisk Breakfast

High Protein Breakfast Bowl – Oats with Chia & Blueberries!

IMG_6444

Some one said ” One should not even attend the end of the world without eating breakfast”!!! Breakfast is really that important meal of the day. Have a great breakfast and somehow even the worst problems really dont feel so bad after all!  A hearty breakfast filled with fruits, protein and carbs really gives the energy for a full day!  I love the super food Chia seeds and almost always add a spoonful or so to my breakfast bowl. Its pretty tasteless and can even pass on as a nutty garnish.  My favourite go to breakfast is the Oats Parfait – A layer of cooked oats, chia seeds soaked in water, and then fruit , walnuts and then some granola if needed. What more can one ask for?  A entire bowl filled with carbs, calcium, protein, omega 3 fatty acids, and more goodness.

What is Chia?

Chia is an edible seed that comes from the desert plant Salvia hispanica, grown in Mexico dating back to Mayan and Aztec cultures. “Chia” means strength, and folklore has it that these cultures used the tiny black and white seeds as an energy booster. That makes sense, as chia seeds are a concentrated food containing healthy omega-3 fatty acids, carbohydrates, protein, fiber, antioxidants, andcalcium. Chia seeds are an unprocessed, whole-grain food that can be absorbed by the body as seeds (unlike flaxseeds). One ounce (about 2 tablespoons) contains 139 calories, 4 grams of protein, 9 grams fat, 12 grams carbohydrates and 11 grams of fiber, plus vitamins and minerals.The mild, nutty flavor of chia seeds makes them easy to add to foods and beverages. They are most often sprinkled on cereal, sauces, vegetables, rice dishes, or yogurt or mixed into drinks and baked goods. They can also be mixed with water and made into a gel. ( Source – WebMD).

INGREDIENTS:

3 Tbsp Traditional Oats.

1 Cup water to cook the oats.

1/4 Cup Milk.

2 Tsp Chia Seeds.

Walnuts.

Raisins as needed.

Granola as needed.

Blueberries.

IMG_6453

PREPARATION:

  • Soak the chia seeds with about 1/4 cup of water for about 10 minutes. The chia seeds soak up the water and get gel like.
  • Take a clean sauce pan and add the oats. Pour in the required amount of oats and cook as per instructions. Add the milk and bring to desired consistency.
  • Pour in to a bowl.
  • Add the gelled chia seeds.
  • Add a dash of blue berries that’s been washed and cleaned.
  • Garnish with walnuts or granola for some crunch.
  • Enjoy your high protein Breakfast Parfait Bowl – Yes its perfect!!!!

HINTS:

Spin around the toppings every other day for a different breakfast bowl. Add raisins, granola. strawberries, chia seeds, flax seeds, pistachios, mandarin oranges, grapes, cereal, rice krispies, dates etc.

Naivedhyams/ Festival Offerings. · Sweets

Motichur Ladoo – Boondhi Ladoo Simplified!

Motichur Ladoo.
Motichur Ladoo.

The very first time that I tried this ladoo was when I got a hamper for New Year`s , from a client organisation, while I was working with ICICI Bank. The ladoo had tiny little miniscule pearls all held together with the gooeyness of sugar and ghee to make one heavenly ball of niceness!  Another time, I tasted these ladoos when my brother in law brought a large pack from Kanpur. This version was redolent with the aroma of ghee and the centre was so smooth and goeey with almost no “boondhis”!  My daughter S fell for them and had been pestering me to make them ever since.  When I actually started looking for inspiration on the internet, I realised that Tarla Dalal`s version was pretty much standard and all other version were inspired by hers.  As we do not have the fine Boondhi Ladle that is required for this version, Vah Chef suggests that you sprinkle some hot water so as to crumble it down and then shape them in to ladoos. This version is much more forgiving than the Traditional Boondhi ladoo which requires a certain discipline in terms of temperature of the sugar syrup, consistency of the syrup and of course fashioning the ladoos ! Try Motichur Ladoos this Diwali and you`ll love it!

INGREDIENTS:

For the Boondhi Batter:

1 1/2 Cup of Besan sifted.

1 1/2 Tbsp FIne Rava sifted.

A pinch of Baking Soda.

A pinch of orange food colour.

For the Sugar Syrup:

1 1/4 Cup Sugar.

1 1/2 Cup Water.

Rose Essence.

A pinch of orange food color.

1 Tsp Cardamom Powder.

For the Garnish:

Almond Slivers.

Saffron Strands.

PREPARATION:

  • In a dry bowl combine the sifted besan, rava, baking powder and the orange food colour and add about a cup of water to get the desired consistency.
  • The batter should not be runny or too tight. Set aside.
Boondhi Batter.
Boondhi Batter.
  • For the sugar syrup add sugar and water to a heavy bottomed pan and allow to boil. When it comes to a boil, keep an eye on it stirring every few minutes until it reaches one string consistency.
  • TO check for ONE STRING  consistency, if the syrup between your index finger and thumb stretches to form a string, you`ve reached the desired consistency.
  • Add rose essence, almond slivers and cardamom powder and mix it in. Keep aside.
  • Start making the boondhis by pouring a ladle full of the boondhi batter on to a perforated ladle and press it in to the hot oil.
  • Keep the flame high and make sure to remove the fried boondhi balls before they get too crisp. IF the balls become crisp, then it alters the texture of the motichur ladoos.
  • Dunk them all in to the warm sugar syrup and mix it well to coat the boondhi balls.
  • Wipe the base of the perforated ladle once its been used to make the boondhis  and then re-use.
  • Continue and complete all the boondhis and then add this to the warm sugar syrup and mix well.

ASSEMBLING THE LADOOS:

  • Boil about 3 tbsp of water in a sauce pan and keep it hot.
  • By now the boondhis would have absorbed all the sugar syrup and be not too firm.
  • Add  all the boondhis in to a mixer or food processor , add the boiling water and give it a quick pulse.
  • Transfer the crushed boondhis to a plate and start making ladoos.
  • Fashion ladoos and garnish with almond slivers.
  • Motichur Ladoo is ready and is best eaten warm!
  • Happy Deepavali wishes to one and all.
Side Dishes for Rotis/Dosas/ Naan.

Restaurant Style Malai Kofta ( Fried Vegetable Balls in Creamy Sauce)

Restaurant Style Malai Kofta.

Malai Kofta is a rich mughlai dish which consists of panneer/vegetable balls floating in a tomato cashew based gravy. It`s garnished with heavy cream/ malai and served with Jeera Rice, Naan, or Parathas. My older daughter S loves Malai Koftas from restaurants and would never ever give it a pass. Comfort food on weekend nights are almost always Malai Koftas with steaming hot Peas Pulav or TIranga Pulav. This is a combination of methods and madness from many sources which has been adapted to suit my taste buds. The panneer from this recipe has been omitted and I have used simply boiled potatoes as I was out of panneer completely.

INGREDIENTS FOR THE KOFTA:

3/4 Cup boiled potatoes.

1/2 Cup boiled carrots, beans, peas.

1/4 Cup Bread Crumbs. ( I simply pulsed one loaf in the mixer)

2 Tsp Dhania Powder.

1 Tsp Cumin Powder.

3/4 Tsp Red Chilli Powder.

10 Cashews broken in to little pieces.

Finely chopped cilantro.

Salt to taste.

INGREDIENTS FOR MALAI SAUCE:

1 Onion chopped fine.

3 Tomatoes grated or chopped fine.

3/4 Tsp Freshly Grated Ginger.

3/4 Tsp Freshly Grated Garlic.

A pinch of turmeric.

1/2 Tsp Garam Masala.

2 Tsp Dhania Powder.

1 Tsp Cumin Powder.

3/4 Tsp Red Chilli Powder.

10 Cashewnuts powdered.

1/4 Cup Half & Half or Heavy Cream or Malai.

1 Tsp Kasoori Methi.

Salt to taste.

1/4 Tsp Garam Masala.

2 Tsp OIl.

1 Tsp Somph.

PREPARATION OF KOFTA BALLS:

  • Boil vegetables like peas, carrots and beans in the pressure cooker with very minimal water and a little salt. I closed the veggies with a lid and placed the potatoes on top of the plate with just sprinkling water.  The steam is sufficient to cook the veggies.
  • Once cooled, peel the potatoes and mash them seperately. Collect all the remaining boiled veggies – carrots, peas, beans etc and put it inside a thin cotton cloth or a muslin and squeeze out all the water until dry. Collect the water to use in the gravy.
  • To the bowl of mashed potatoes, add the boiled veggies and all the other ingredients needed for Koftas and mash and mix in to a ball.
  • Divide in to little balls large or small enough to fit inside your appam pan.  Alternately you could also deep fry them but I prefer using the Aappam Pan for frying the same.
Kofta Balls fried in the Abelskiver Pan.
  • Pour oil in to the appam depressions and allow to heat.
  • Shallow fry all the kofta balls on medium heat until they are done on all sides and remove with a spoon on to a dry tissue towel.
  • Alternately, you could roll the kofta balls in cornflour or bread crumbs and deep fry in oil.
Koftas!
Koftas!

PREPARATION OF MALAI SAUCE:

  • In a large heavy bottomed kadai, add about 2 tsp of oil. Season with a pinch of jeera and add the finely chopped onions.
  • Add a pinch of salt and saute the onions until brown. The slow browning of the onions are very important to the taste of the sauce.
  • Now add the freshly grated ginger and garlic and allow to saute.
  • Add chopped tomatoes, turmeric powder, red chilli powder, dhania powder, and cumin powder and salt and saute until all the water is evaporated and its well cooked and mushy.
  • If at this point you have inadvertently increased the heat of the stove and you feel that its slightly dry, add a couple spoonfulls of water.
  • Set aside to cool and puree to a smooth consistency.
  • In the same kadai, add more oil, season with shah jeera or somph and add the ground paste.
  • At this point, make sure that the flame is on medium low as the paste might start splattering all around.
  • Add about 1 cup of water, heavy cream / half & half and the ground cashew powder and swirl in to mix.
  • When the sauce bubbles slightly switch off heat and add crushed kasoori methi.
  • When its time to serve , drop the fried and crisp kofta balls in to the Malai sauce, garnished with chopped cilantro and serve.

NOTES:

The Kofta Balls can be made with any available ingredients on hand – Panneer, peas, carrots, beans, quinoa etc. The proportion also can be tweaked around, as long as you are able to fashion it in to a smooth ball.

The Malai sauce has to be ground to a smooth consistency, and not so much like in the picture. My daughter likes the texture and thats the reason my version is not ground all the way.