Sambar / Rasam / Kuzhambu Varieties.

Milagu Jeeraga Rasam (Tomato broth simmered with roasted cummin,pepper and lentils.)

Milagu Jeeraga Rasam - Pathya Samayal.

Milagu Jeeraga Rasam is also part of the comfort food series…On a cold day to have a dose of steaming pepper rasam along with piping hot rice and your favorite side of vegetable like vendekkai kari, Amma`s Alu Fry or “kootu” is something I can never trade anything else for!!! Whenever its the rainy season and we come down with a cold or cough, amma or Madurai amma would make piping hot rasam and we would feel fussed. It`s also “Pathya Samayal” as its given to people when are they not keeping well, to purify the body, build immunity and to recuperate. The flavor of the “rasam” is enhanced when you add a drop of ghee – what else can you call that aroma and taste – Divine!!!

This morning my husband was not keeping too well, complained of cold and sore throat and I thought this was a good day to make comfort food. Its lightly flavored with the sourness of the tomatoes and the pepper and cumin gives it that extra kick that enhances the warmth around the throat. Here it is, from my kitchen to yours…

INGREDIENTS:

1 1/2 cups of tamarind water extracted from a lime size tamarind .

1/4 cup of cooked toor dhal. (Optional)
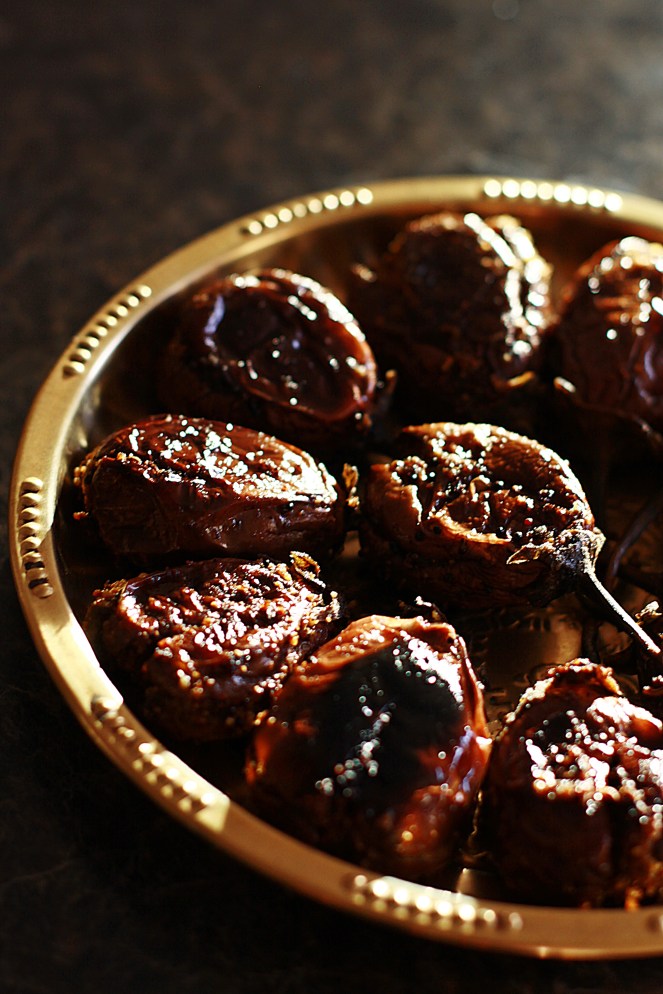
1 Tomato.

Turmeric

Hing

Salt to taste

Curry Leaves.

Roast Dry:

Dry Roasted Ingredients.

1 1/2 spoons of pepper.

1 spoon of jeera (cumin)

3/4 spoon of Bengal Gram

5 curry leaves.

Seasoning:

Mustard, Vepampoo and curry leaves.

PREPARATION:

  • In the mixer, grind the dry roasted ingredients to a powder and THEN add one tomato chopped coarsely with a little tamarind water and grind to a paste.
  • In the copper bottomed vessel, add the ground paste and the remaining tamarind water.
  • Add salt, hing. curry leaves and turmeric and allow to boil on a medium low flame.
  • When the raw smell is gone and the liquid is reduced by 1/3, dilute the cooked toor dhal with 1/2-3/4 cup of water and pour it in.
  • If you are making this for a person who has an upset stomach, you may skip the toor dhal and simply dilute it with 1/2 cup of plain water.
  • When it begings to boil, switch off the stove and add chopped corriander.
  • Season in ghee with mustard, vepampoo and curry leaves.
  • The Vepampoo or the Neem Flower is believed to aid in digestion and stimulate the liver and also prevent many kinds of cancers, so I thought it would be a good idea to add some more nutrition and build immunity in to our systems.

Sending  piping hot pots of  Pepper Jeera Rasam to “Think Spice – Think Pepper” event hosted by Divya Vikram of Dil Se and started by Sunita.

p1000059


Sambar / Rasam / Kuzhambu Varieties.

Vengaya VethalKuzhambu (Onions fried and simmered in tamarind gravy)

Vengaya Vethalkuzhambu served with rice.

My mum makes the most fragrant, yummy, delicious,mouth watering Vengaya Vethalkuzhambu you ever ate!!! It always used to be a delicacy my sister and me would get indulged in, over the weekends…Weekends would always be spending long hours on things that we wouod never get time for during the frenzied weekdays – amma smothering our scalps with gently warmed gingely oil, cleaning the window sills chatting about what happened in school and college over the week, and amma listening to us and making fragrant Vengaya vethalkuzhambu and alu fry. We would have our beauty baths with shikhakai traditionally ground my Madurai amma and get so hungry that we would be ravenous…A slow filling lunch consisting of this kuzhambu, alu fry, thakkali rasam, vadam and thayir sadam with vepallaikatti…Man, my day was made!!!
It`s now a huge favorite of my husband`s. It`s one of those comfort feel good gravies that make you content on a cold lazy sunday afternoon…Here it is, for all of you to try and test…
This is also my entry for FIC-Orange which is the brainchild of Harini of Sunshinemomsblog and hosted by Aparna of MydiverseKitchens.

INGREDIENTS:

1 1/2 cups of Tamarind Juice extracted from a lime sized tamarind ball.

1 Medium onion chopped or 20 numbers small onions or 10 numbers shallots.

1 spoon of Vathal (sundaikkai or manathangalikkai) (this is optional)

1 spoon heaped Sambar Powder.

My amma`s sambar powder...

1 spoon salt
A dash of Turmeric.

A pinch of hing.

3 spoons of Oil.

A dash of mustard and curry leaves for seasoning.

1 spoon of rice flour dissolved in 4  spoons of water.

PREPARATION:

  • Take a heavy bottomed kadai or copper bottomed vessel and pour in 3 spoons of oil. When the oil starts to smoke, reduce the flame and pop in the mustard, curry leaves and immediately the chopped onions or the shallots.
  • Allow to saute in the oil for sometime until they get a little brown and then add the vathals which are pretty dispensable in this version of the kuzhambu. You can also make this kuzhambu completely omitting the vathal.
  • When well roasted, add the extracted tamarind juice, hing, turmeric, salt, and sambar powder and allow to simmer for 25 mins or so until it reduces to a thicker consistency.
  • At the very end, add the rice flour dissolved in the water, to this thick reduction to loosen it a bit, so it comes to a pouring consistency.
  • Garnish with corriander leaves and serve HOT over rice with Alu Fry.
Brisk Breakfast · Kid Friendly Recipes. · Snacks & Tiffin Items

Quick Mango Lemon Sevai – Rice sticks flavoured with mango & lemon with temperings.

Quick Mango Lemon Sevai

Rice sticks are definitely a quick and easy substitution for its fresher variant we do back home – “Sevai”….Sevai is when grind rice that has been soaked, cook it over a stove top to make it thicker, shape it in to dumplings and steam them in the cooker and then extrude the cooked rice dumplings in the form of noodles with the help of a press. This is then flavoured with lemon, tomato, pulikachal (tamarind paste), coconut or some times eaten as they are!!! Many of us, when we were kids, liked the unprocessed sevai, smelling of a trace of hing, and coconut oil….YUM!!!

When I was a school kid, sevai was an elaborate event planned for every alternate saturday afternoons. Madurai amma would supervise the grinding of the rice batter by my mami and amma would chip in, after half day`s work at the bank, by cooking the 4 cups of rice batter on the stove top. We lived in a lovely large joint family of 8, so there would definitely be no holds barred. Then all the children of the family would be called for shaping the cooked balls in to rough round dumplings to steam in the cooker in multiple rounds. THEN, all of us would take turns in extruding the sevai from the iron press – This was one with a huge tripod stand, and a big receptacle for the dumpling to sit in and a large handle to push in the press, to extrude out the steaming hot sevai. This pressing would have to be finished when the dumplings are still hot, so Madurai amma would be watchfully overseeing us, to make sure that there is no small talk in the middle of the proceedings! Then she would divide them in to 4 portions – The bigger portion would be for the spicy tamarind sevai, one portion for the lemon sevai,  one for the coconut sevai and the plain tiny portion for my little baby cousin!!!  The fruit of the 3 hours labour would vanish when we all sit down and partake of  our favourite sevai for tiffin as well as for dinner!!!

When my daughter S, visited Madras last year, and we were all helping out with the usual Sevai routine, she was thrilled to see white steaming noodle ribbons getting pressed out and she exclaimed in glee!!! Madurai amma happily doled out a huge portion to her which she ate in minutes with hundreds of tiny pieces strewn on the dining table, expectantly asking for more…S loved it so much, she offered to press the sevai to help us with it…Madurai amma was proud of her great grand-daughter…She had dutifully wanted to chip in to the family tradition!!!

Knowing that my daughter loves Sevai,  I can only give in to her request, which are pretty much last minute, by using 777 Dhideer Sevai or Rice Sticks that are available in the Asian Grocers. Both have to be cooked in boiling water for 5 mins, but I indulge by adding a few drops of coconut oil, so that the rice sticks are fragrant and dont stick to one another. Once they are cooked, drain them on to a collander, and allow to stay for ten minutes. Take the precaution to  keep the collander closed so that the rice sticks are not robbed of their moisture.

Today, I wanted to try lemon sevai, but decided to add Mango also to it….My friend Rekha, had once made Mango Rice and so I adapted it to suit my daughter`s palate!!! This is an excellent dish to take when you have long drives ahead of you. Easy to eat, as its non-fussy, very tasty and requires minimal time in the kitchen!! Also great for potlucks and parties and kids always love them!!!

INGREDIENTS:

1 pack of rice sticks.

1 Mango freshly grated.

Juice from 1/2  lemon.

Turmeric Powder.

1 Onion chopped.

Salt to taste.

2 Green Chillis chopped.

Cilantro to garnish.

Seasoning:

Oil. Mustard, Channa Dal, Curry Leaves, peanuts.

PREPARATION:

  • Take a wide mouthed kadai and add 3 spoons of oil. When warm, add mustard, bengal gram, peanuts, green chillis and curry leaves in that order.
  • When the mustard splutters and the dals are a little brown, add the chopped onions and saute well till they are pinkish brown.
  • Add turmeric and salt and grated mango and simmer the stove to very low.
  • Mix in all the ingredients carefully so as not to break the soft grated mango pieces.
  • Swirl in the cooked rice sticks and mix well with the cooked ingredients after adding adequate salt.
  • Finally squeeze juice from half a lemon and garnish with chopped corriander leaves.
  • You can also serve HOT with coconut flakes garnish.

This delicious tangy Mango Sevai makes an excellent easy Breakfast to be sent to Divya`s Show Me Your Breakfast.

Easy LunchBox Series. · Kid Friendly Recipes.

Instant Healthy Bread Pizza & Masala Bread Chat

My daughter has always been a poor eater all the way. And like any another kid, getting her to have her daily dose of vegetables is a pretty herculean task. I some times wonder how big chunks of pasta and pizza can get past her oesophagus in a matter of seconds, but rasam sadam and keerai always seems to get stuck some where midway!!! But, as is the dilemma of other moms, I have to invent creative little dinners for her to eat, on the other hand, make sure that she does not lose her veggie spread . Yesterday I had to create a quick fix one for daughter and one for the dear dad for a Valentine Day Pre Party snack!!! They both enjoyed it and I did too…

INSTANT BREAD PIZZA:


Instant Bread Pizza


INGREDIENTS:

1/2 cup The prepared Vegetable Topping.

Tomato Ketchup.

Salt to sprinkle.

1/4 cup part skim mozzarella cheese grated.

Bhujiya to sprinkle

ASSEMBLY:

  • Take a single slice of bread either slightly toasted or plain. Start by smearing a single layer of tomato ketchup. Alternatively you could use Marinara sauce, but the ketchup does not make the bread soggy and allows whatever is placed about it to stay in place.
  • Scoop a big chunk of the prepared topping and flatten it over the layer of ketchup.
  • Add a small dash of the bhujiya and top over that with mozzarella cheese.
  • Pop it for just 30 seconds in the microwave and serve it to your child and enjoy the smiles and praises you get right there!!!
  • Mine said “Mommy, you are the best”!!!…and my day was made!!!

Flagging off this post to The Bread Mania – by Bayleaf.

———————————————————————————————————————————————————————————–

QUICK BREAD CHAT:


Quick Bread Chat


INGREDIENTS:

1/2 cup of prepared vegetable topping.

Tomato Ketchup.

Sweet Tamarind Chutney

Pudina Chutney.

Salt to sprinkle.

A spoon of chopped onions to sprinkle.

Corriander to garnish.

ASSEMBLY:

  • Take a single slice of lightly toasted or plain bread. Spread over it, a thin layer of tomato ketchup.
  • Scoop the vegetable filling and flatten. Add a dash of sweet tamarind chutney and pudina chutney.
  • Add a garnish of bhujiya, raw onions and chopped corriander.
  • Serve as it is – Almost felt to me like a quick chat snack!!!..and smelt like one too…

The chunky topping is a combination of the following:

3 Medium Potatoes  cooked and mashes.

1/2 Onion chopped.

1/4 cup Peas

1/4 cup beans

1/4 cup carrots.

1 spoon of salt

1/4 spoon of amchur.

1/4 spoon of dhania powder.

1/4 spoon of red chilli powder.

Corriander to garnish.

Pinch of turmeric.

Jeera to season.

PREPARATION:

  • In a kadai, add oil and when warm add a pinch of jeera and the onions. Saute till they turn pinkish brown.
  • Add the carrots, mashed potatoes, peas and beans and stir in turmeric and salt.
  • Drop in the powders – amchur, red chilli powder, dhania powder and incorporate them in to the mixture.
  • When nicely cooked, switch off and allow to cool. Garnish with chopped corriander.
  • This cold be a base for any filling – Stuffed Capsicum, Stuffed Tomatoes, Vegetable Puffs, sandwiches etc.
Sweets

Microwave 10 Minute Apple Payasam (Apple Kheer)

Quick Apple Payasam.

When I saw Jayasree`s posting announcing the Microwave Easy Cooking Event – Puddings, I really got thinking as to the kind of recipe I had to submit for the same.  Instantly, my eyes fell on the ripe apples that I had bought at a farmer`s market this weekend…Incidentally, I also had apple butter, that I had purchased from “My Grandpa`s Farm” at Katy Trail, Augusta, MO. So I decided on quick fix microwaved version of my Apple Payasam. An apple a day keeps the doctor away is an old adage…but many times when I think back, I appreciate the truth behind such a saying and find that there are scientific evidences  for this claim. Apples promotes digestion, cleans and strengthens gums, reduces the risk of certain types of cancer, lowers cholestrol and detoxifies the body. With all these inputs, lets proceed to Apple Kingdom!!!

INGREDIENTS:

1 ripe apple chopped in to pieces.

2 spoons Apple Butter/Apple Sauce.

3/4 cup 2% Reduced Fat Milk.

1/4 cup Condensed Milk.

1/2 cup Brown Sugar.

2 spoons Coconut Milk or Heavy Cream.

Cashews

Saffron Strands dissolved in milk.

A pinch of Cardamom

PREPARATION:

  • Pop the chopped apples in the microwave on HIGH for 3 mins and allow to cool.
  • Grind the apples with 2 spoons of coconut milk or heavy cream.
  • Add this ground apple puree to a large microwave safe mixing bowl.
  • From the 3/4 cup of milk, draw out a little to soak the saffron strands.
  • Add apple butter, milk, condensed milk,saffron milk and sugar to the pureed apples in the bowl and mix well.
  • Microwave on HIGH for ten minutes. After 7 mins, remove from microwave and add powdered cardamom.
  • Replace the bowl back in to the microwave and complete the remaining 3 minutes.
  • The milk should have slightly thickened to a “kheer” consistency. Depending on the make of the microwave, the capacity, power supply and the size of the container, this time could vary by about 2 mins ahead or after.
  • On personal preference, I like my kheer a little thick, so If you still want a little more thickness, pop it in the microwave for a couple mins more.
  • In a little glass dish, add 2 spoons of ghee and cashews and microwave it on HIGH for 1 minute. When its roasted well emitting fragrant aroma, add this to the kheer.
  • Sprinkle more saffron strands for a pretty garnish.
  • Serve HOT or CHILLED!!!

Sending this chilled bowl of Apple Kheer to the Microwave Easy Cooking Event – Puddings hosted by Jayasree of Kailas Kitchens

and Srivalli of Cooking4allseasons. meclogo_pud

Rice Varieties.

Simple Peas Pulav. (Rice pilaf with spices and peas)

Simple Peas Pulav
Simple Peas Pulav

This simple recipe was an inspiration to me from Ritu…who makes this in a dash. Its a rice that can be made in literally a dash…Its wholesome, light and can be had on those days when you are really fed up of spicy masalas and heavily greasy dishes. The only suggestion is that this entree wholly depends on the lightness, flavour and aroma of the basmati rice, and the best one that brings out the covert essence of this simple delicacy is the Daawat Basmati Rice. No other basmati rice, is so aromatic in my opinion. I reserve the Daawat for special occasions and on other days use the other brand.

Here`s the minimalistic list of ingredients…and the modus operandi for this easy  entree`.

INGREDIENTS:

2 cups basmati rice

1 cup peas

3 Green Chillis slit

2 tsp Coconut Milk

Chopped Cliantro to garnish.

Seasoning:

2 tsp Jeera

1 inch cinnamon

2 cloves.

1 star anise

2 bay leaves

curry leaves

dsc00072

PREPARATION:

  • Measure out 2 cups of Daawat basmati rice and cook in the rice cooker with 31/2-4 cups of water. Add 2 tsp of coconut milk and a spoon of oil  to the  rice in the cooker, to bring out the richness. Optionally, you may skip this part, if you are watching your calories.
  • When rice is cooked, spread it on a  flat plate and allow to cool to avoid it from getting broken while stirring.
  • Take a flat bottomed pan, add 2 spoons of  ghee/oil and add the seasoning ingredients one by one, all the while stirring it in so the oil soaks up the flavors of the spices.
  • Add the slit green chillis and curry leaves and pour in the fresh peas.
  • With a spatula, mix in the peas, add salt  and allow to cook for 3-4 mins on a medium flame.
  • Finally, add the cooked rice, salt and  and mix well.
  • Garnish with chopped cilantro and a dash of lime juice.
Poriyals / Kootu Varieties. · Side Dishes for Rotis/Dosas/ Naan.

Quick Cauliflower subzi.

Cauliflowers are always a welcome addition to any dish I make as cauliflowers are an excellent source of Vitamin C and dietary fiber. I am a fiber freak and try to sneak in this element of our daily requirement in any dish I create. I also have this habit of immediately cleaning with salt water, drying and storing the florets in an air tight container, so I can scoop them and add them in to any dish I am making for the day. Cauliflowers are an excellent addition to any dry subzi preparation, mixed rices, bajjis, fillings and gravies. This is one of my entry for JFI Cauliflower hosted by Paajaka Recipes.

Cauliflower Subzi.
Cauliflower Subzi.

logo_jfi1

This is a quick and simple everyday recipe, known for its simplistic presentation and flavourful taste. A handful of peas could also be thrown in for added nutrition. It`s all about innovation in everyday cooking right???

INGREDIENTS:

Cauliflower:                 2 cups. (cleaned and chopped in to florets)

Salt

Besan                              1 spoon

Seasoning:

Mustard, Broken Urad Dhal, Curry Leaves, Hing.

Roast in Oil and Powder:

Toor Dhal           – 2 spoons

Bengal Gram     – 2 spoons

Dhania                 –  2 spoons

Pottu Kadalai   –  1 spoon

Red Chillis         – 5

Hing

Curry Leaves

PREPARATION:

  • Before you start, pop the cauliflower in to the microwave for 3 minutes so its almost halfway cooked. There is no need to add water, as the inherent water content in the cauliflower helps it to cook.
  • Place the tava in the stove, pour a spoon of oil,season with mustard, urad dhal, curry leaves and hing and immediately add the cauliflower.
  • Add turneric and salt according to taste and allow to cook for 5 mins or so until the raw smell is gone.
  • Add the ground powder, sprinkle besan  and serve garnished with cilantro.
  • This subzi is quick and can be coupled with roti or rice. For added nutrition and colour, pop in peas or lilva beans.
Poriyals / Kootu Varieties.

Stuffed Yennai Kathirikkai – (Eggplant stuffed with ground masala and slow roasted in oil)


img_5133Stuffed Brinjal is a delicacy that has a hundred different methods of preparation – influenced by the culture and changes over the times. My mother in law is an expert in this delicacy and she would make it often when we visited home in Srirangam. My husband loves eggplants and specially this particular dish and relishes it ,when its lovingly made by his  mother.At his request, I learnt to make this dish from my mother in law. Over times, on account of lavish use of oil, I have concocted my own way of simplifying this dish to accommodate both counts of flavor and health. There are a number of little tips that are important for this delicacy to turn out the way its supposed to be presented. Care should be taken to buy fresh, tender, small  brinjals, and prepare it in its freshest form, to minimize the effort involved as well as the oil used in its preparation.Most of the cooking is finished in the microwave oven, so that saves a lot of time, makes it a lot more simpler, and reduces the oil used. My recent addition of the Calphalon Sear Pan with its super wide base and sear bottom halves the cooking time and makes it fuss free.

INGREDIENTS: 15 – 18 tender and fresh Brinjals.

Salt

Curry Leaves

Hing

Roast in oil:

4 Tsp Dhania

2 Tsp  Bengal Gram.

1 Tsp Toor Dhal

1 Tsp Pottu Kadalai  .

1 Tsp Peanuts.

6 – 7  Red Chillis

1/2 Tsp Salt

1 Tbsp Coconut

5- 7 Curry Leaves

Hing

PREPARATION:

  • Clean the brinjals, dry them and slit them in horizontally and vertically until you just reach the stalk.
  • Roast the captioned ingredients in oil and powder them finely in a mixer. The ground powder already has salt which will help to flavor the brinjals.
  • Spray the eggplants with oil spray/ (spread gingely oil ) and sprinkle salt over them.
  • When the  brinjals are cooled, stuff the powder inside the brinjals, and keep them closed again as if they were whole. Since they are sprayed with oil, the stuffing will stick to the sides of the brinjals.
  • Place inside a greased cooker and cook on HIGH for one whistle.

img_5125

  • Take a wide mouthed pan, add oil, and season with mustard and curry leaves and slowly place the stuffed brinjals one by one,  in to the pan.img_5127
  • Cover and cook on low flame for about twenty minutes. Keep adding a spoon or two of oil, if you think its getting dry.
  • If needed sprinkle a few drops of water and cook until the brinjals are soft and cooked to perfection.
  • When one side of the brinjal gets seared, tip them over with a spoon so they cook uniformly.
  • When done switch off stove and serve HOT with Mango Kuzhambu or Chinna Vengaya Vathal Kuzhambu. 
  • IMG_1373
Snacks & Tiffin Items

Healthy Adai with oats and flax.

“Adai” is one of the most nutritious tiffin items loaded with nutrition and health. Traditionally, in our homes, adai is an come-home-after-school evening snack. But many days, its a filling dinner. Adai is a thick crepe like entree, serves with Avial in tamil nadu and other times with Idly Podi or tomato thokku. Its basically made with rice, bengal gram and toor dhal, but in the process of making it more healthier, I also add oats, flax, spinach, cabbage etc, to boost on the fibre intake. Many times, when I take stock of the daily food intake, what I miss at the most, is Fibre.

Fibre rich foods keeps the digestive system in good working order helps prevent a lot of lifestyle driven dieseases, and is packed with protiens and minerals. Its also important that one gradually increases the fibre intake and should be followed by a substantial increase in fluid intake, in order to assist the body to assimilate the fibre consumed.

Adai can be rehashed to include onions, or minus onions to include cabbage, or for those who find the aroma of cooked cabbage unagreeable, corriander and spinach, brocolli and collards etc. I also add two spoons of flax powder, which acts as a catalyst in increasing the fibre, but does not alter the taste even a wee bit.

This is a version with Oats, flax and onions.

Onion,Oats and flax Adai with Tomato Thokku.

INGREDIENTS:

Idli Rice/Boiled Rice          – 1 cup.

Bengal Gram                           – 1/2 cup.

Toor Dhal                                 – 1/2 cup.

Red Chillis                                 – 6 or 7.

Curry Leaves                           – 6 or 7.

Oats Old fashioned                – 1/2 cup

Flax Seed Powder                   – 2 tsp.

Salt                                                – 1 and 1/2 tsp – 2tsp accd to taste

Corriander                                  – 1/4 cup.

Hing                                               – A pinch.

Onions chopped                       – 1.

PREPARATION:

  • Soak the boiled rice,  and the dhals seperately and to this add the seven red chillis; Allow to soak for 3 hours. Add the oats to soak for ten minutes only.
  • Grind the rice, dhals, oats,red chillis, salt, hing, curry leaves and corriander to a coarse batter. The batter should be almost 80% ground, but not to a smooth paste. Do not make the batter watery – grind the batter with around 1/2 cup of water.
  • Keep the batter ready and add some  more chopped curry leaves for added flavour.
  • If the batter is a little too thick, feel free to add a little water to make it in to a consistency easy to make in to a dosa form.
  • Keep the tava on the stove and when hot, grease with gingely oil.
  • Pour the batter on the tava, and circle to form a thick dosa. Make a little hole in the middle of the adai, with your dosa turner and pour some oil to allow uniform cooking. We do this, as the adai is packed with pulses, which needs to be cooked well.
  • Immediately add the chopped onion pieces.
  • When done on one side, turn over to cook on the other. Keep the stove on a medium flame.
  • Serve HOT with Avial or Tomato Thokku.

HINT:

  • Vary the taste of the adai to include onions when you grind to get a light flavourful onion adai.
  • Cook the adai with chopped cabbage for a healthy alternative.
  • You can also soak soya beans, green gram dhals etc to vary the nutrition and taste.

Sending piping hot adais to Meetha`s Monthly Mingle – Ravishing Rice.

Naivedhyams/ Festival Offerings.

Ribbon Pakoda – Any time snack.

IMG_5598

Ahhh…the most loved anytime snack  – the ribbon pakoda is a family favourite. Ribbon Pakodas are an inclusion to all festivals and occasions  Those days Madurai amma would make a whole large aluminum tin, full of this delicious crunchy snack. Somehow, all of us cousins would invent reasons to visit the kitchen frequently and be extremely accommodating to the elders if they wanted us to get pickle or salt from the kitchen as it pronounced a chance to snack on the pakodas with a rock solid alibi!!!

These days, as is the family tradition, I also include it as a part of the “Bakshanam” for any festival, specially Deepavali. It`s a great snack to have on long drives or simply when the family gets together for a movie or a chat…My daughter loves it a lot, and I am sure you would too…

INGREDIENTS:

2 Cups Store Bought Rice Flour, sieved

1 Cup Besan, sieved.

2 Tsp  Urad Flour.

1 and 3/4 Cups (approx) Water.

1 Heaped Tsp Chilli Powder.

2 Tsp Salt.

1/4 Tsp Hing .

1.5  Tbsp Butter.

PREPARATION:

  • Take a heavy flat bottomed vessel and pour in canola or refined oil and switch on the stove on medium low.
  • In a mixing bowl, add the butter, hing, red chilli powder and  salt and cream/mix  it together with your hands. This is the base of this snack so make sure that its creamed and mixed well.
  • If you overdo the butter, it gets too greasy that it does not get pressed out as ribbons. They would all fall out in little pieces…So more is not always good!
  • Measure out the flours and add them to the bowl of creamed spices. Mix it in dry for a couple seconds.
  • Add the water little by little and knead the dough in to a soft homogenous ball.
  • The ball should slightly soft and  moist.
  • Dole out a big piece on to the hand press and when the oil is hot enough, slowly press out the dough on to the oil in to a circle.
  • Try to press them in to a flattened circle taking care not to clump them up at any time.
  • When one side is a done to a golden yellowish brown,  turn over to fry the other side and place on a soft tissue to allow the excess oil to drain.
  • Store in an air tight container and enjoy lazy afternoons with hot coffee or chai!!!

HINTS:

  • The main hint for this snack is that it should be crisp but melt in the mouth.
  • One the oil needs to be hot when you put in the item to be fried. Keep your flame on medium high and put in the Ribbon Pakoda. When one side is well done, turn it over and fry on the other side too. Between putting the next bunch of ribbon pakoda to be fried, allow the oil to get heated again.
  • When you finish one bunch, drain it on a collander, allow it to come to room temperature, taste it, adjust salt, spice levels  etc and then proceed to store it in an air tight container.
  • In case the  “Acchu” has a thicker hole,  allow it to cook well. but not brown. It is preferable to have thin crisp Ribbon Pakodas.

IMG_5595