Sweets

Ten Minute Ellu Urundai – Sesame Laddoo.Indian Cooking Challenge – August.

Ellu Urundai
Ellu Urundai

Sesame seeds have been one of the most commonly available ingredient in our pantry. It has been a very deglamourised spice in my home. Since I assosciate the spice with one served in the “Shradham” offerings, I never had much of an interest in it anyway. The ICC gave me an opportunity to relook at this sweet with a whole new angle. I have to thanks Srivalli for the same. I had never known it would be offered as Neivedhyam for Vinayaka Chathurthi. I also looked up the health benefits and found that it is a rich source of copper, manganese and calcium.

Since the sesame seeds are high in oil content its important to store them properly else they turn rancid . This is the reason why sesame seeds are sold in small quantities. One has to make sure that there is no water content at the time of purchase. Once the cover has  been opened for use, its is better to store in an air tight container inside the refrigerator.

This has been the easiest of the sweets to be prepared for Neivedhyam to Vinayaka. Here is the simple illustration.

INGREDIENTS:

100 gms of Black Sesame Seeds.

3 Tbsp of Grated jaggery.

PREPARATION:

  • Take a dry kadai and roast the sesame seeds until you get the aroma of the sesame. They will also start to crackle.
  • Set aside to cool.
  • Grate 3 tbsp of jaggery and keep aside.
  • In a mixer add the dry roasted sesame and the grated jaggery and give it a quick spin.
  • The resulting aroma is very pleasant and sweet.
  • Transfer contents to a plate and make little balls with your hands. The oil emanated from the sesame and the slight warmth itself assists in the shaping of the balls.
  • Offer to Lord Ganesha and enjoy delicious Ellu Urundai.
Lord Ganesha after the Pooja.
No Need of Onions!!! · Sambar / Rasam / Kuzhambu Varieties.

Yennai Kathirikkai Kara Kuzhambu.(Baby Brinjals filled with spices fried in oil soaked in spicy tamarind gravy)

Yennai Kathirikkai Kara Kuzhambu

Eggplants have always been my husband`s  favourite vegetable. He loves it in any form. I know a lot of people who are allergic to eggplants because of the seeds in it.In addition to featuring a host of vitamins and minerals, eggplant also contains important phytonutrients, many which have antioxidant activity. Phytonutrients contained in eggplant include phenolic compounds, such caffeic and chlorogenic acid, and flavonoids, such as nasunin. Nasunin is believed to protect cell membranes from damage. Its also rich in dietary fibre and known to also promote cardio vascular health.

How to Select and Store: (Courtesy – Whole Foods)

Choose eggplants that are firm and heavy for their size. Their skin should be smooth and shiny, and their color, whether it be purple, white or green, should be vivid. They should be free of discoloration, scars, and bruises, which usually indicate that the flesh beneath has become damaged and possibly decayed.The stem and cap, on either end of the eggplant, should be bright green in color. As you would with other fruits and vegetables, avoid purchasing eggplant that has been waxed.

Place uncut and unwashed eggplant in a plastic bag and store in the refrigerator crisper where it will keep for a few days. If it is too large for the crisper, do not try to force it in; this will damage the skin and cause the eggplant to spoil and decay. Instead, place it on a shelf within the refrigerator.If you purchase eggplant that is wrapped in plastic film, remove it as soon as possible since it will inhibit the eggplant from breathing and degrade its freshness.

I always prefer cooking with the Japanese Eggplant as its very soft, has minimal seeds and cooks extremely fast. I use the Indian Eggplant only when I would reequire to make stuffed brinjals etc.

I already have a few posts with the Brinjals:

This time around my husband wanted Yennai Kathirikkai Kara Kuzhambu and so I was inspired completely by Viji`s method and have made a few changes to  her version to incorporate a few of my inputs. There is no grinding of masalas or spices and once you put it on the stove to simmer, you can forget about it. The resulting gravy was tangy, spicy and completely out of the world taste. Since it combines the stuffing of the brinjals with spice powders and then simmering it in the tamarind gravy, the combination of best practises was heavenly.

INGREDIENTS:

5 Baby Brinjals.

1 large organic sour tomato or 2 medium sized tomatoes.

Curry Powder to stuff the brinjals.( I once used store bought Puliyodharai Powder/Vangibath Powder etc)

2 tsp Sambar Powder.

1/2 tsp Red Chilli Powder.

Tamarind Juice extracted from a gooseberry sized tamarind.

Hing

Salt

Turmeric.

Curry Leaves.

Seasoning: Mustard, Urad Dhal, Curry Leaves, Hing.

PREPARATION:

  • Wash and clean the brinjals and dry them with a paper towel. Slit them three times across with a knife keeping the calyx intact. Take  a few drops of coconut oil and slide it in to the slit brinjals.

Brinjals slit and filled with drops of oil and salt.
  • Now sprinkle some salt from a salt shaker and place it in the microwave for 3 min on HIGH.
  • The brinjals come out a little cooked with the salt sticking to their sides. Keep aside for a few minutes to cool.

Brinjals with salt, curry powder filling.
  • Meanwhile slit the side of a tomato with a cross and pop it in boiling water for 5-6 minutes.
  • Remove from water and when slightly cool, puree it in the mixer. Keep aside.
  • Combine the tomato puree and the tamarind water.
  • Now slowly fill in the vangibath powder/curry powder/puliyodharai powder into the moist brinjals and set aside. Since there is some oil inside, the powder would stick to the sides.
  • Take a kadai, add 2-3 spoons of gingely oil and when hot, add mustard, urad dhal, curry leaves, hing and slowly the stuffed brinjals.
  • The stuffed brinjals will slowly get shallow fried in the oil in the kadai. Turn them around every few minutes to make sure that they are cooked on all sides.
  • Now add the tamarind tomato water and bring the flame to medium low.
  • Add salt, hing, turmeric, sambar powder, red chilli powder and some torn curry leaves.
  • Keep the flame on medium low and allow to simmer for some time until the raw smell is  gone.
  • When the oil starts to separate, switch off the stove and garnish with chopped cilantro leaves.
  • Serve HOT with Appalam and Beans Poriyal.


Awards

MY 150`th POST, AWARDS & THE GREEN BLOG PROJECT!

Scrumptious Blog award.

Sometimes its a nice feeling to flip back a few pages in your own handwritten journal, to watch wedding DVD`s of a few years before, take out an old album, look at your family where all of them are a few years younger, smile at a lovely moment caught frozen for a lifetime….I always love doing that….Going over and over a past memory, a card, an old crumpled letter, again and again. Today I was doing just that with my own little creation – my website…and I suddenly realised that I was on my 149`th post.  This award from Indu of Kaipakkuvam took me way over the clouds….and with what perfect timing???

Incidentally, this afternoon, I was looking for authentic Kerala Recipes and stumbled on Ginger and Mango`s blogsite which had an interesting link – The Green Blog Project.

The aim of this project is to cook up something as the main ingredient, right from our garden without those harmful pesticides and fertilizers. It could be anything small, a creeper, a herb, a root, etc. The aim is to try growing at least one vegetable for summer and another one for winter and keep on trying a new vegetable every season, so it will be really interesting. Many of us are limited on space because of living in apartments and in cold places. But I guess, a little help here, a little trial there would really help in making this planet more greener, less pesticide dependant, and our foods more wholesome. My suggestion is to start with little herbs, basil, mint, methi etc and gradually start on tomatoes, okra etc.

A Sweet Pea Creeper in my patio garden!!!

My aunt has a little garden at her home , and she has the tallest curry leaf plant you ever saw…almost as tall as a human!  She started out with mint, tomatoes, jasmine, roses, hibiscus, and hey even the banana tree.  All summer she gets basket full of fragrant jasmine. She never buys curry leaves from Florida doling out 1.99 for a pound, and every festival she goes in to the yard and cuts banana leaves for them to have their special feast. In fact many days, when she hosts little gatherings for chanting shlokas etc, she distributes “Neivedyam” on little banana leaves. The leaves dry out when they stay on the plant for too long. So she cuts them in to little squares and uses them for serving food. I guess its a small way, but a very commendable way of a greener planet. There is absolutely no plastic, no paper, no recycling.

Curry Leaves Plant in  my aunt`s home.
Curry Leaves Plant in my aunt`s home.

Another blogger friend Mriganayani has just harvested her first home grown tomatoes.

Jay & Bee are my all time favourites on this front. They grow peas, strawberries, raspeberries, onions, okra, cherries, lavenders,roses and just about everything under the sun. I take my time to drool at those awesome pics clicked on the Mark 5D and the patience and devotion put in to their gardening passion!

A close friend of mine living in Phoenix, AZ has tomatoes, curry leaves, mint, cilantro, okra, jasmine, sweet peas, banana plant and even a tender Drumstick Tree. In summer, spring and winter, they get different vegetables and much of their cooking is self sufficient on the pesticide free veggies right out of their home garden.Imagine how tasty and fulfilling that must be??

A lovely Jasmine Shrub..

I realise I have not mentioned some thing, one has never waxed eloquent about before. Its just that, at this time and place, as I was inspired by GingerMango`s blog, and I felt, if I could reach out to even a handful of people through my blogsite, I have achieved my goal in to making this world a better place. Yes its an effort to buy out the pots, fill it with soil, tender to the plants, move them inside during winter, and out again during summer, but the joy in reaping the benefits of one`s own  labour can never  be fulfilled with a couple of leaves stashed in a plastic ziploc cover out of a refrigerator!!!

Awards

A bunch of awards and a Tag…

Padmajha Suresh of Seduce Your Tastebuds has passed on a whole bunch of awards for me…

  1. Kreative Blogger award.
  2. One Lovely Blog Award.
  3. I Love your Blog Award.

Thanks Padmajha, you really made my day.

kreativblogger[1]

lovely_blog_award

iloveyourblogaward

I had been postponing this particular draft for at least a week as its been pretty crazy what with two festivals within a fortnight! Today I  had decided come what may, I was going for the inevitable. Getting one award itself is a very pleasing experience….getting a bunch made me feel special and its been almost 7 months of hard work and a lot of learning at the same time….And now for the tag…

  • What is your current obsession?

I am currently obsessed with the Canon 50D – Digital SLR, and I have been yearning for it since the time I felt the beauty in my hands in the store. Imagine the countless opportunities an SLR can open up to you….!!!

  • What are you wearing today?

Well…a comfortable soft cotton PJ for the night!!!

  • What’s for dinner?

Vengaya VethalKuzhambu, Alu Fry and my all time favourite curd rice.

  • What’s the last thing you bought?

A pair of comfortable Dr.Scholls floaters….I am floating when I walk now!!!

  • What are you listening to right now?

Udhaya Udhaya sung by Sadhana Sargam composed by AR Rehman!!!

  • What do you think about the person who tagged you?

She is very creative and I am sure we share photography passions quite a bit…

  • If you could have a house totally paid for, fully furnished anywhere in the world, where would you like it to be?

Greece …as long as I am with my family.

  • What are your must-have pieces for summer?

My Maui Jim sunglasses, my perfume, iced drinks and loads of rose water…

  • If you could go anywhere in the world for the next hour, where would you go?

Home is where the heart is – Chennai!!!

  • Which language do you want to learn?

French.

  • Who do you want to meet right now?

My family in Chennai.

  • What is your favourite colour?

Burgundy, Maroon in fact any shade of vibrant red…

  • What is your favourite piece of clothing in your own closet?

My crepes and my chiffons…I love flowy fabrics.

  • What is your dream job?

I wouldnt exactly call it a job. I would like to have a small montessori school for toddlers…

  • What’s your favourite magazine?

Femina, Business World, Advertising & Marketing, Inside Outside, Good Housekeeping.

  • If you had $100 now, what would you spend it on?

LUSH!!!

  • Describe your personal style?

Ethnic, Elegant,Comfortable.

  • Your all time favourite author?

Arthur Hailey.

  • What are your favourite movies?

Too many to name – a few – Kannathil Muthamittal, Salangai Oli, Nayagan, Catch me if you can, Top Gun…

  • What inspires you?

Anything creative, beautiful, colourful raptures my attention.

  • Give us three styling tips that always work for you:

Dress comfortable.

Simple and ethnic.

According to the occassion to exude inner beauty and confidence.

  • Coffee or Tea?

Freshly brewed Decoction Coffee out of a percolator!!!

  • What do you do when you are feeling low or terribly depressed?

Speaking to my mom has a way of making everything seem a lot better….Many times music has a way of soothing me.

  • What is the meaning of your name?

Beauty…

  • Which other blogs you love visiting?

Any blog that has good content, originality, great pictures, current topics of interest.
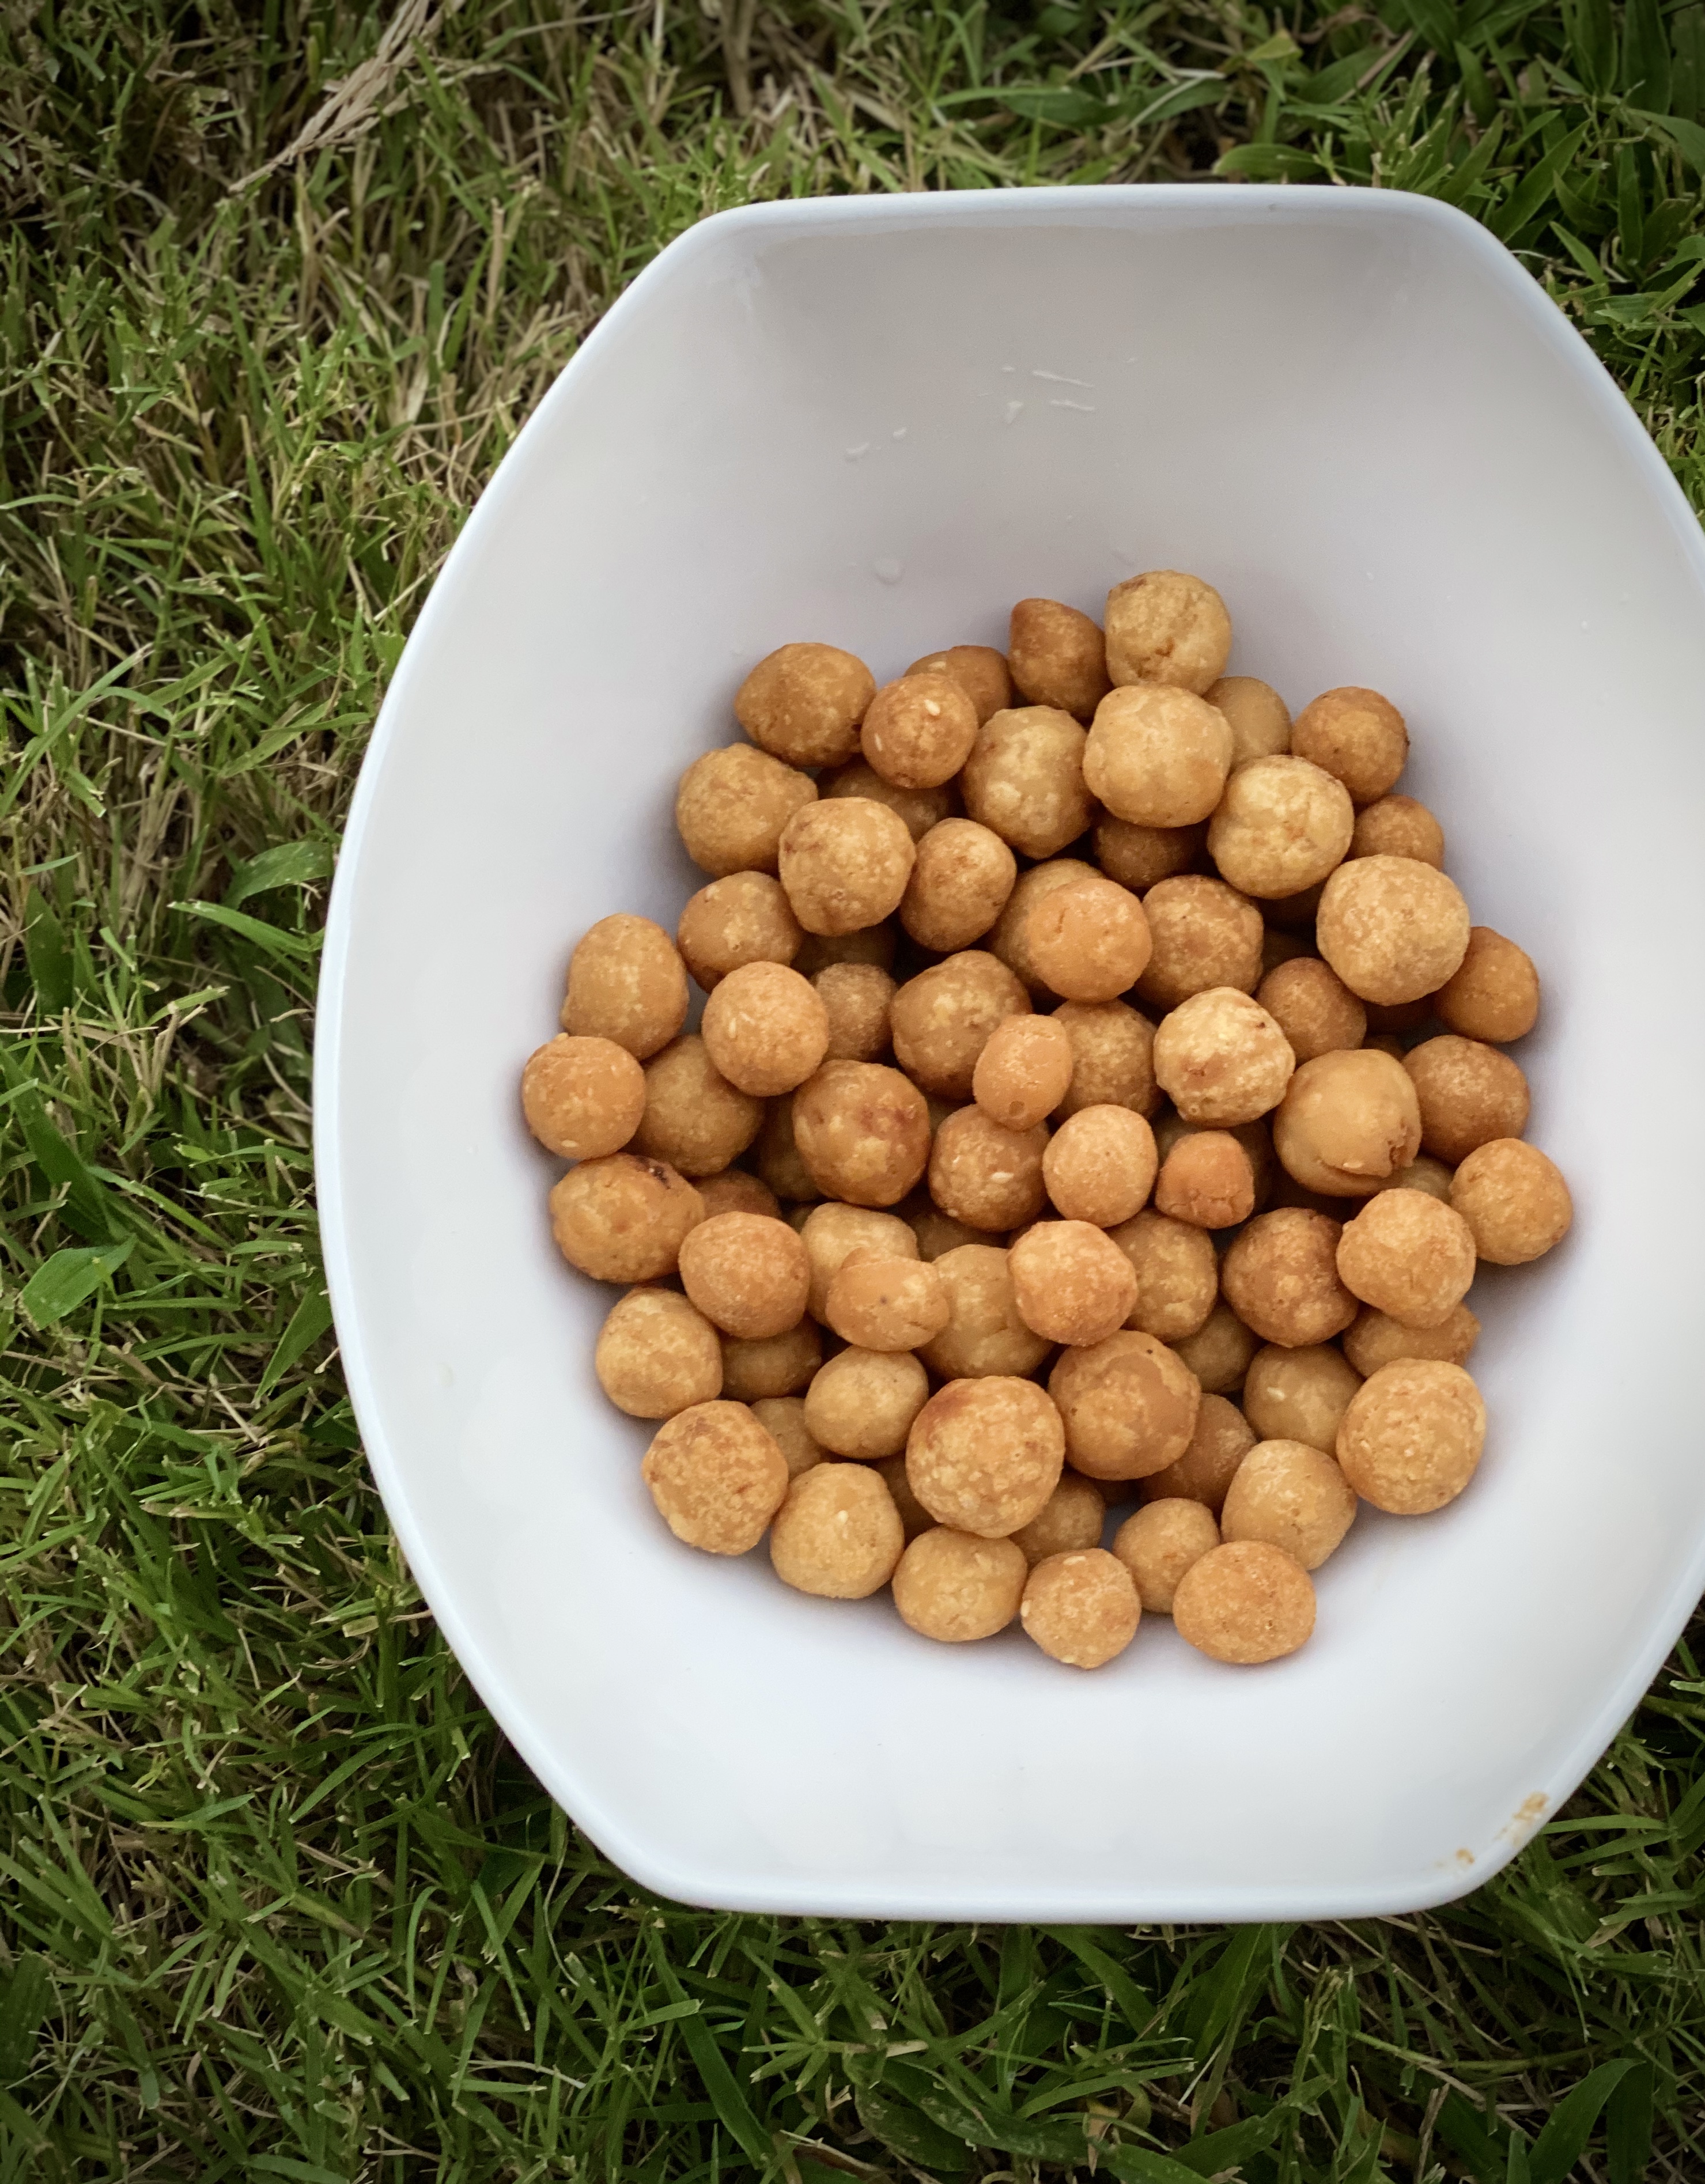
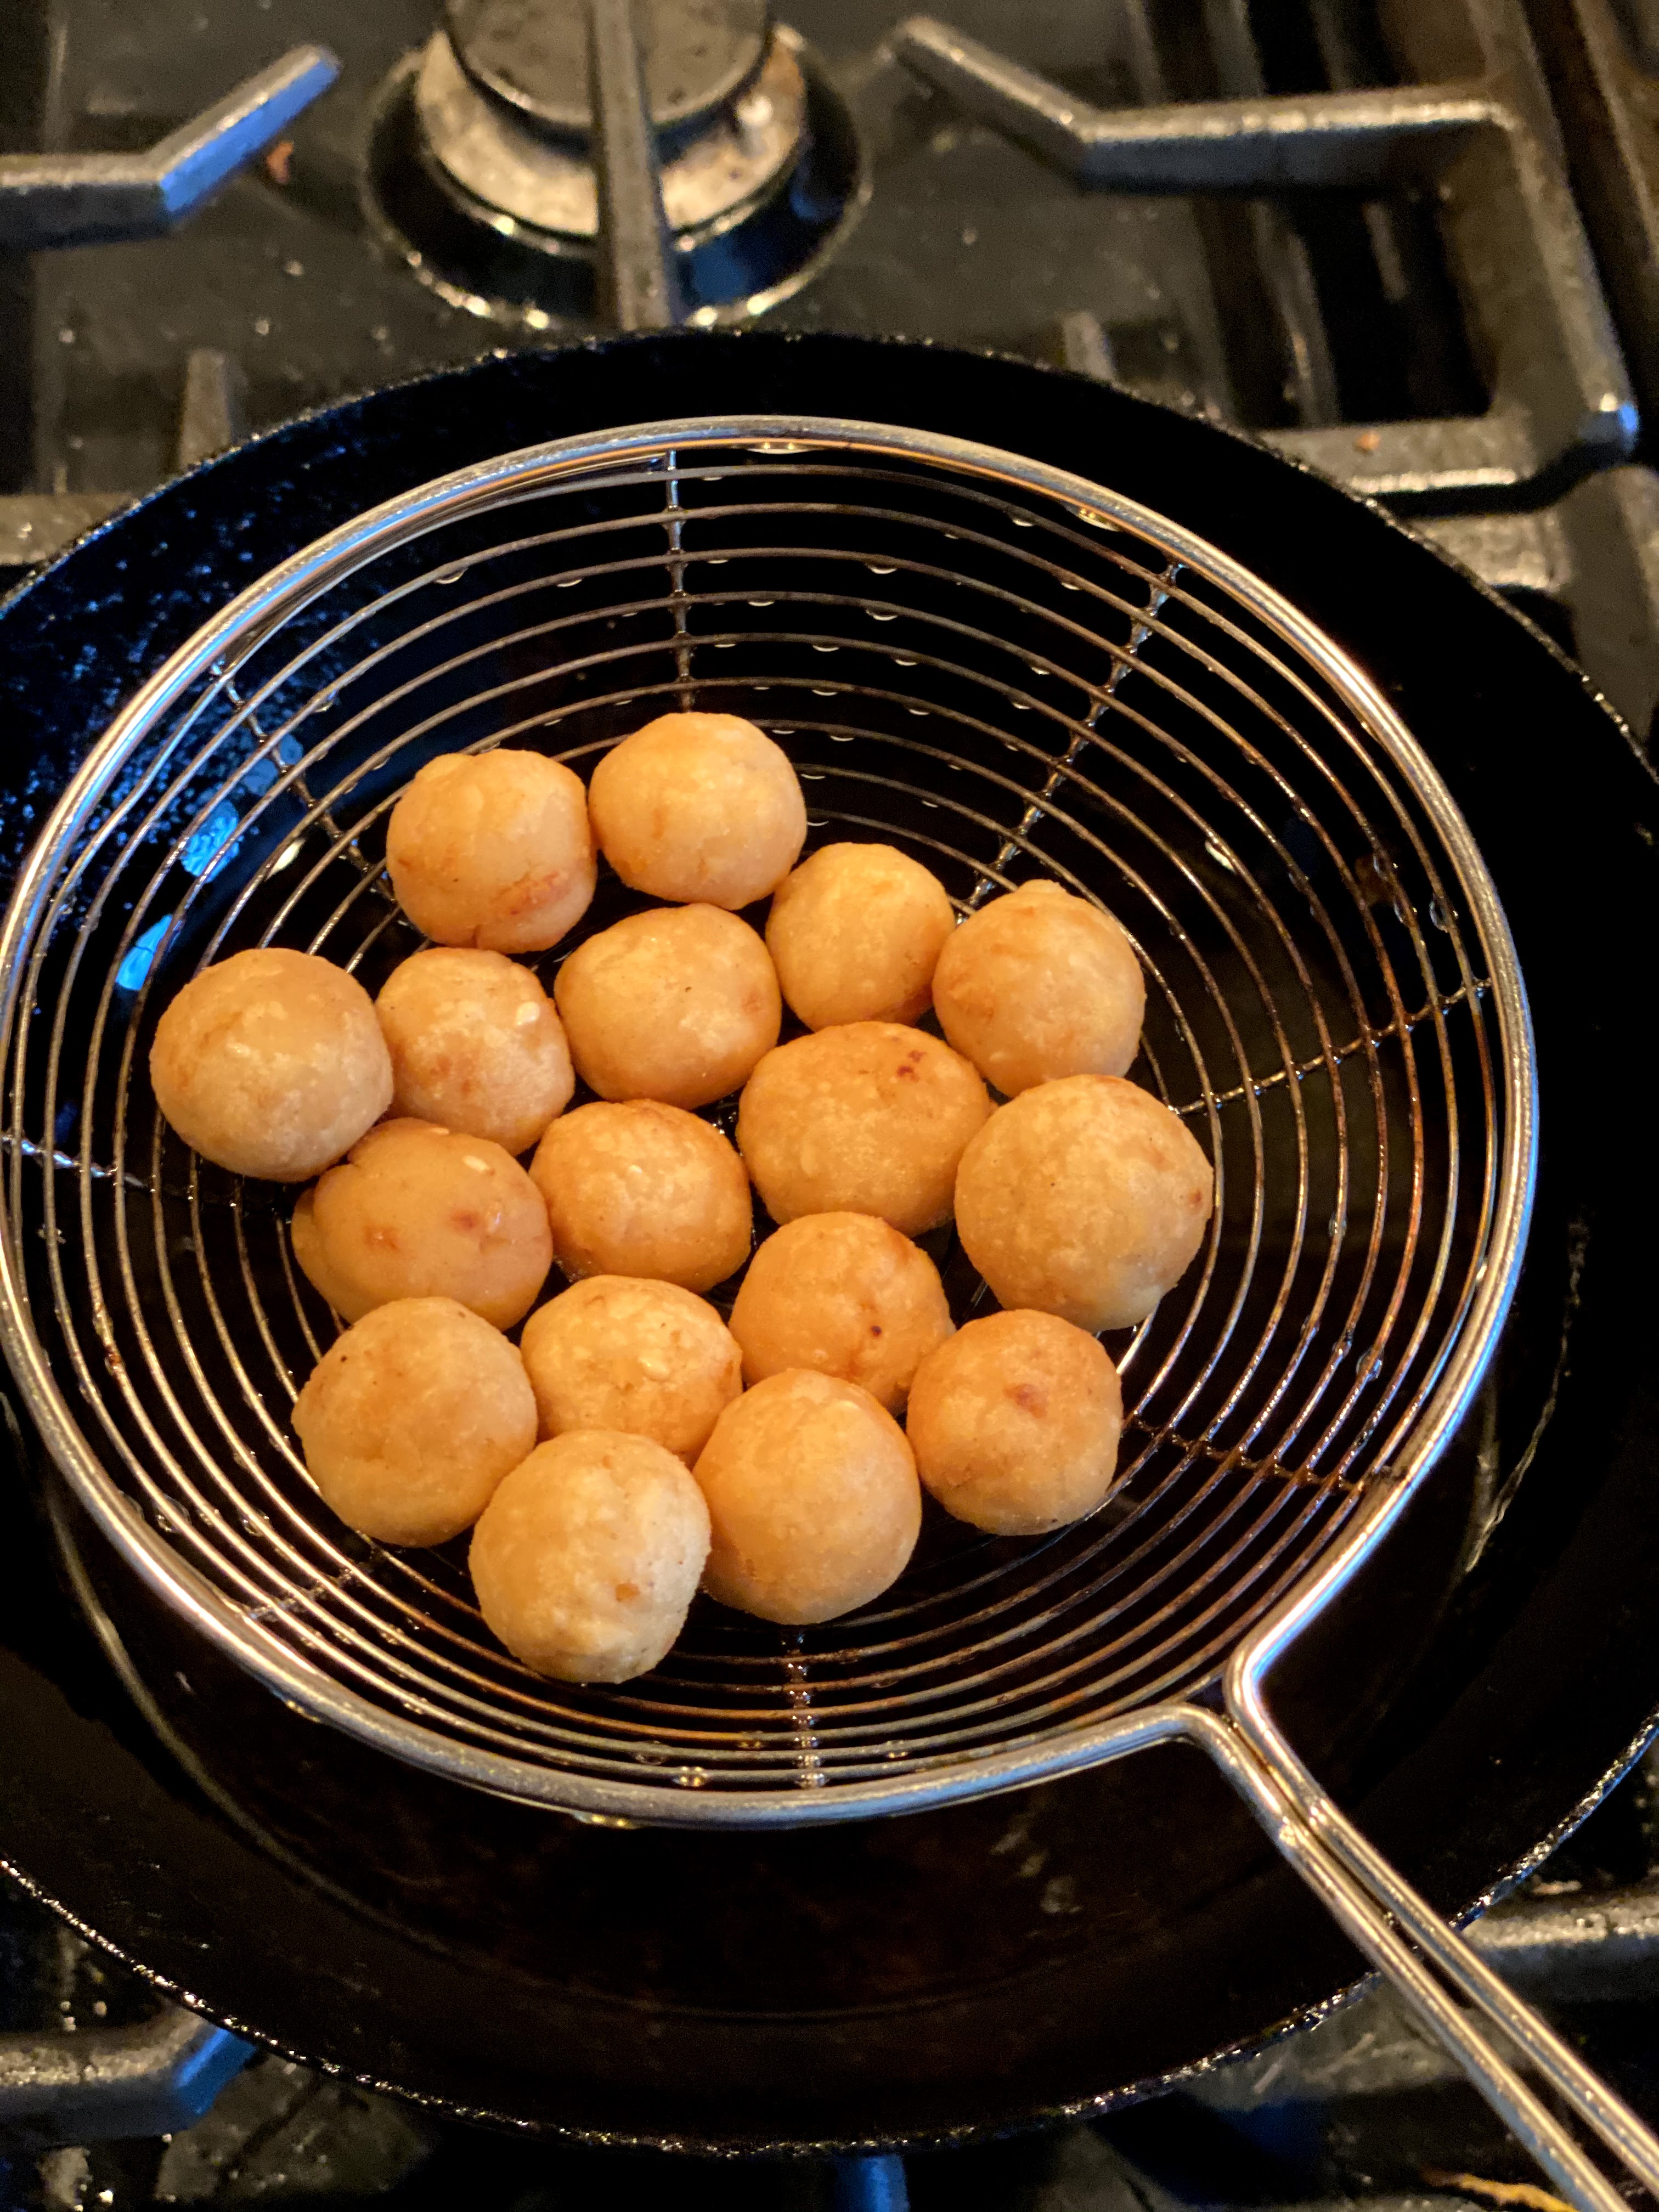
  • Favorite Dessert/Sweet?

Jangiri, Badushah.

  • Favourite Food???

Eggplant Parmesan, Thayir Sadam and Maavadu, Street foods like Bhel Puri, Pani Puri etc.

  • What do you consider to be unethical in blogging?

I consider unethical reproduction of content of any form very very unacceptable in blogging.

Now to add a question of my own…

What is your most prized possession in your kitchen??

In turn, I shall be tagging 8 other fellow bloggers, who have inspired me to reach greater heights, to think beyond the usual, who inspire me to be here and continue blogging….

  1. The Yum Blog – Latha Narasimhan & Lakshmi.
  2. Jaysri Satish of Kailas Kitchen.
  3. Lata Raja of Flavours & Tastes.
  4. MS Abhilash of Hindu Devotional Blog.
  5. Indira of Mahanadhi.
  6. Menu Today
  7. Nandita of Saffron Trail.
  8. Asal Tamil Penn.

Congratulations dear fellow bloggers on these lovely awards. Please do take your time to repost these awards on your own website.

Respond and rework – answer the questions on your own blog, replace one question that you dislike with a question of your own invention and add one more question of your own. Then tag eight other people.

Have a great day!!!

Naivedhyams/ Festival Offerings.

Uppu Kozhukattai / Ulundhu Kozhukattai

Uppu Kozhukattais
Uppu Kozhukattais

Uppu Kozhukattai is the prasadam for Vinayaka Chathurthi along with the  Vella Kozhakattai and Ammini Kozhakattai. I love the Uppu Kozhakattai as its almost like a paruppu usili filled in the rice balls and then steamed in the pressure cooker. The Uppu Kozhukattais, I always felt were comparitively more easier to make as one makes the balls ahead and then stretch the outer dough over the balls to cover it.

As always the first part is the Outer Dough which is the base of the whole preparation. Keep this prepared Outer Kozhukattai Dough covered tight to preserve the moisture and warmth as this is imperative for easily working on this dough.

INGREDIENTS:

Kozhukattai Outer Dough

1/2 cup Urad Dhal..

1/4  cup Bengal Gram

3- 4 Green Chillies.

1/4 Cup Coconut.

A Pinch of Hing.

Salt

PREPARATION:

  • Soak the Bengal Gram and Urad Dhal for about 3 hours just as you would for Paruppu Usili.
  • I have used the proportion of 1/4 cup of bengal gram to 1/2 cup of urad dhal. If you want more numbers, you can extrapolate it to double the quantity.
  • Grind the bengal gram and urad dhal in the mixer with salt, green chillies  and curry leaves with as little water as possible. The water added is  important as this affects the final consistency of the urad dhal crumble.
  • It should not be ground too smooth but a little short of that, a little coarse.  Add hing and  a spoon of oil and mix it in well.
  • Place a seasoning kadai on the stove, add oil and mustard, When the mustard splutters, add it to the ground paste. Mix and in a few minutes add the grated coconut. (This is optional).
Ground Paste in Idli Plates ready for steaming.
  • Grease 1 or 2 idli plates and fill the firm ground  paste in the idli plates. Steam in the pressure cooker for 12 – 15 minutes. Switch off gas and remove the plates and allow to cool.
  • Transfer the cooked dhal idlis to a plate and pour 1 spoon of coconut/gingely/canola oil on them and slowly crumble them with your oiled fingers.
  • Try to do this when its still warm.
  • Now with the help of a oil greased hands again, press the crumbles in to 1 inch balls. Keep covered in a container to retain the moisture.
Salt Poornam made in to balls.
  • Follow the usual procedure of making little cups with the Outer Dough.
  • Place a urad ball in to the little modhak cups.
Little cups for filling Poornam
  • Close like a coconut and make a little tuft resembling a coconut.,
  • Keep your hands oiled when you are working with the Outer Dough.
  • Place the prepared modhaks in greased idli plates and steam in the pressure cooker for 12 minutes.
  • Switch off stove, and after a few minutes transfer to a casserole.
  • Offer Uppu Kozhukattais Neivedhyam to the Lord.
  • Also see my post on Vella Kozhukattais.
Uppu Kozhukattai Balls ready for Steaming.

HINT:

  1. If you are not able to shape the crumble in to balls, do not fret. Simply pop a spoon, and fill in your modhak cups with the crumble and continue as usual to seal them. Making them in to balls makes it more easier to handle as there is no binding agent as such except the urad dhal.
  2. If you have exhausted your Ulundhu balls and left with the Outer Dough, proceed to make in to little balls and make Ammini Kozhakattais.
  3. If you are left with the Urad dhal balls, simply crumble and make Usili with beans or cabbage.

Sending delicious Ulundhu Kozhukattais to Festive Food Event happening at Purva`s Daawat.

krishna ganesh logo1

Naivedhyams/ Festival Offerings. · Snacks & Tiffin Items · Sweets

Vella Kozhukattai/Sweet Modhakas ( Steamed rice balls with jaggery coconut filling)

Ganesh Chathurthi Offerings – Sweet Kozhukattai, Uppu Kozhukattai, Ammini Kozhukattai, Sundal and Vella Aval


The Vella Kozhukattais or the sweet modhakas is an all time favourite of mine since I was a little girl. When I was a little girl, we lived in a big joint family so any festival was celebrated  with lots of fun and fanfare. Every year for Vinayaka Chathurthi, Madurai amma would make us the outer dough for us to work on and my sister D and me would make little cups out of the dough, fill it with the “Poornam” and arrange it neatly in little idli plates for steaming. Although we would be longing to eat the neivedhyam, we would have to wait until the entire pooja was over and we would get only 3 or 4.Mum would always promise me that she would make it for us on another day so we could have it to our heart`s content. Of course, that day would never come until the next Vinayaka Chathurthi the next  year…

Now, my daughter S loves them so much that I decided to make it whenever possible, as often as I can. For instance every month for Sankatahara Chathurthi to offer it as Neivedhyam to the Lord. Sankatahara Chathurthi  is an auspicious day dedicated to Lord Ganesha in a traditional Hindu lunar month. It falls during the waning phase of the moon – fourth day after the full moon. Staunch Ganesha devotees observe a fast  on the day.Fasting on Sankatahara Chaturthi begins at sunrise and ends after evening puja or after sighting the moon. Ganesh Temples conduct special pujas on the day.It is widely believed by Ganesha devotees that observing Sankashta Chaturthi will bring material progress, happiness and fulfillment of desires.

INGREDIENTS:

Kozhukattai Outer Dough.

1 cup of fresh grated coconut.

3/4 – 1 cup of grated jaggery (Depending on brand, degree of sweetness etc)

1 tsp of powdered cardamom.

1 tbsp of milk.( If needed)

2-3 tbsp of water.

PREPARATION:

  • Always prepare the poornams or filling ahead as the outer dough has to be made last just before consolidating the Kozhukattais.
  • In a kadai add the jaggery and very little water about 2  Tbsp and 1 tbsp milk and allow to melt.
  • When the jaggery is well melted add the fresh grated coconut and mix well.
  • Also put in the powdered cardamom and stir in well until the mixture leaves the sides.
  • I prefer to make my poornam a little thicker by keeping it on the stove for a longer time to enable me to make them in to balls.
  • Cool the poornam filling and  it will be easier for you roll  them in to little balls.
  •  

  • Keep the Kozhukattai outer dough prepared and ready as per instructions here . Keep it covered under a moist cloth and over that a lid to preserve the moisture and the warmth.
  • Create an assembly line with the Poornam balls, outer dough, greased idli plates and a small cup having 2-3 spoons of coconut oil.
  • Keep everything ready before you start as the outer dough should never dry out.
  • Grease your palms with coconut oil and then take a ball of the outer dough and smoothen it between your palms.
  • Make a little depression with your thumb and make it in to the shape of a diya with smooth sides.

DSC02561

  • Fill the depression with the coconut jaggery poornam,  and close the edges and seal it with your fingers.
  • Continue until you finish the poornam filling.
  • Ready to be steamed
    Ready to be steamed
  • If you have the outer dough left over, you can add a little more salt and make delicious Ammini Kozhukattais.
  • Arrange all the prepared modhakams for steaming on the greased idli plate.
  • Steam it in the pressure cooker for 10 – 12 minutes just as you would do with idlis.
  • Remove from steam, transfer to a casserole or container and enjoy after offering it to Lord Ganesha.
  • Wishing all my readers a very Happy Vinayaka Chathurthi.

HINT:

  1. If your sweet poornam/filling is not as thick as you would like it to be, dont fret. Allow it to sit on the stove for a couple of minutes more and add 1 spoon or two of wheat flour. This will bind them together.
  2. Another option is to make rough balls and pop them in to the refrigerator for a few minutes. This will automatically firm them up.
  3. Before steaming the prepared Modhakas, keep them covered as if they exposed to the air etc, they get dry and crack up. This might render the  poornam to seep out during steaming.


Side Dishes for Rotis/Dosas/ Naan.

Aloo Dum (Baby Potatoes in Spicy Red Gravy served with lemons and onion slices).

Aloo Dum
Aloo Dum

Aloo Dum has always been a favourite of mine when we were little kids. The concept of whole baby potatoes was something very novel and so this was a dish that was always on the top of my favourites. Amma used to make Kutty Aloo Fry with the baby potatoes, which was also a delicacy to be had with steaming hot Bisi Bela Bath or Araithu vitta Vengaya Sambar.

During my short stint in Bangalore one of my friend`s mom made such awesome Aloo Dum. Her mother learnt it from the Nawabi cooks in Hyderabad in those days and aunty had carefully passed on her recipe to me.

The actual recipe calls for dry coconut but I did not have it ready in my pantry today. The recipe tastes just as great. Try it and you will realise that it is even better than the restaurant style Aloo Dum served with a lot of grease!!!

Chopped Tomatoes.
Chopped Tomatoes.

INGREDIENTS:

1 kg of Baby Potatoes.

1 Big Red Onion.

1 Big Homegrown Tomato or 2 Roma Tomatoes.

Ginger 1 inch

Garlic 3 Pods

Dry Coconut – 1 Tbsp.

Dried Kasuri Methi – 1 Tbsp.

1 tsp Garam Masala Powder.

1 tsp Red Chilli Powder.

1/2 tsp Jeera Powder.

1/2 tsp Dhania Powder.

1/4 tsp Methi Powder.

1 Tbsp Broken Cashew pieces.

Salt to taste.

Chopped Pudina

Chopped Cilantro.

3/4 – 1 cup Tamarind Water.

Cloves, Bay Leaf, Jeera  etc for seasoning.

Lemon quarters and sliced onion to serve.

PREPARATION:

  • Wash the baby potatoes in water and prick  them on both sides with a fork. This is to enable them to cook well in the salted water. Keep the skin on.
  • Cook the baby potatoes in salted water to which you can add a bay leaf and 1 or 2 cloves. Cook to one whistle only. Set aside.
  • In a kadai, add oil and saute the onions well. Set aside to cool.
  • In the same kadai, saute the chopped tomatoes and set aside to cool.
  • In the mixer grind the following: Sauted Onions, Dry coconut, Garam Masala Powder, Garlic, Ginger, Jeera Powder, Dhania Powder, Methi Powder, Cashews.
  • Make sure that they are all ground to a smooth paste nad keep aside.
  • In the kadai, add 2-3 spoons of oil, jeera a clove, bay leaf and immediately the ground paste. Saute the paste in oil until most of the raw smell is gone.
  • Now add the sauteed tomatoes, salt, turmeric powder, red chilli powder, chopped cilantro and pudina and stir well.
  • After a few more minutes, add the cooked baby potatoes and stir in well for a few more minutes.
  • Now add the tamarind water in the kadai and keeping the flame on medium low allow to cook covered.
  • The aim is to allow the aloo to get cooked in the kadai, until the oil seperates and to keep it also covered to lock in the aromas.
  • When the oil seperates, switch off the flame and serve HOT with parathas or phulkas. or simple Tiranga Pulav.
  • Restaurant style ALOO DUM is served with lemon and sliced onions.

As the oil seperates..

HINT:

This could also be made in to a dry starter entree by cutting down the tamarind water and allowing to saute until the gravy is absorbed on a slow flame. Alternately, bake it in the oven covered with foil at 400 F for 3-4 minutes. Crunchy but soft Aloo Dum Dry is ready!!!

Aloo Dum served with piping hot phulkas are packed and sent to Viki`s Kitchen for her “Side Dish for Chapathi” Event which is on until Sep 15`th 2009.

A side dish for chapathi

Naivedhyams/ Festival Offerings. · Sweets

Coconut & Milk Rice Payasam.

Coconut & Milk Rice Payasam.

Coconuts are always a delicacy for me and we are pretty lavish in our preparations on festivals and Neivedhyams. When I wanted to prepare a Payasam for Avani Avittam, I had to decide between Paruppu Payasam and then a rice based payasam. One of my mom`s favourites has been the simple Cooker Payasam cooked in a pressure cooker with simply rice and milk. Today I wanted to add another ingredient and make the kheer more richer and tastier. I was also enthused on seeing Viji Jeyakumar`s Rice Coconut Payasam and wanted to try something similar. The ensuing dish was extremely tasty and delicious and my husband actually had a second helping of it!!!

The ingredients are simple and wholesome and available in your pantry at all times.  One suggestion is to use natural and fresh ingredients alone, as the taste is distinctive  and particularly delectable.

INGREDIENTS:

2 cups of Whole milk.

1/3 cup of light coconut milk.

1/2 cup of fresh grated coconut.

1/3 cup of Raw Rice.

1/2 cup of grated jaggery.

Powdered Cardamom Seeds.

3 spoons of ghee.

Cashews.

Raisins.

Saffron Strands for garnishing.

PREPARATION:

  • Soak the rice for about 30 minutes and when done pulse in the mixer for a few seconds.
  • To the mixer, add the grated coconut, elaichi  and the coconut milk and grind to a paste. The rice kernels will be coarsely ground and that is perfect texture for the payasam.
  • Pour this in to a heavy bottomed vessel, add the 2 cups of milk and allow the rice to slowly cook  in the rich milk mixture.
  • Maintain the flame on medium low and keep stirring the vessel with a whisk. It will slowly thicken.
  • Meanwhile, add the grated jaggery to a vessel and pour just enough water for it to be dissolved.
  • Keep on the flame and when melted add it to the milk mixture in the heavy vessel.
  • Stir for a few more minutes until the desired consistency is reached.
  • In a seasoning ladle, add ghee, and fry cashews and rasins and add to the payasam.
  • Garnish with saffron strands.

DSC02468

Naivedhyams/ Festival Offerings.

Sweet Cheedai/Vella Cheedai.

IMG_4520

The Sweet Cheedai is a variant of the salted one, only using jaggery. The trick is to maintain the consistency of the dough to be moist and non sticky at the same time to render it pliable.By using  this method, I find that the balls come out smooth and do not crack up when they are fried. This is guaranteed to give you perfect results everytime. I have not tried this using “Cane Sugar/Brown Sugar” instead of jaggery.  I always grate the jaggery in to little shavings as this gives a more perfect measurement instead of little blocks.

INGREDIENTS:

1 cup Roasted Rice Flour.

1 1/2 Tbsp Urad Flour.

3/4 cup grated Jaggery.(Please adjust as per sweetness)

3/4 cup water.( Proportion of jaggery to water is 1:1)

Elaichi Powder.

Finely chopped coconut pieces.

PREPARATION:

  • In a vessel mix the butter, rice flour, urad flour elaichi and coconut pieces.
  • In a kadai, add the water and the jaggery, slightly mix with a ladle and place on the stove.
  • Add a spoon of ghee to the jaggery water mixture.
  • As soon as all the jaggery melts, switch off the flame and remove from the stove.
  • Add the melted jaggery to the flour mix and knead them gently together little by little.
  • Do not add all the water in one go, add little by little and knead until you get a smooth non sticky soft dough ball.

Vella Seedai made in a homogenous ball.

DSC02520

  • Now roll smaller 1 inch balls and transfer to a plate.
  • Keep the flame on medium low just as you would do for gulab jamuns, and fry the balls until they are a deep brown on all sides.
  • Offer to Lord Sri Krishna as neivedhyam and then partake of your offering.

Sending a little serving of Vella Cheedai to Festive Food Event – Janmashtami & Krishna Jayanthi at Purvi`s Dawat.

krishna ganesh logo1

Naivedhyams/ Festival Offerings.

Uppu Cheedai ( Roasted rice flour mixed with salt & spices and fried in oil)

img_6650

Preparation of Uppu Cheedai, one of the Neivedhyams offered to Lord Krishna has been a real learning experience for me. The thing about Uppu Cheedai is that there was never uniformity or consistency in my preparation. This was because there would no uniformity in the rice that we used, in the way it is ground in the mill, or in the ingredients. Many times, the jeera in the batter has caused it to splutter in the oil and hence result in small accidents in the kitchen. For a couple of years, I had given up on this specialty completely. Curiosity got the better of me as I wanted to know how to turn around the problem. This is my shortcut and I hope this works for you too.

RICE FLOUR:

The base rice flour can be made in two ways.

  • Option 1: Soak 1 cup of raw rice for 1/2 hour and allow to spread and dry on a soft towel until the water is all drained completely. Then grind the rice in the mixer to a fine powder.
  • Option 2 : is to use READY MADE STORE BOUGHT rice flour. ( I  use DURBAR/ SWAD/ Nirapara Brand).
  • Now take a dry kadai and roast the rice flour on medium low heat stirring ocassionally.
  • The white rice flour slowly changes colour to a yellowish light brown and also emits an aroma.
  • As soon as you are able to take the roasted rice flour and draw a line like a “kolam” that’s the indication that you have gone as far as you should.
  • Immediately transfer the contents to a dry container as keeping it in the same kadai might burn the rice flour.
  • Do not close the rice flour until it cools down to room temperature.
  • The method of roasting is the same whether the rice flour is made from scratch or it is store bought. Both render excellent results.
  • Sieve and keep aside. 


Plain & Roasted Rice Flour.


Draw a line with the roasted rice flour.


URAD FLOUR:

  • Dry roast 2 Tbsp of whole urad dhal/ Urad Dhal flour in the kadai on medium flame until the urad dhal slowly emits an aroma and it turns to a dull yellowish brown colour.
  • Set aside to cool on a plate.
  • Grind little by little in a mixer to a fine powder.
  • Sieve and keep aside.

Grated Coconut:

  • Dry roast 2 Tbsp of grated coconut on a low flame until its a little dry and moisture is gone.
  • Set aside.

PROPORTION OF RICE FLOUR TO URAD FLOUR : 1 cup of rice flour : 2 tbsp of Urad Flour.

INGREDIENTS:

1 cup Roasted Rice flour as per procedure above.

2 Tbsp of Roasted Urad Flour prepared as per procedure above.

1 Tsp finely ground and sieved Jeera Powder. (Optional).

2 Tbsp Grated and roasted coconut.

1 Tbsp butter at room temperature.

1 Tsp salt.

Hing.

Almost 3/4 cup of water.

PREPARATION:

  • In a dry vessel add butter, ground jeera, and hing and mix well with your fingers.
  • Add the 1 cup of rice flour, the urad flour , salt and grated coconut and mix all the dry ingredients well.
  • Add the water slowly and mix it in. If the batter is already mixed in to a firm consistency, do not add all the water. Use your discretion in this regard.
  • The dough should be firm and non sticky but moist and creamy.
  • Roll out rough balls and keep on a plate. Do not press hard in to balls.
  • The secret is to roll them in to really small balls so they crisp quickly when fried.
  • I do not recommend sitting under the fan and rolling out balls  as I have felt that this robs the balls of moisture and causes cracks and hence splutters in the oil.
  • Heat sufficient oil in a kadai and when hot, add 7-8 balls of the cheedai.

img_6638-1

  • Allow to fry well on medium low heat until crisp and well done and draw out the balls on a paper towel.
  • After a couple of minutes, store in an air tight container.
  • Enjoy crisp and crunchy Uppu Cheedai after offering to the Lord.


HINTS:

  • Fry the cheedai balls on medium low heat like you would do with Gulab Jamuns as they need to get completely fried on the insides. Keeping the flame high would render them overcooked on the outside yet not cooked enough on the inside.
  • Right after frying, allow them to cool before closing the container. If the balls are still warm, closing them would make them “sweat” and make them chewy.